Archives: Gmedia Albums


Turbopump 3D CAD
3D CAD model images of the A4/V2 rocket engine’s steam turbine powered propellent pumps – all images by Ray Matter. To see Ray Matter’s blog 3D CAD modelling the V2 rocket turbopump introducing these images, just click the link.
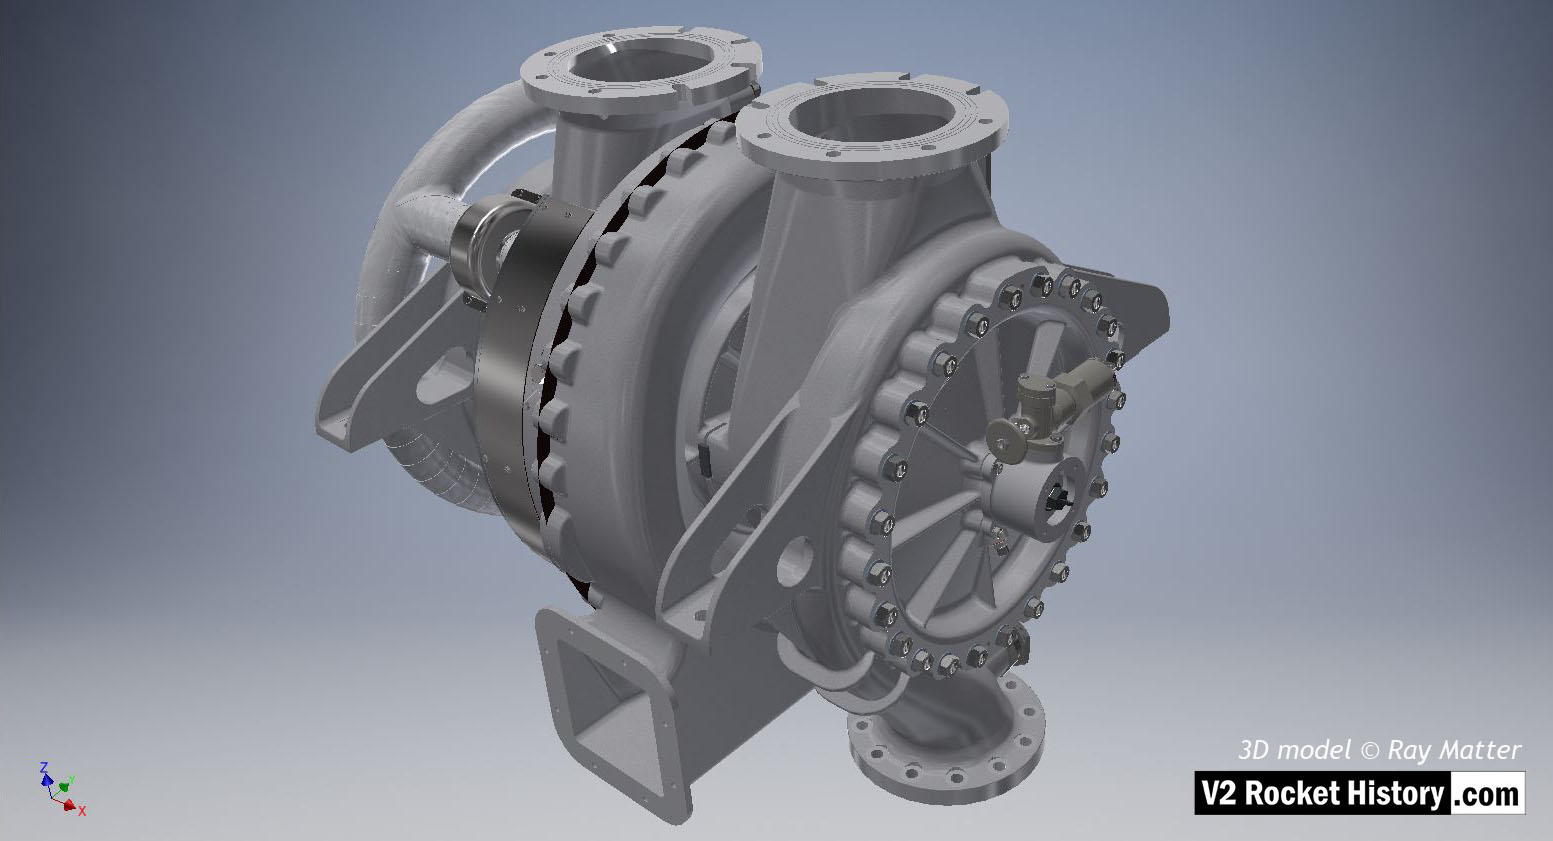
Turbine powered propellant pumps for A4/V2 rocket engine – fuel pump on right. Full perspective assembly showing tubular ring steam inlet manifold with asbestos bandage extreme left, inlet flanges at top, frame support brackets, steam exhaust outlet square shape lower center. The overspeed trip switch can be seen just above center on fuel pump face plate. The fuel outlet flange can also been seen btm right of center. 3D model by Ray Matter
| Album | Turbopump 3D CAD |
| Category | Turbo-pump |
Turbine powered propellant pumps for A4/V2 rocket engine – fuel pump on right. Full assembly showing steam inlet manifold on left, inlet flanges at top, support brackets, steam exhaust outlet square shape lower center. The over-speed trip switch can be seen just above center on fuel pump face plate. The fuel outlet flange can also been seen btm right of center. 3D model by Ray Matter
| Album | Turbopump 3D CAD |
| Category | Turbo-pump |
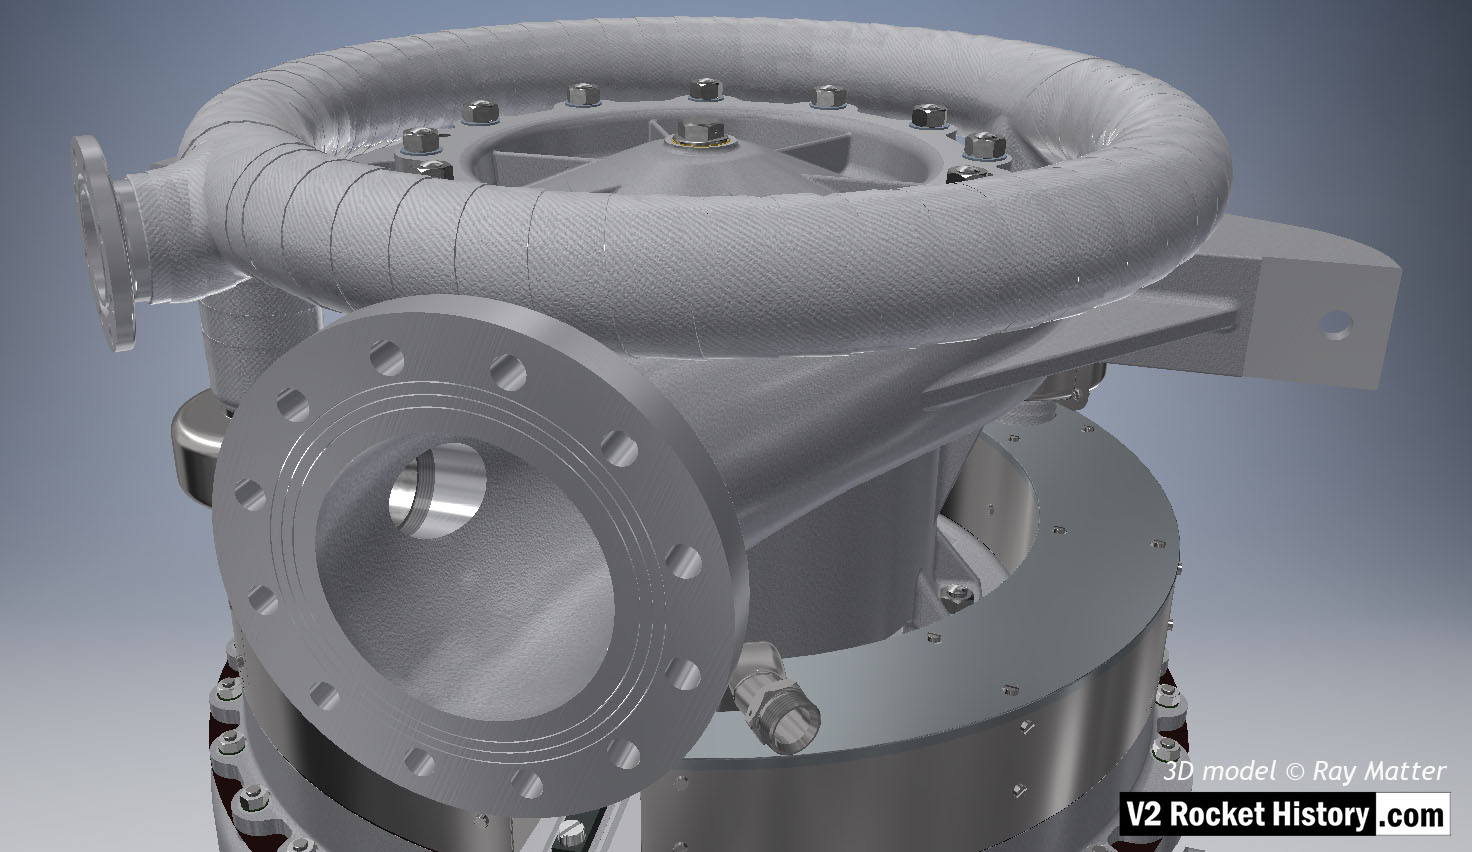
Full assembly showing, from top, steam inlet ring manifold, LOX pump and portion of steam turbine assembly. View shows outlet flange facing camera. Note the three fine rings milled into flange face. The rings were designed to improve keying for the sealing ‘putty’ that was used to seal the connection between the flange face and the inlet pipe. 3D model Ray Matter
| Album | Turbopump 3D CAD |
| Category | Turbo-pump |
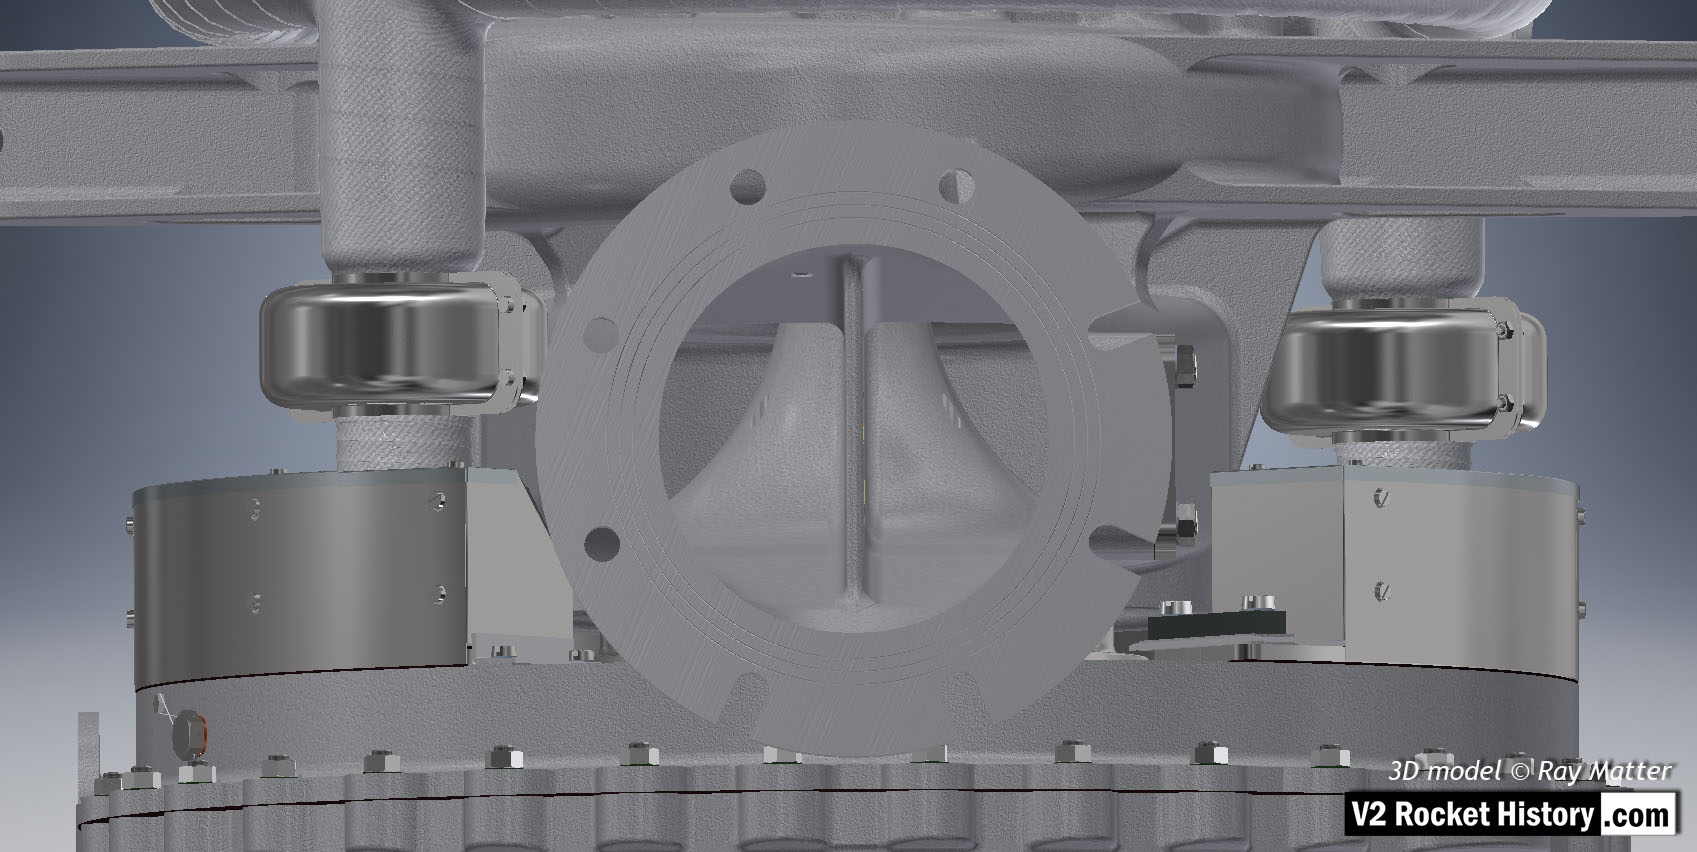
A (LOX) Pump close-up showing inlet flange, with fastener slots and holes, as well as the throat baffle. To the right and left of the flange, the steam inlets are shown – with steel cases covering the steam manifold connection flanges. Of special note in this view is the self-purge orifice seen at the top right-hand side of the inlet throat baffle. This hole allowed gas to escape from the top of the LOX volute space back to the low-pressure inlet throat and proved problematic in manufacturing and was revised in late 1944. 3D model Ray Matter
| Album | Turbopump 3D CAD |
| Category | Turbo-pump |
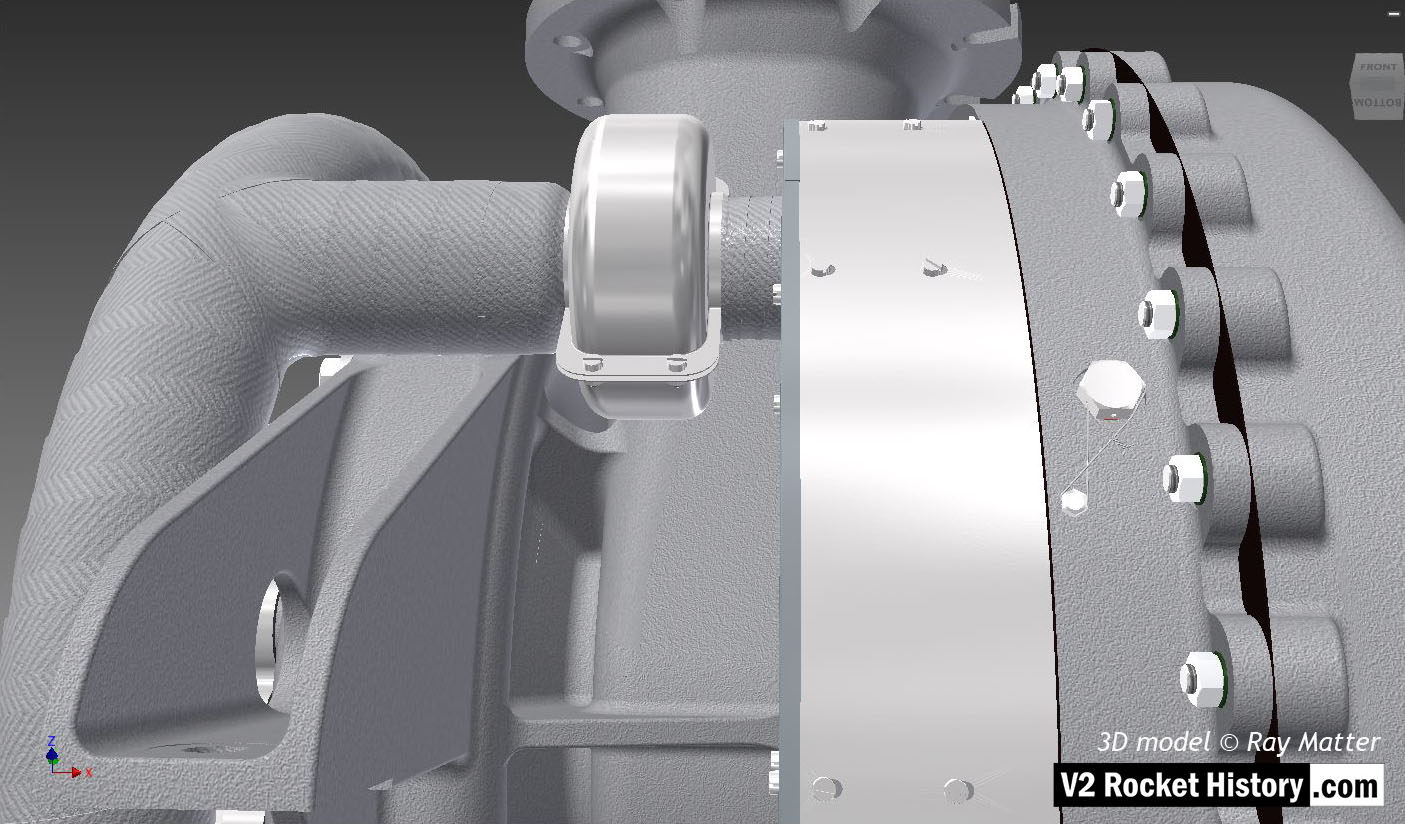
Close-up of turbine steam inlet ring manifold showing one of the entry points. The thin steel case that fits around the steam manifold mating flanges is clearly shown as is the wire restraint fastener locking system (see close-up in gallery). 3D model by Ray Matter
| Album | Turbopump 3D CAD |
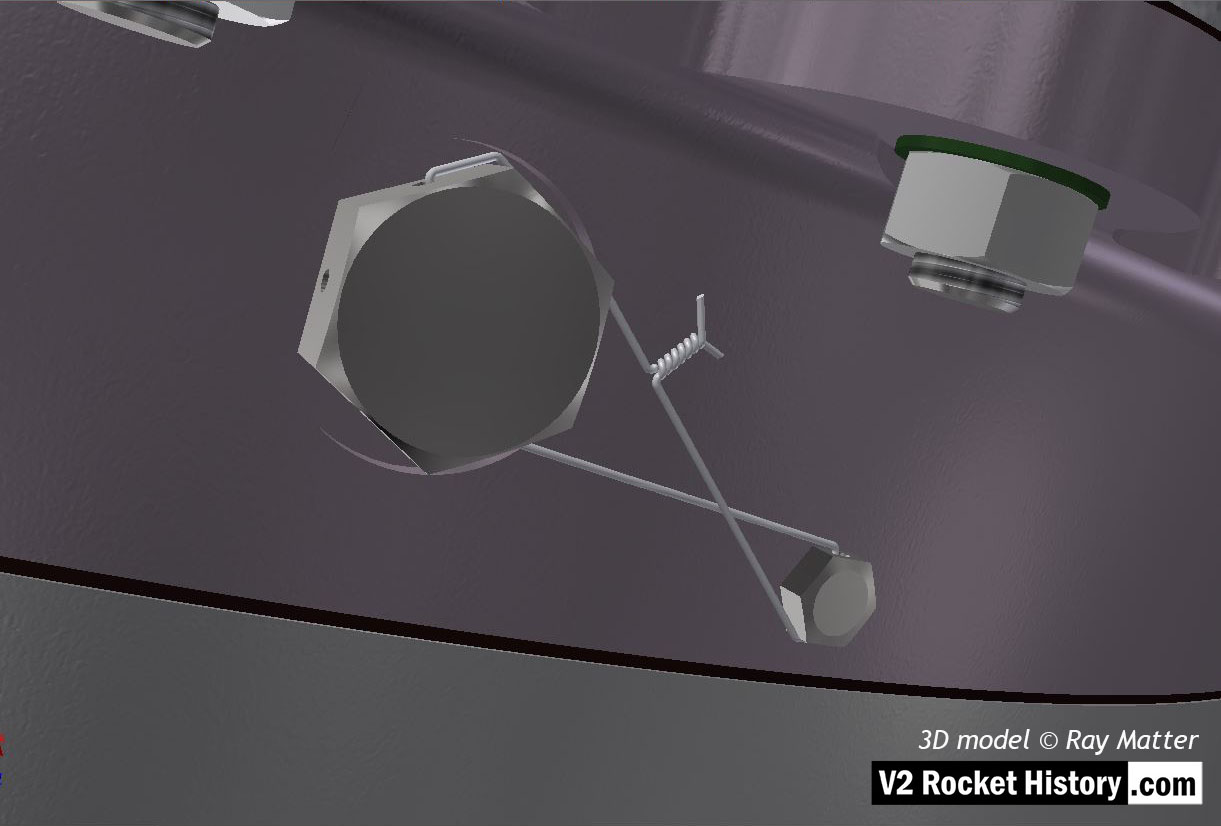
Turbine powered propellant pumps for A4/V2 rocket engine – close-up of turbine casing shows wire restraint fastener locking system. 3D model by Ray Matter
| Album | Turbopump 3D CAD |
| Category | Turbo-pump |
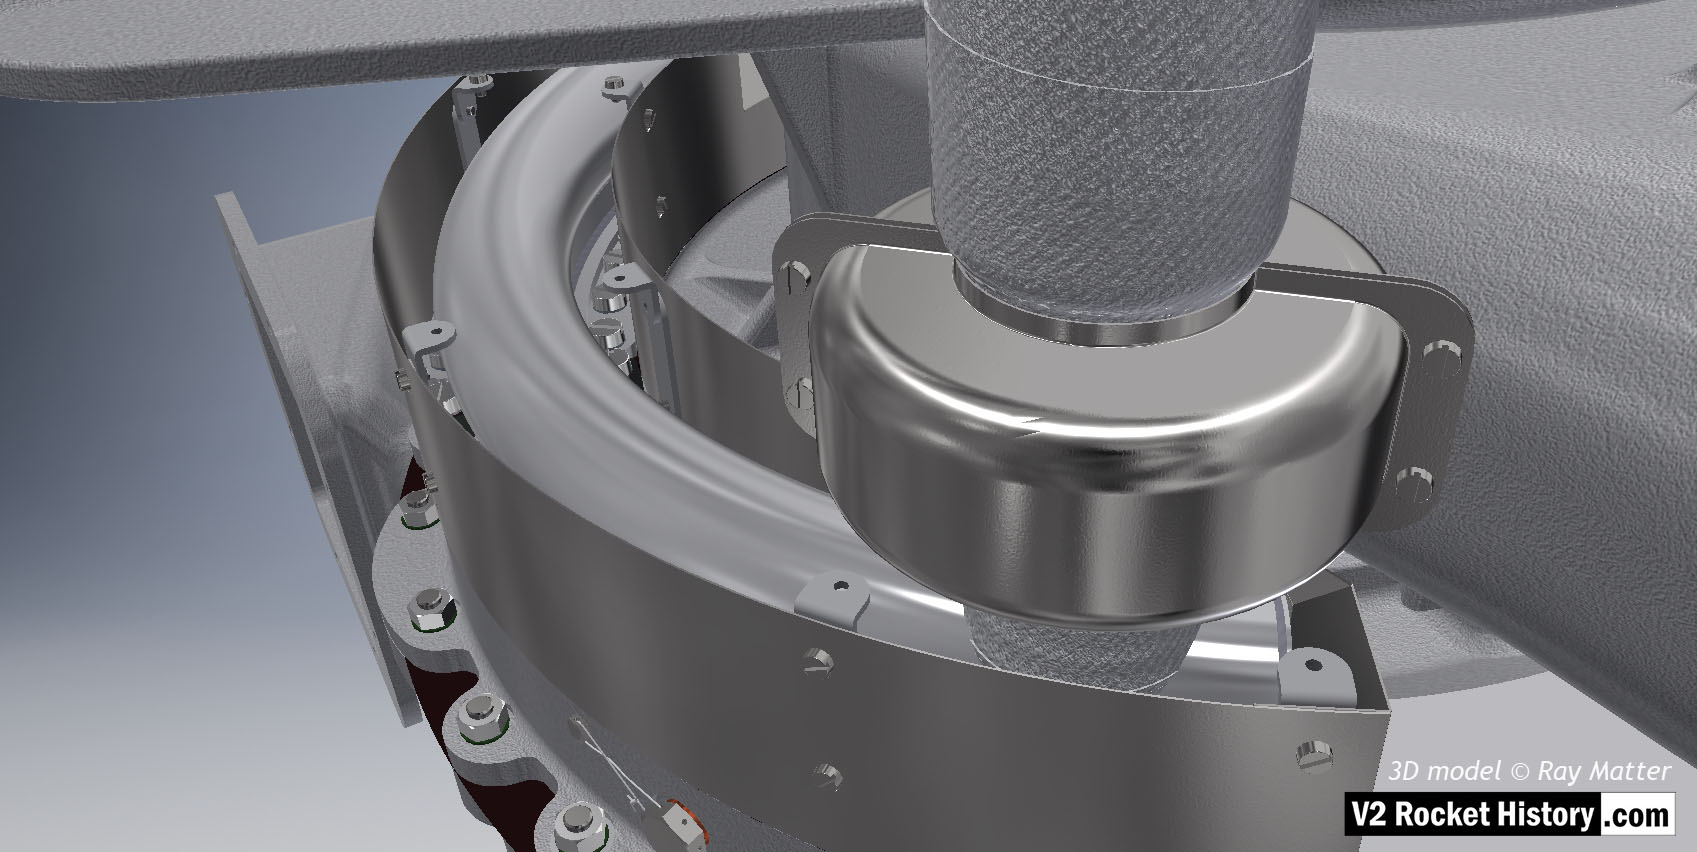
Close-up of turbine showing steel case with lid removed to show steam inlet ring manifold. The thin steel case that fits around the steam manifold mating flanges is clearly shown as is the wire restraint fastener locking system (see close-up in gallery). 3D model by Ray Matter
| Album | Turbopump 3D CAD |
| Category | Turbo-pump |
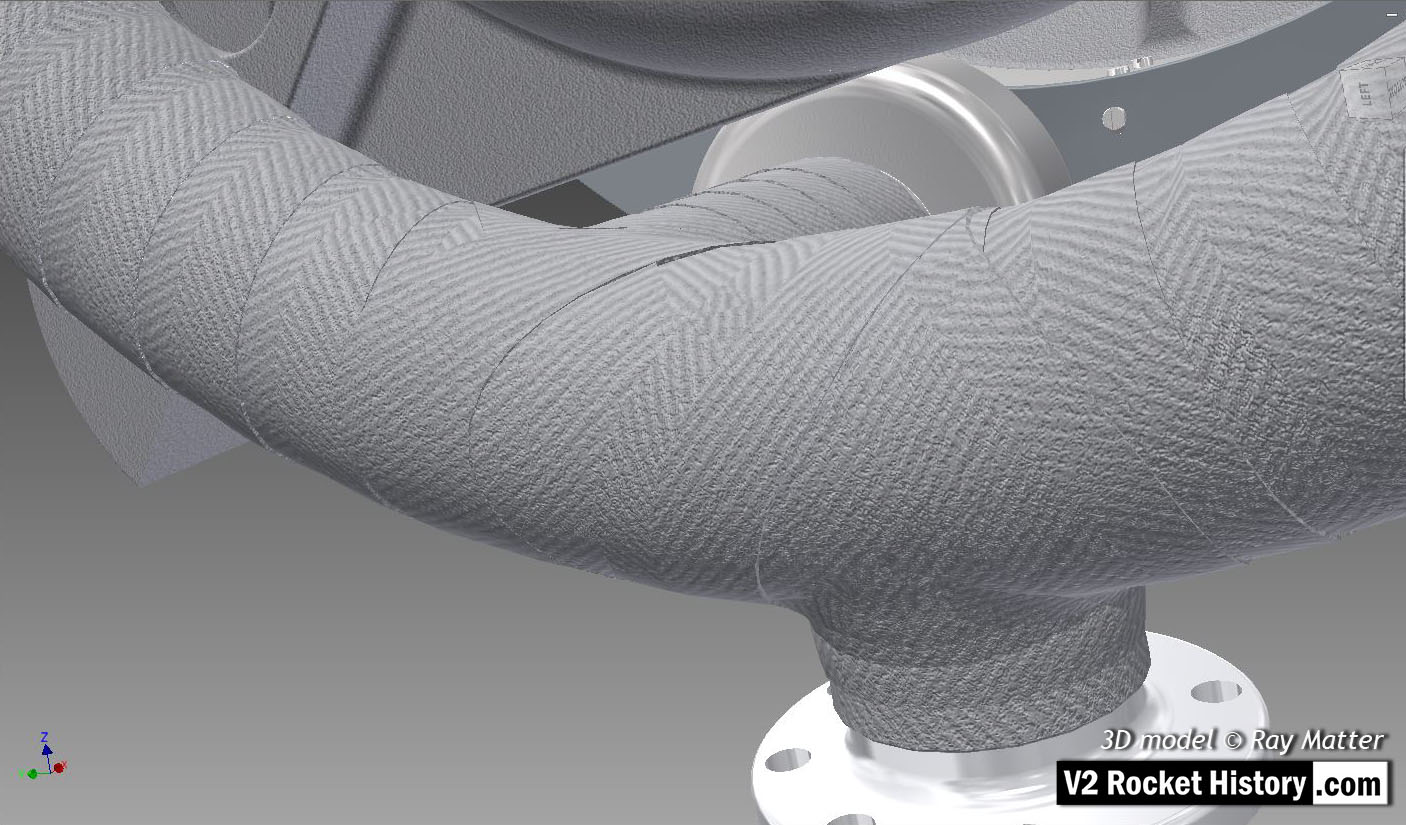
Close-up of turbine steam inlet ring manifold showing asbestos bandage wrapped around the tubular ring. Sometimes a thin wire was used to help retail the heat resistant material. This bandage is often missing from museum exhibits. 3D model by Ray Matter
| Album | Turbopump 3D CAD |
| Category | Turbo-pump |
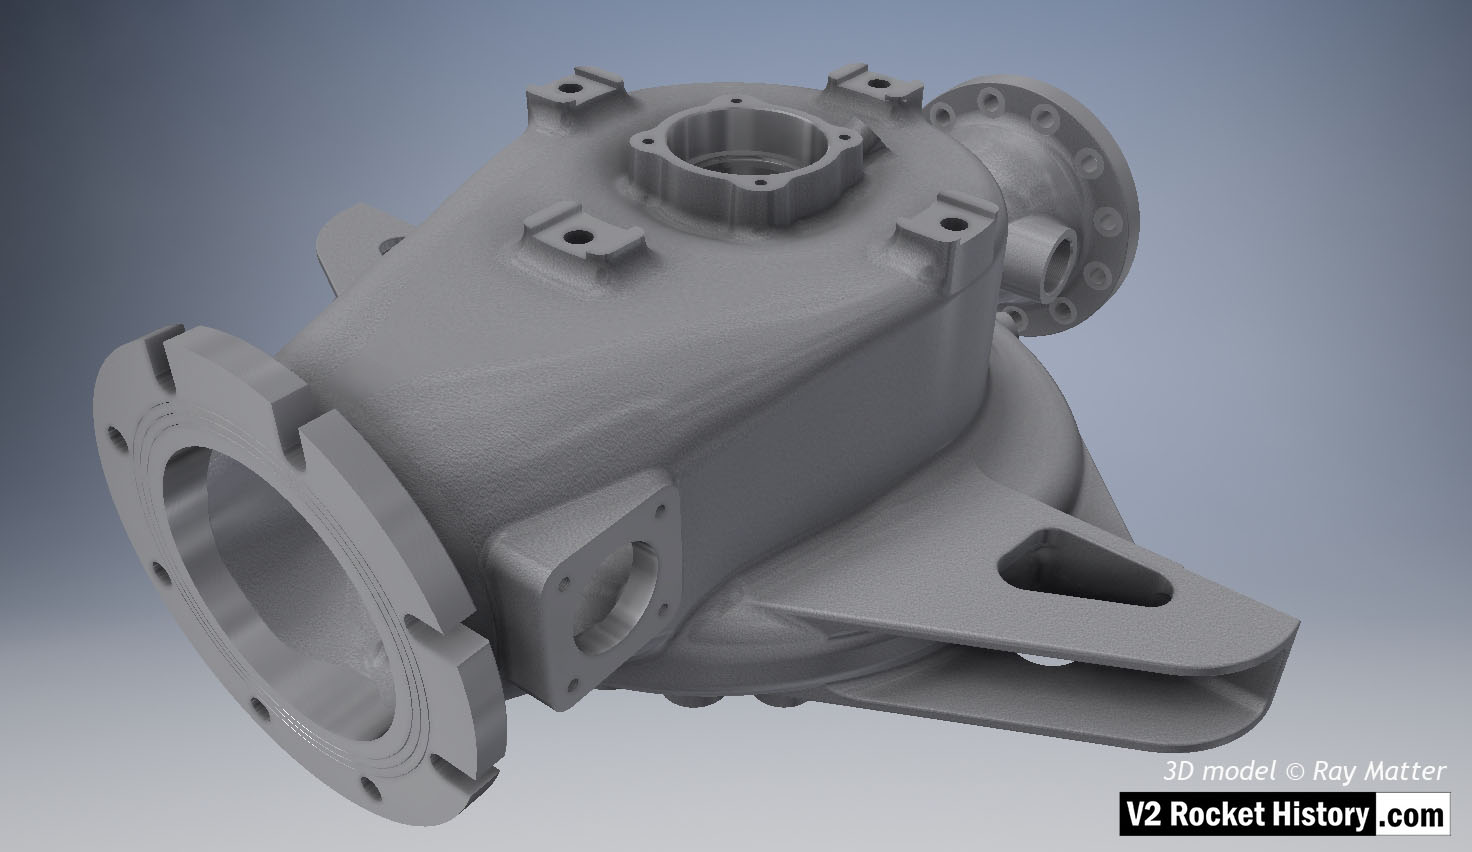
B (fuel) Pump sub-assembly, single piece casting showing machined (milled) areas without fittings. View shows inlet flange fastener slots and the throat aperture – facing right, initially blanked off by square plate, but towards the end of 1944 used for fuel return from the main fuel valve situated in the center of the thrust chamber injection head. 3D model Ray Matter
| Album | Turbopump 3D CAD |
| Category | Turbo-pump |
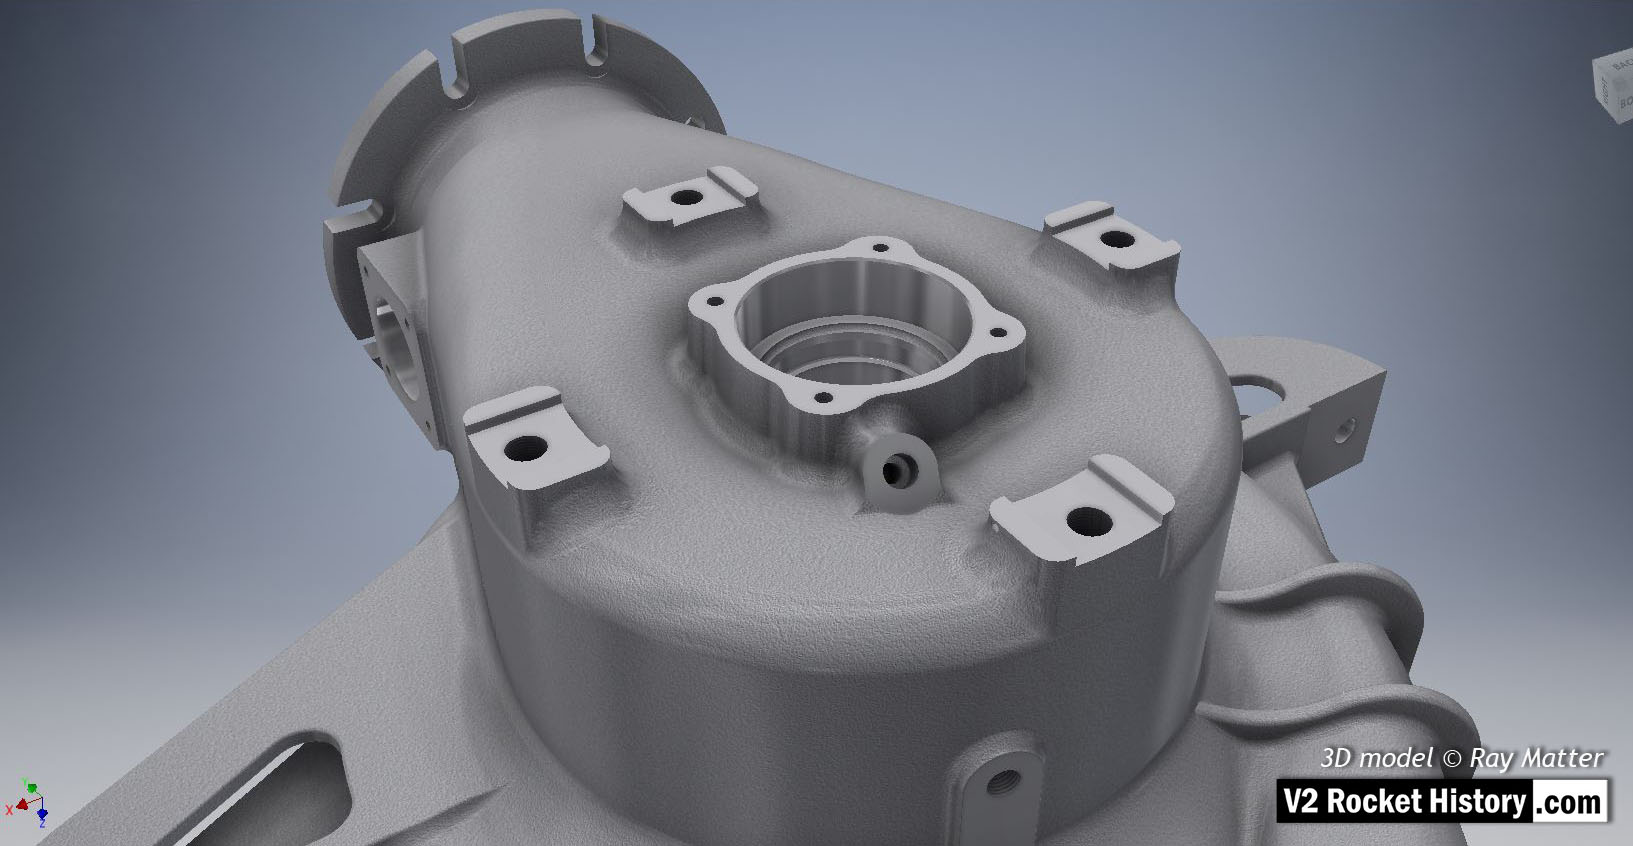
B (fuel) Pump sub-assembly, single piece casting showing machined (milled) areas and without fittings. 3D model Ray Matter
| Album | Turbopump 3D CAD |
| Category | Turbo-pump |
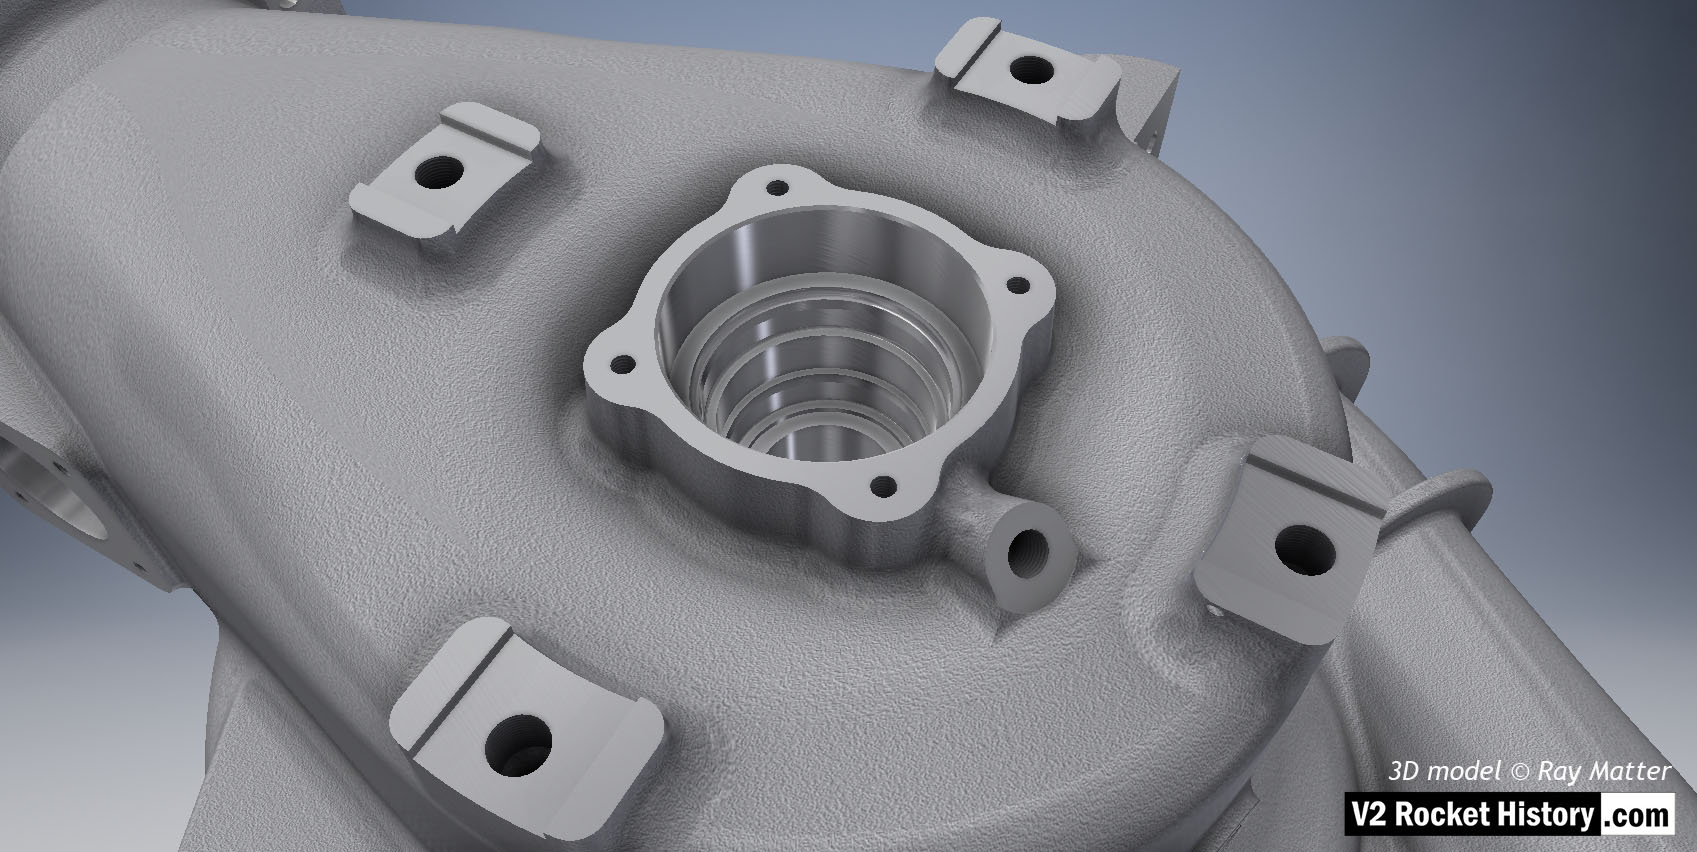
B (fuel) Pump sub-assembly shown without fittings. Single piece casting showing detail of bearing and seal cavity as well as threaded fuel bleed connection. 3D model Ray Matter
| Album | Turbopump 3D CAD |
| Category | Turbo-pump |
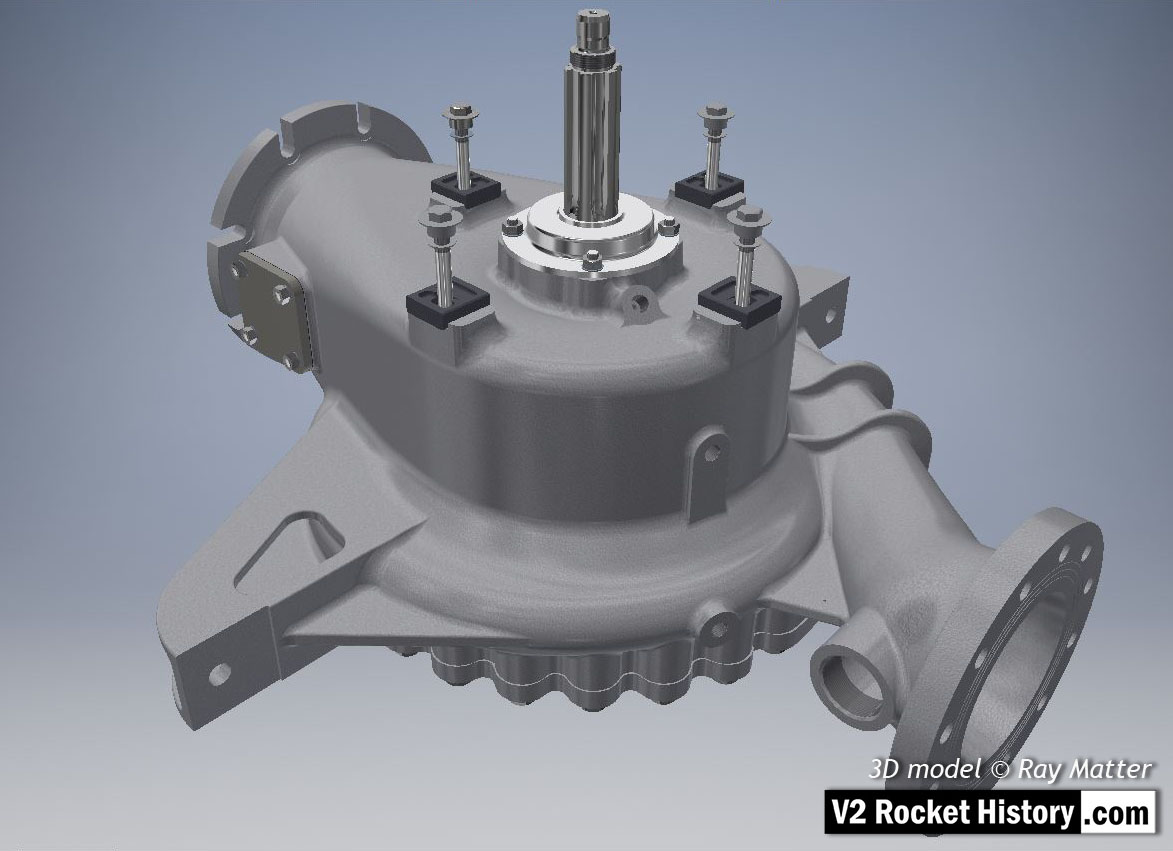
B-Pump sub-assembly, showing earlier version square inlet throat blanking plate (later versions employed a fuel return connection point mounted on this plate).
Fastenings, turbine case contact furniture, splined turbine connection shaft, and shaft seal cap are also shown. 3D model Ray Matter
| Album | Turbopump 3D CAD |
| Category | Turbo-pump |
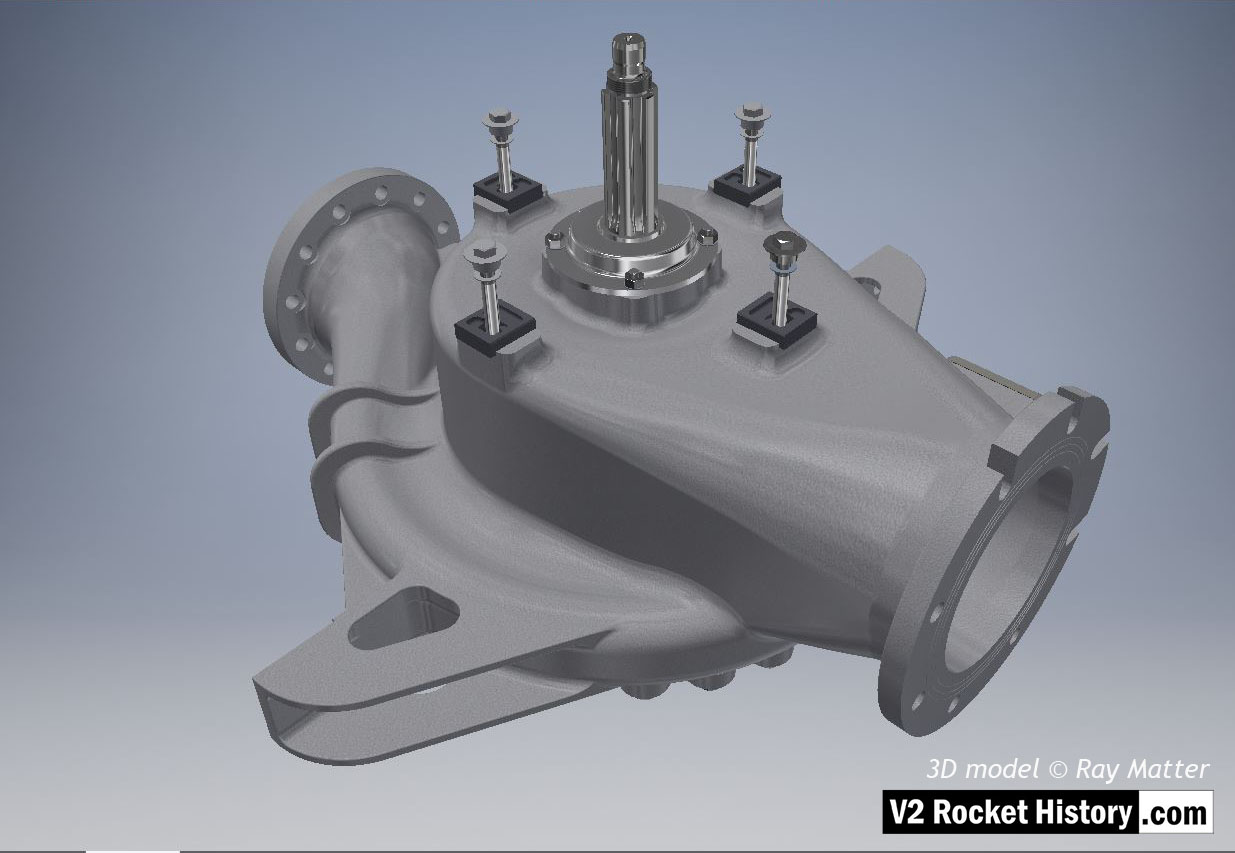
B-Pump sub-assembly complete with fastenings, turbine case contact furniture, splined turbine connection shaft, and shaft seal cap. 3D model Ray Matter
| Album | Turbopump 3D CAD |
| Category | Turbo-pump |
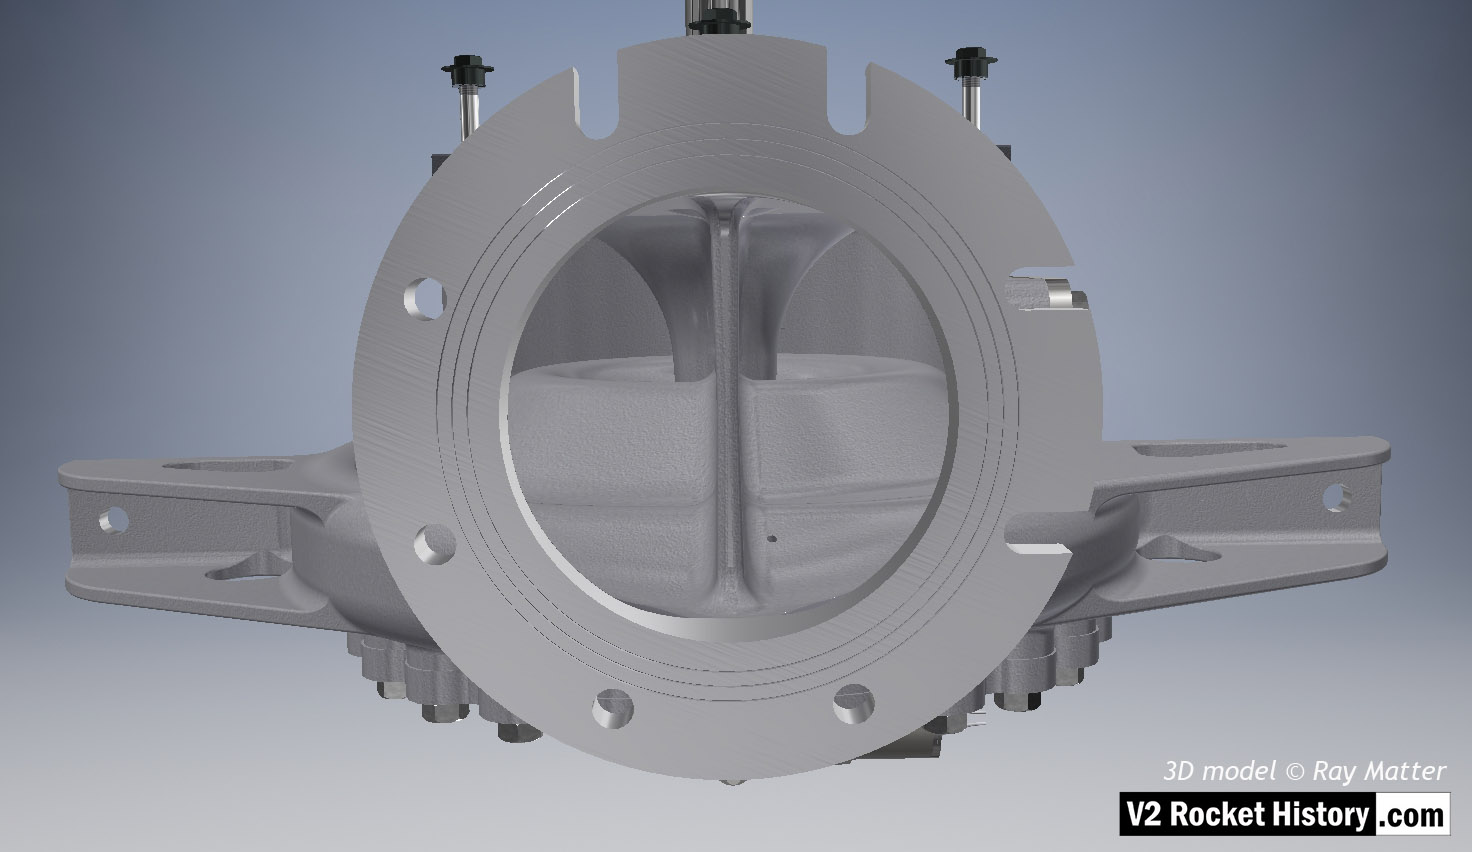
B-Pump Sub-assembly shown from top. View shows outlet flange facing camera – the splined drive shaft can just be seen at the top of the screen. Note the three fine rings milled into flange face.The rings were designed to improve keying for the ‘putty’ that was used to seal the connection between the flange face and the inlet pipe. Note, small self-purge orifice on the lower left of the inlet throat baffle. Unlike the upper purge hole in the LOX casing, the shallower face angle at the location of the hole in the fuel pump casing, was more accessible to drilling and was therefore not problematic. 3D model Ray Matter
| Album | Turbopump 3D CAD |
| Category | Turbo-pump |
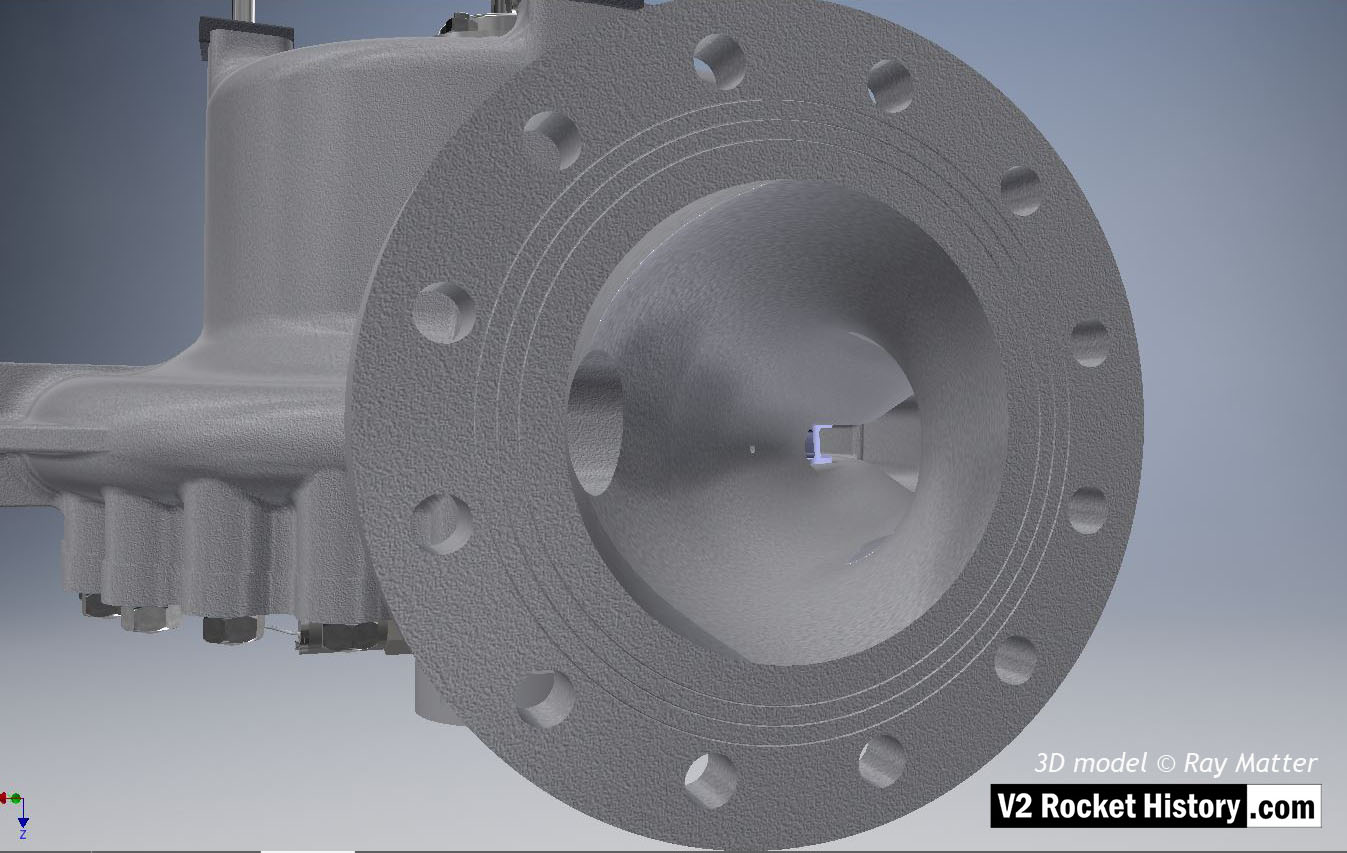
B-Pump sub-assembly close-up showing fuel outlet flange. Note the three fine rings milled into the flange face. The rings were designed to improve keying for the ‘putty’ that was used to seal the connection between the flange face and the flow choke. Both faces of the choke and top face of the fuel outflow connector had similar rings. 3D model Ray Matter
| Album | Turbopump 3D CAD |
| Category | Turbo-pump |
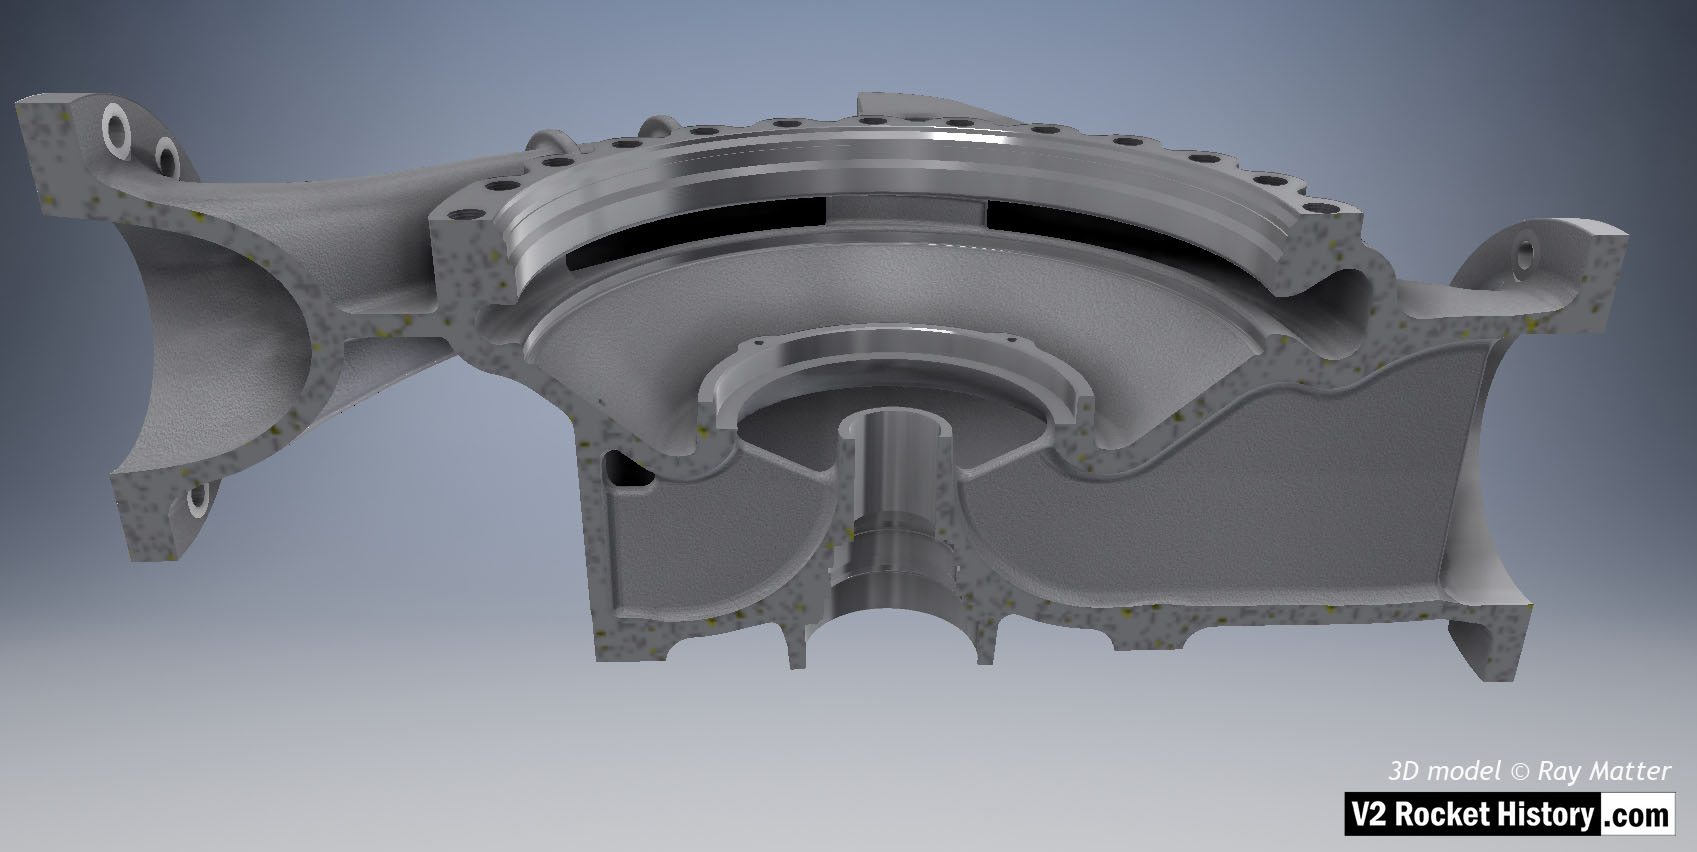
B Pump housing sectioned to show baffle and volute space area expansion as flow passes from inlet (right) to outlet (left). 3D model Ray Matter
| Album | Turbopump 3D CAD |
| Category | Turbo-pump |
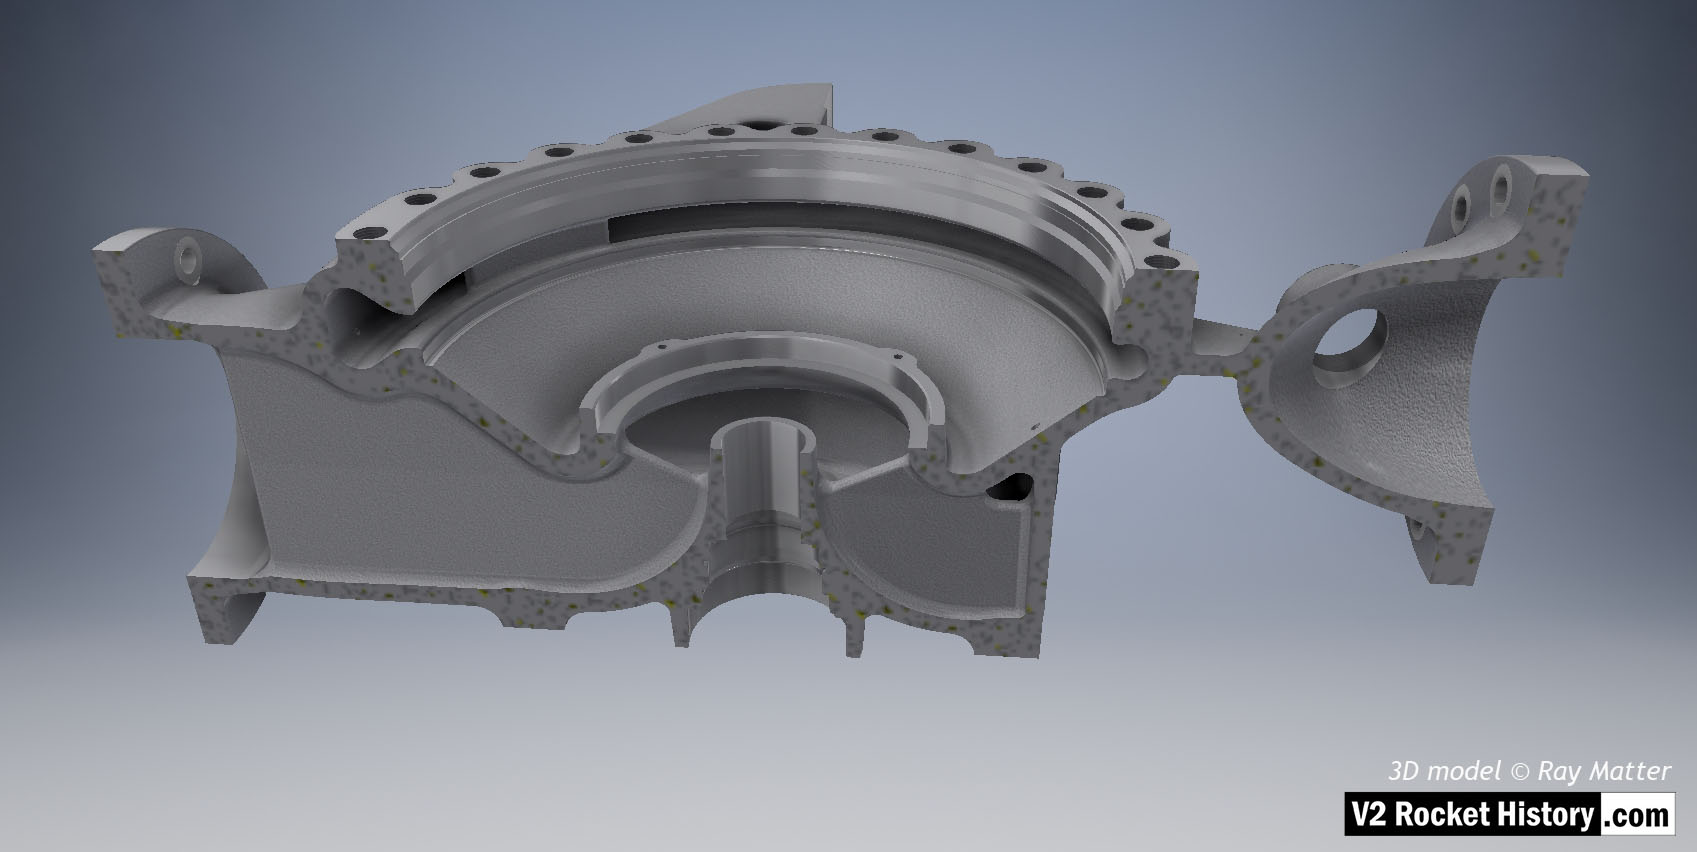
B Pump housing sectioned to show baffle with vent and volute space area expansion as flow passes from inlet (left) to outlet (right). 3D model Ray Matter
| Album | Turbopump 3D CAD |
| Category | Turbo-pump |
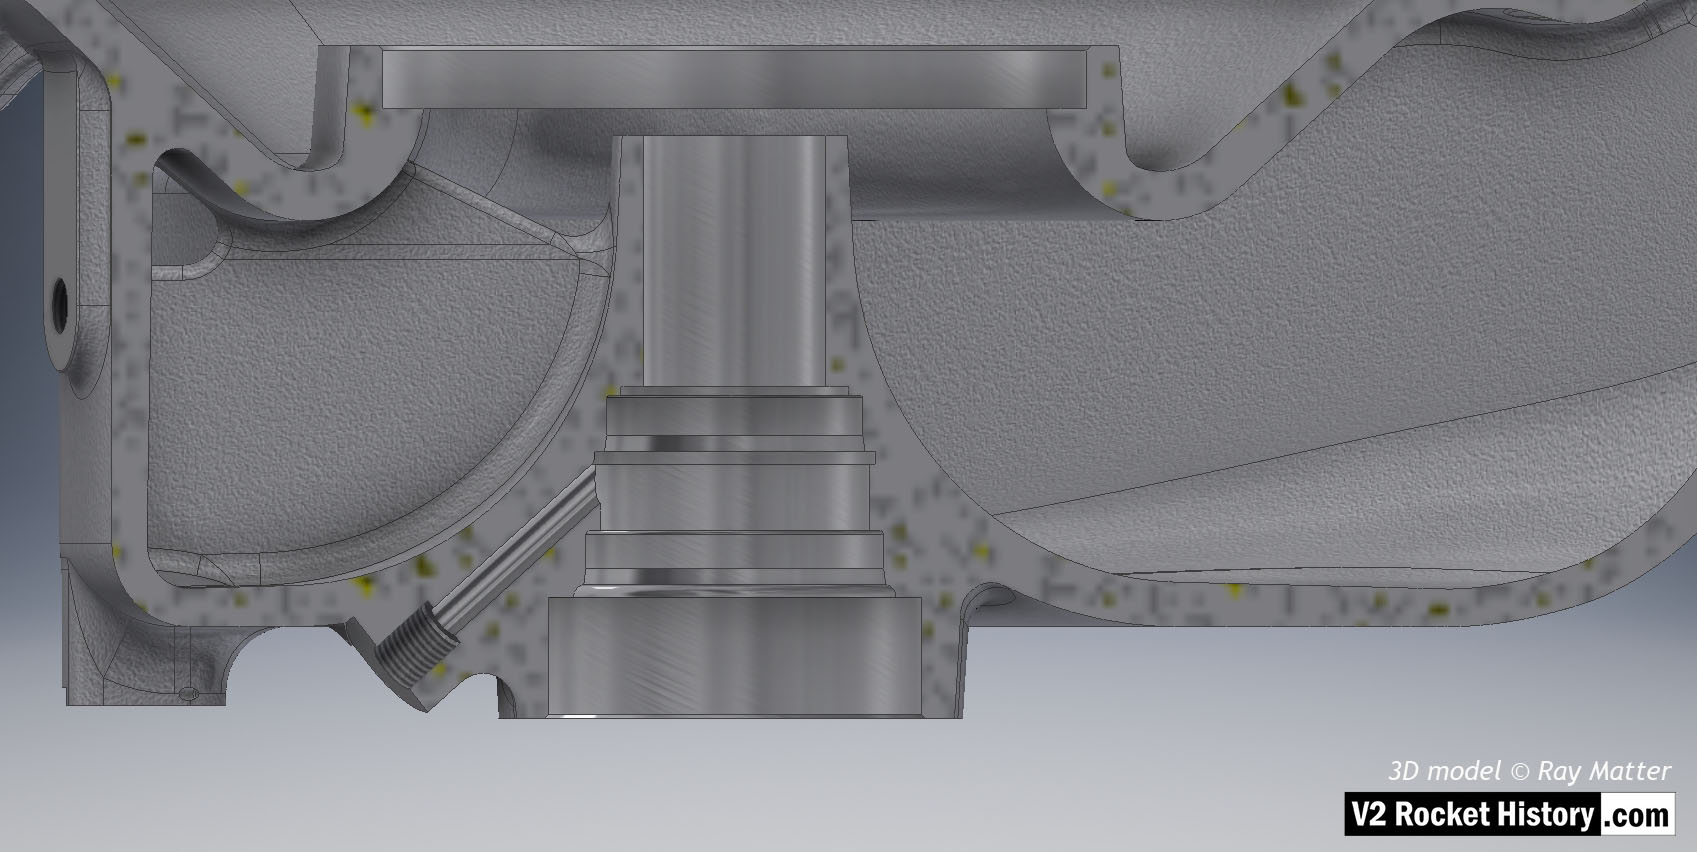
B pump housing showing sectioned area for shaft and bearing cavities with fuel pathway to left. 3D model Ray Matter
| Album | Turbopump 3D CAD |
| Category | Turbo-pump |
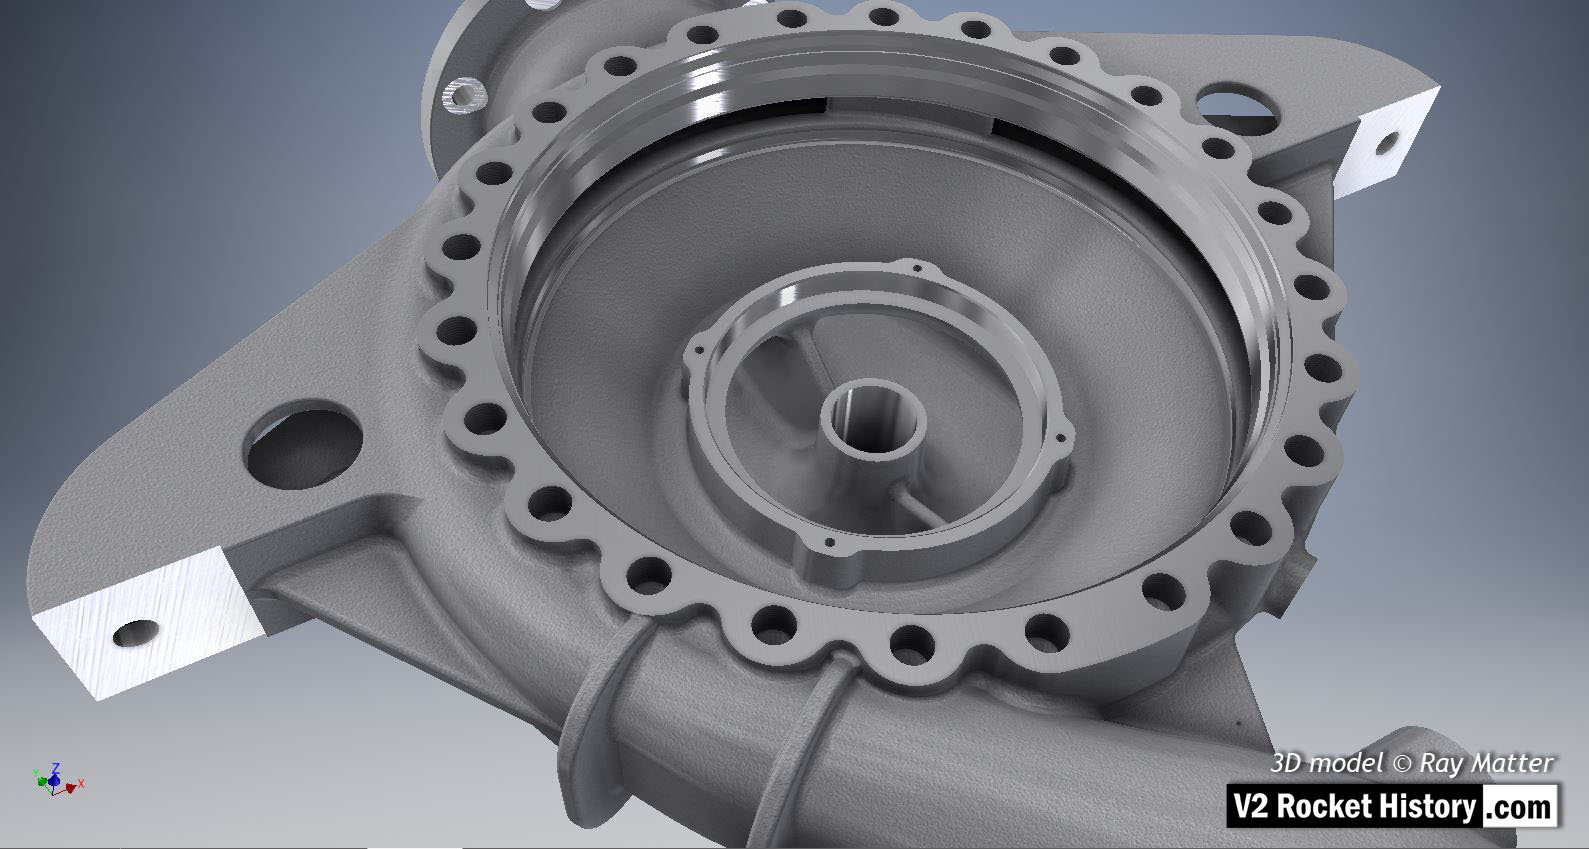
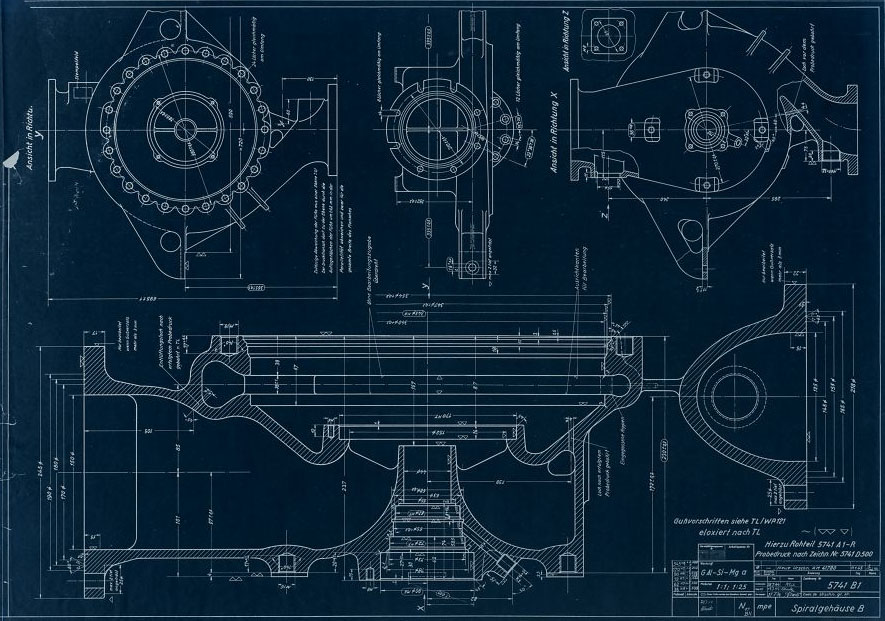
‘B’ fuel pump housing for V2 rocket engine turbopump showing cast and machined surfaces – some machined areas with obvious specular reflections. Of note are the rarely seen machined contact points on the integral support brackets and the larger areas in two locations in the ring of double ended bolt fixing holes seen at 12 and 6 o’clock. These areas allowed two ‘push’ screws to be threaded into corresponding locations in the face plate. These could then be screwed down to provide a pushing force to remove the face plate from the main housing seat. This retraction system was required owing to the very tight fit of the face plate due to the narrow ‘piston fit’ tolerances and the vacuum effect of a soft gasket that was employed between the faces. 3D model by Ray Matter
| Album | Turbopump 3D CAD |
| Category | Turbo-pump |
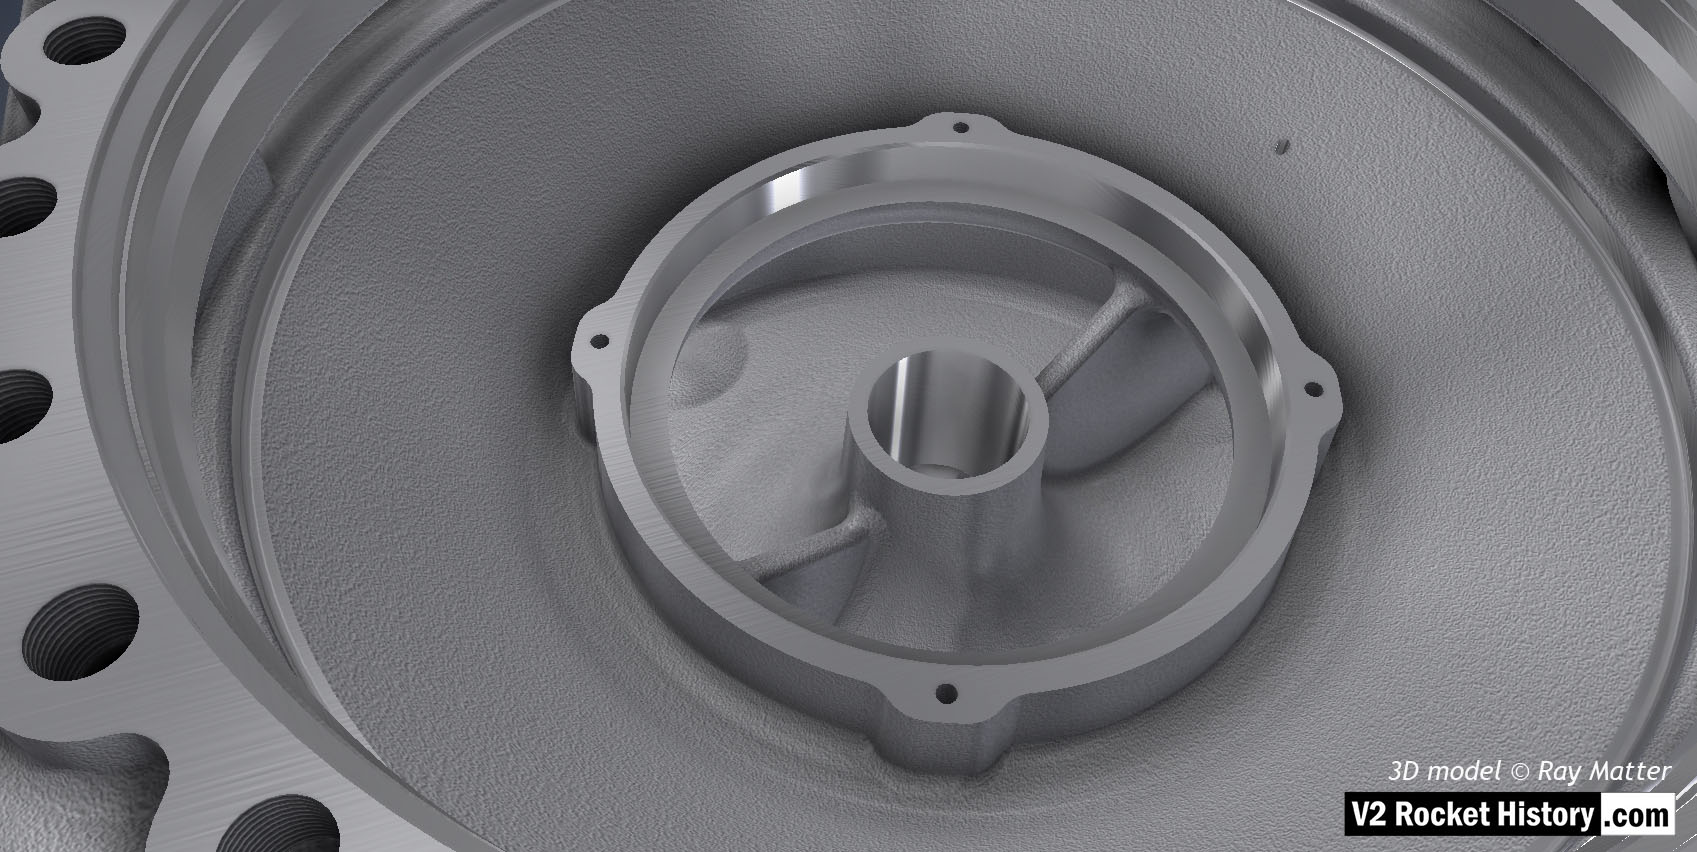
Close-up of ‘B’ fuel pump housing displaying cast and machined surfaces. Fuel inlet aperture shown with small purge orifice shown at 2 o’clock. 3D model by Ray Matter
| Album | Turbopump 3D CAD |
| Category | Turbo-pump |
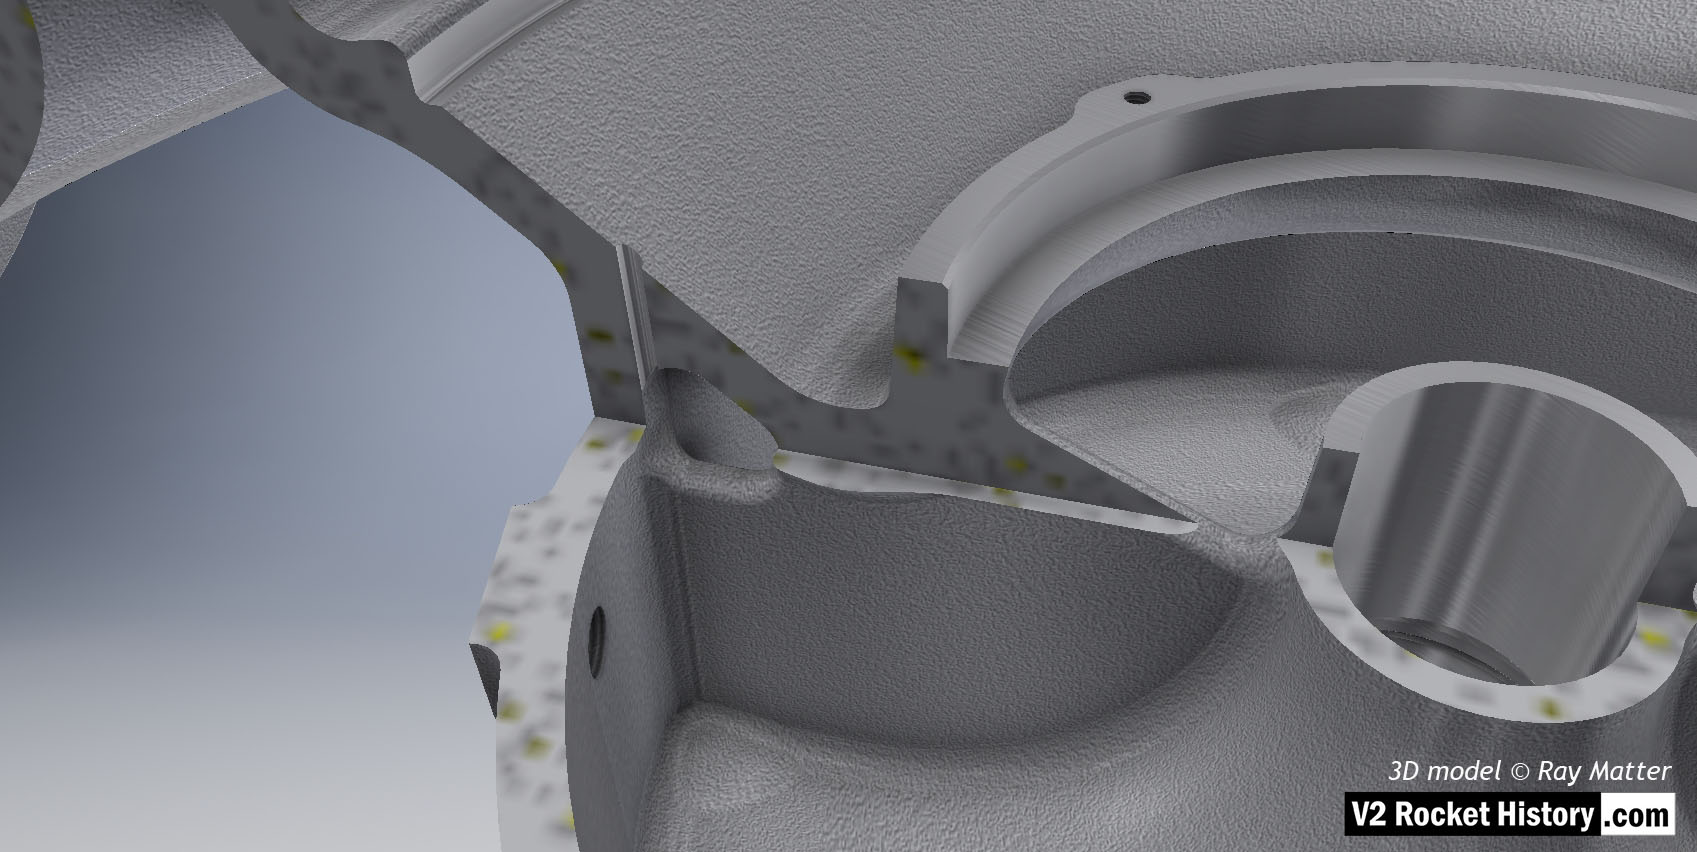
B Pump Housing, sectioned to show close-up of fuel bleed aperture and baffle vent for fuel pressure equalization between cavities inside the B pump casing. 3D model by Ray Matter
| Album | Turbopump 3D CAD |
| Category | Turbo-pump |
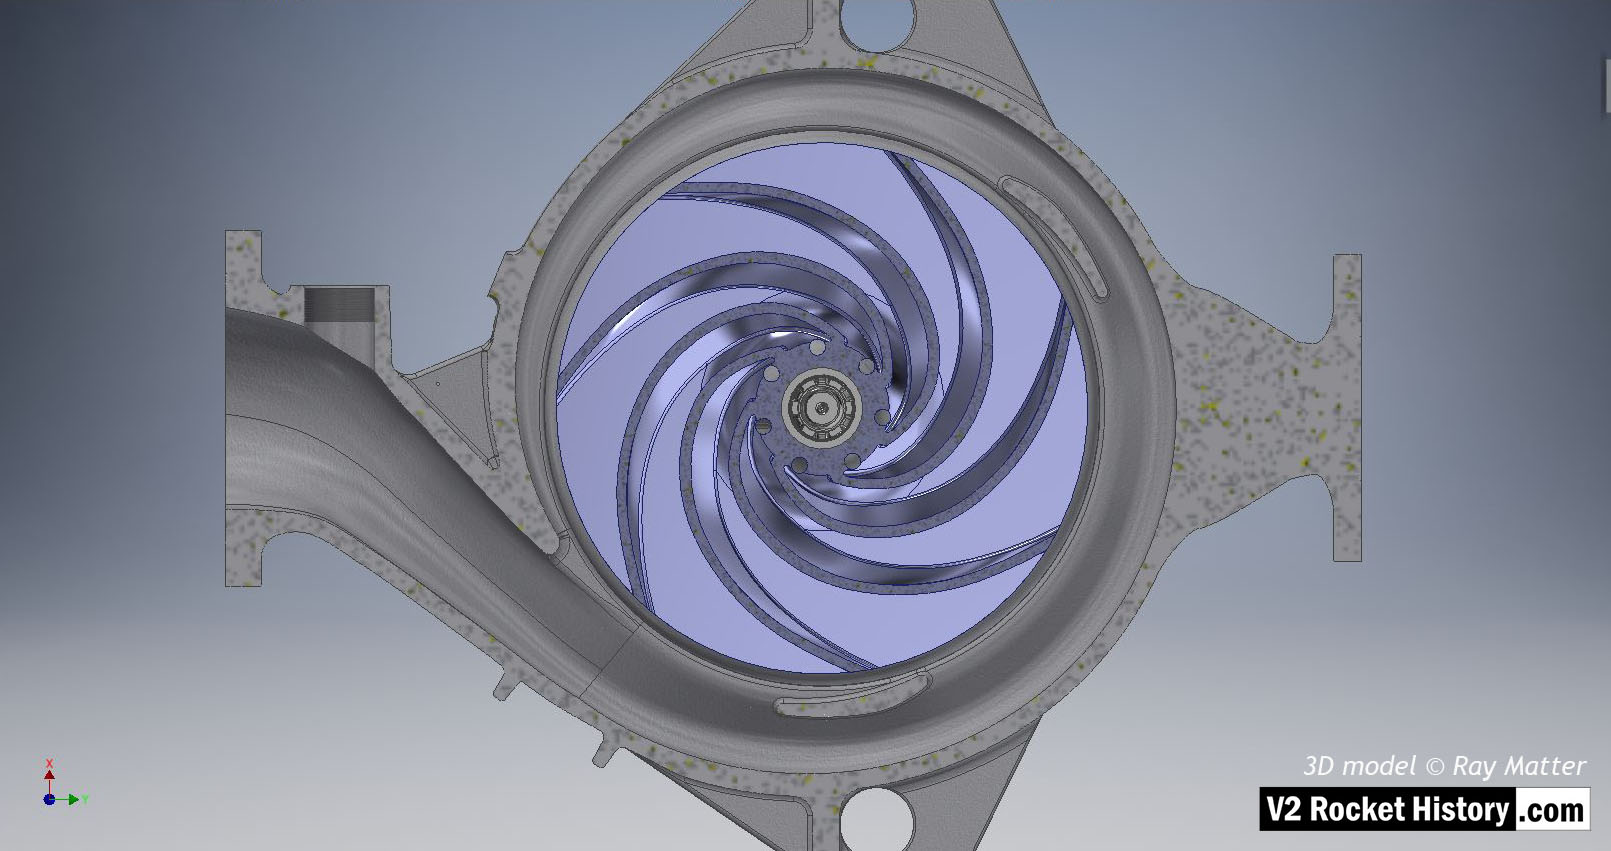
B (fuel) pump sub-assembly elevation view showing sectioned casing to reveal centrifugal pump impeller (in light purple for visibility). Outlet to left. The centrifugal pump impeller has been sectioned to remove one impeller face and reveal the curved vanes. The hub pass holes and end view of splined shaft are also shown. The spiral volute shape is very clear in this image. 3D model Ray Matter
| Album | Turbopump 3D CAD |
| Category | Turbo-pump |
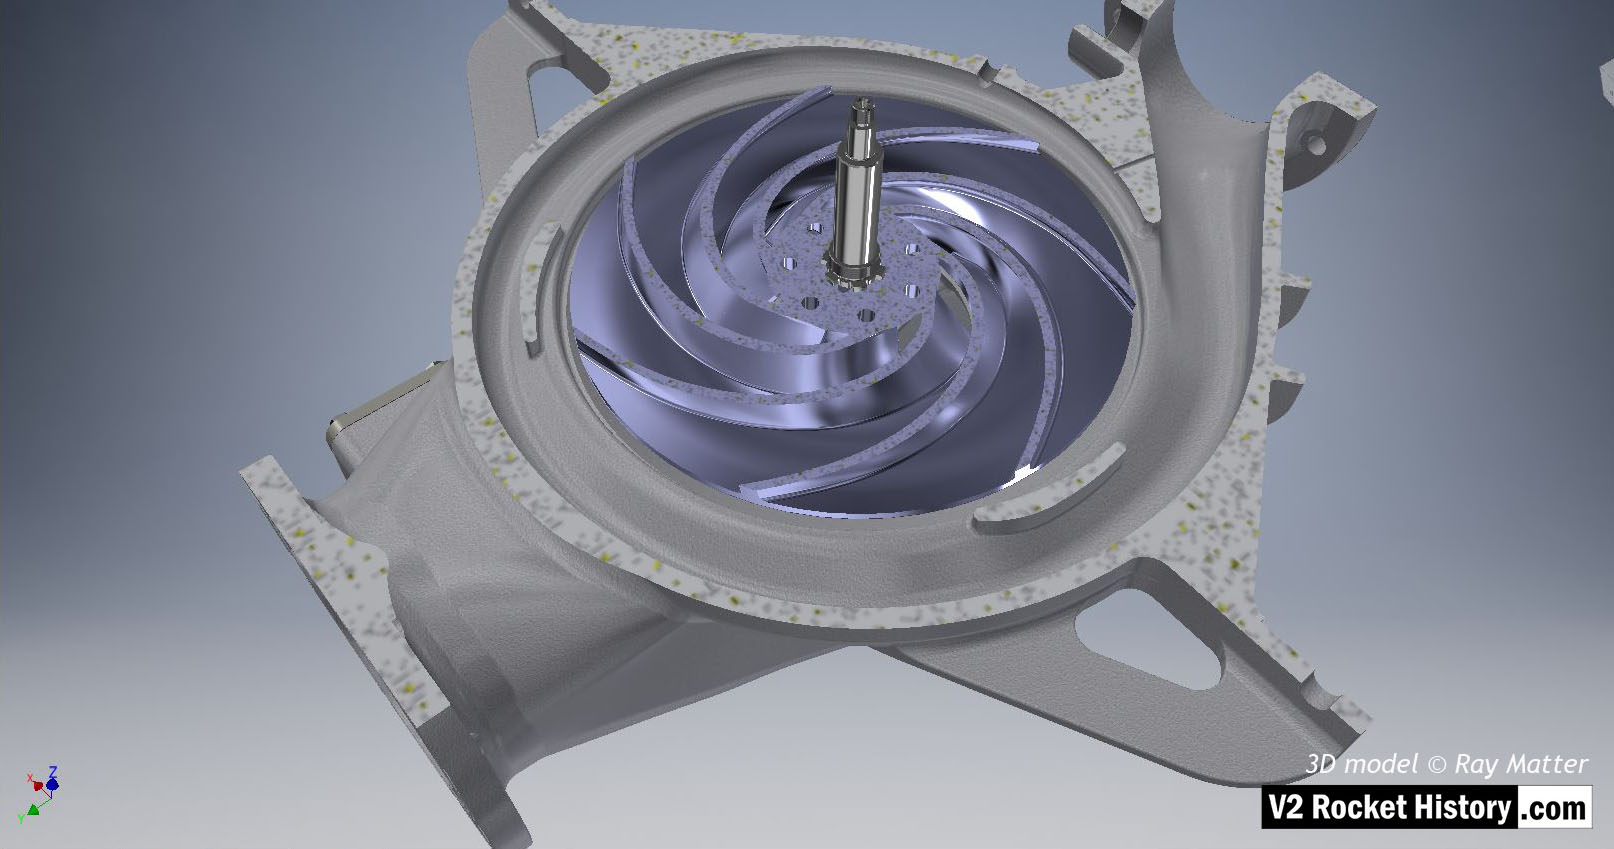
B (fuel) pump sub-assembly showing sectioned casing to reveal centrifugal pump impeller (in light purple for visibility). Outlet to top right. The centrifugal pump rotor has been sectioned to remove one impeller face and reveal the curved vanes.The shaft and spiral volute space shape is very clear in this image. 3D model Ray Matter
| Album | Turbopump 3D CAD |
| Category | Turbo-pump |
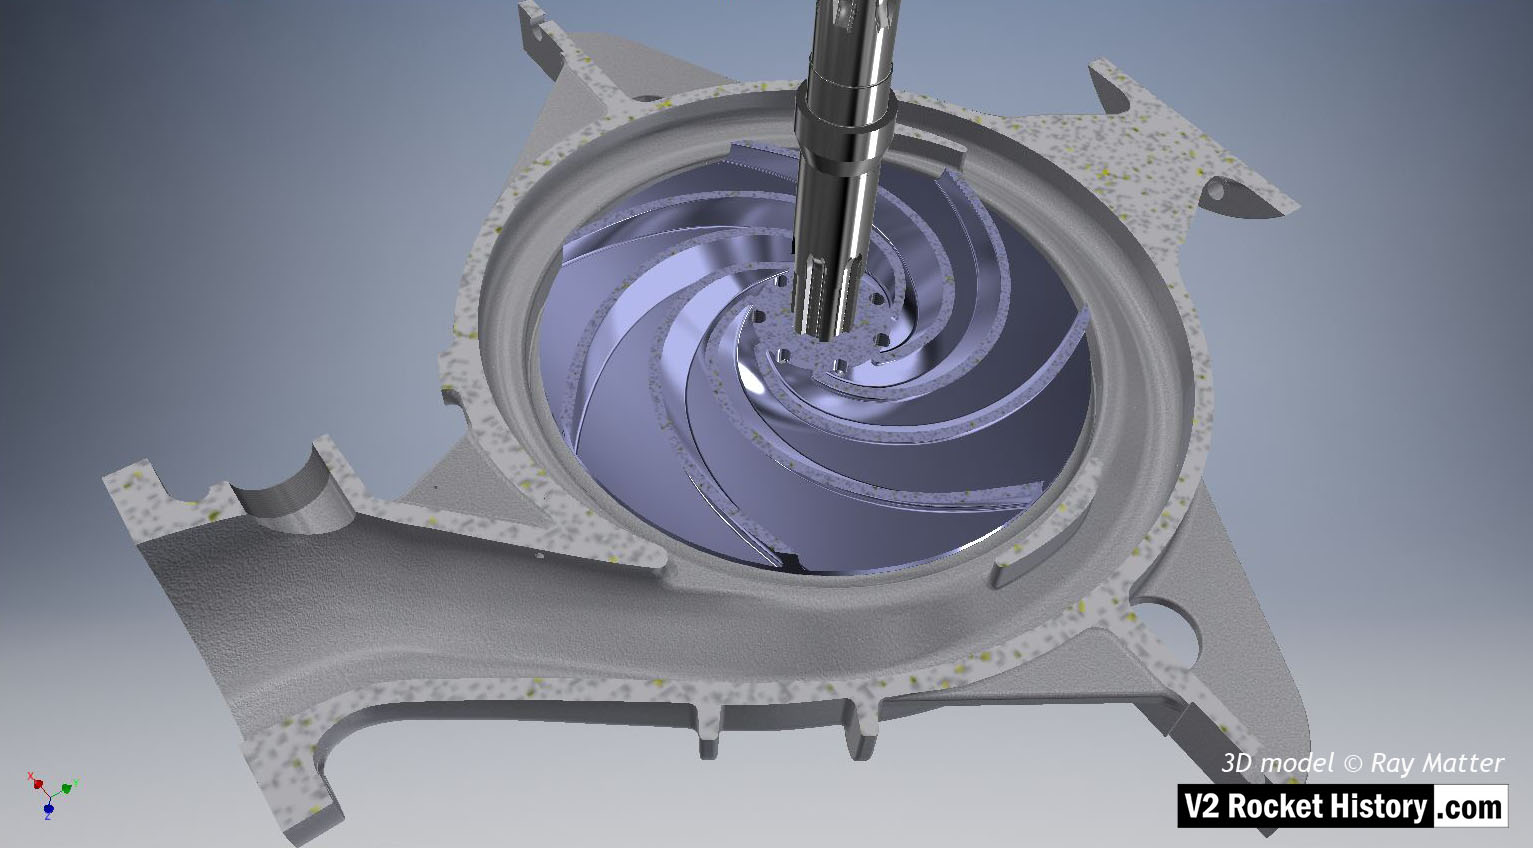
B (fuel) pump sub-assembly showing sectioned casing to reveal centrifugal pump impeller. Outlet to btm right. The centrifugal pump impeller has been sectioned to remove one rotor face and reveal the curved vanes. The shaft and spiral volute space shape are shown in this image. 3D model Ray Matter
| Album | Turbopump 3D CAD |
| Category | Turbo-pump |
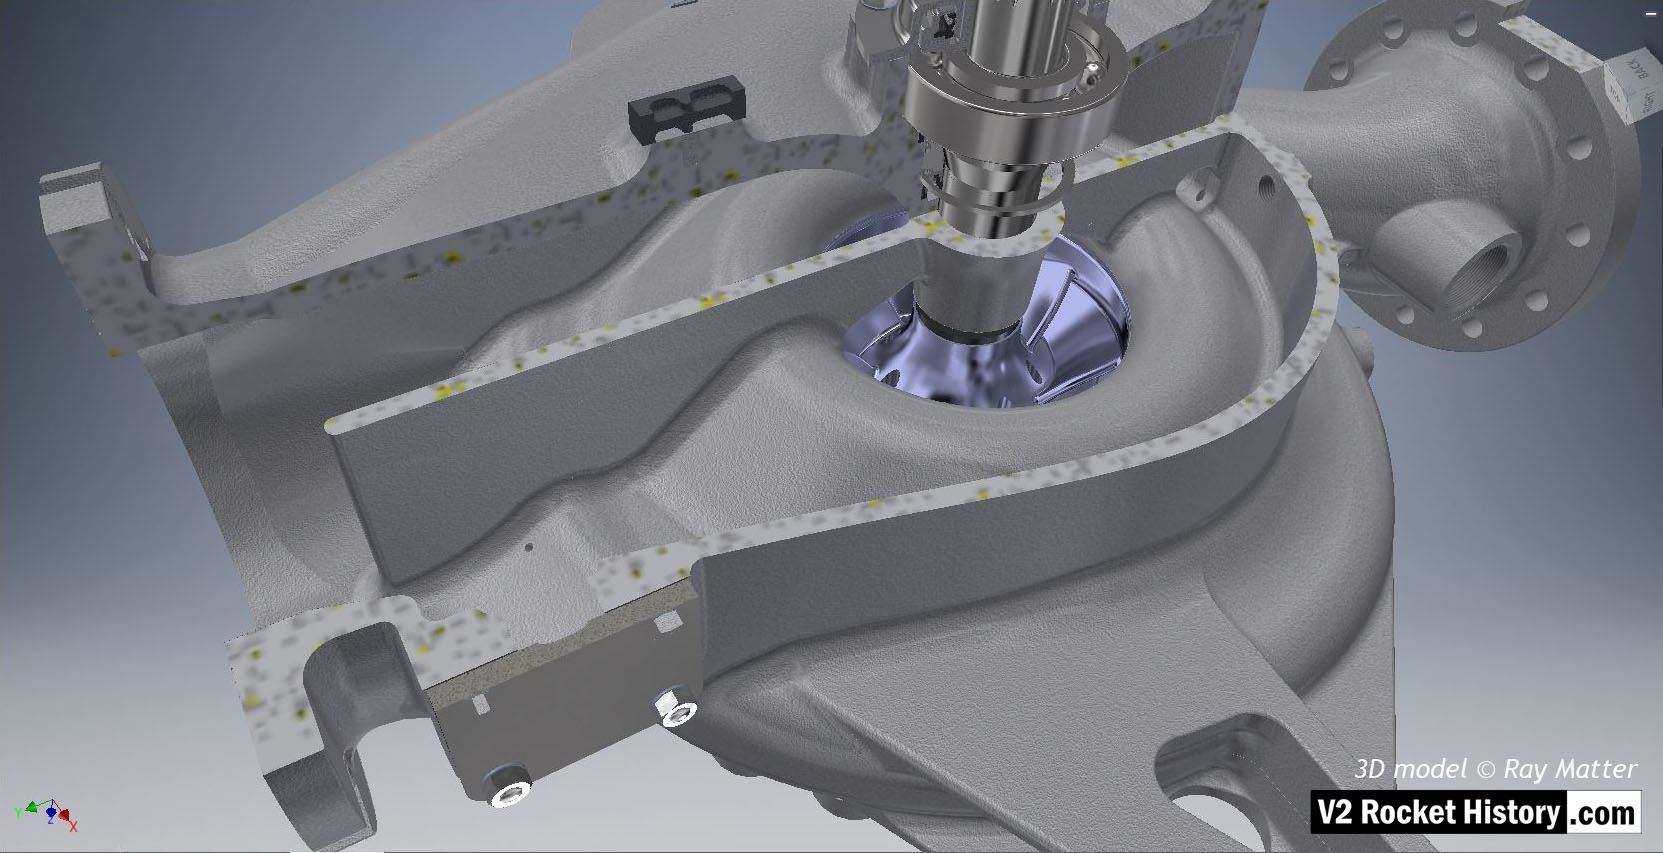
B-Pump sub-assembly sectioned to show fuel pump impeller inlet (purple area), baffle, and other shaft details. 3D model Ray Matter
| Album | Turbopump 3D CAD |
| Category | Turbo-pump |
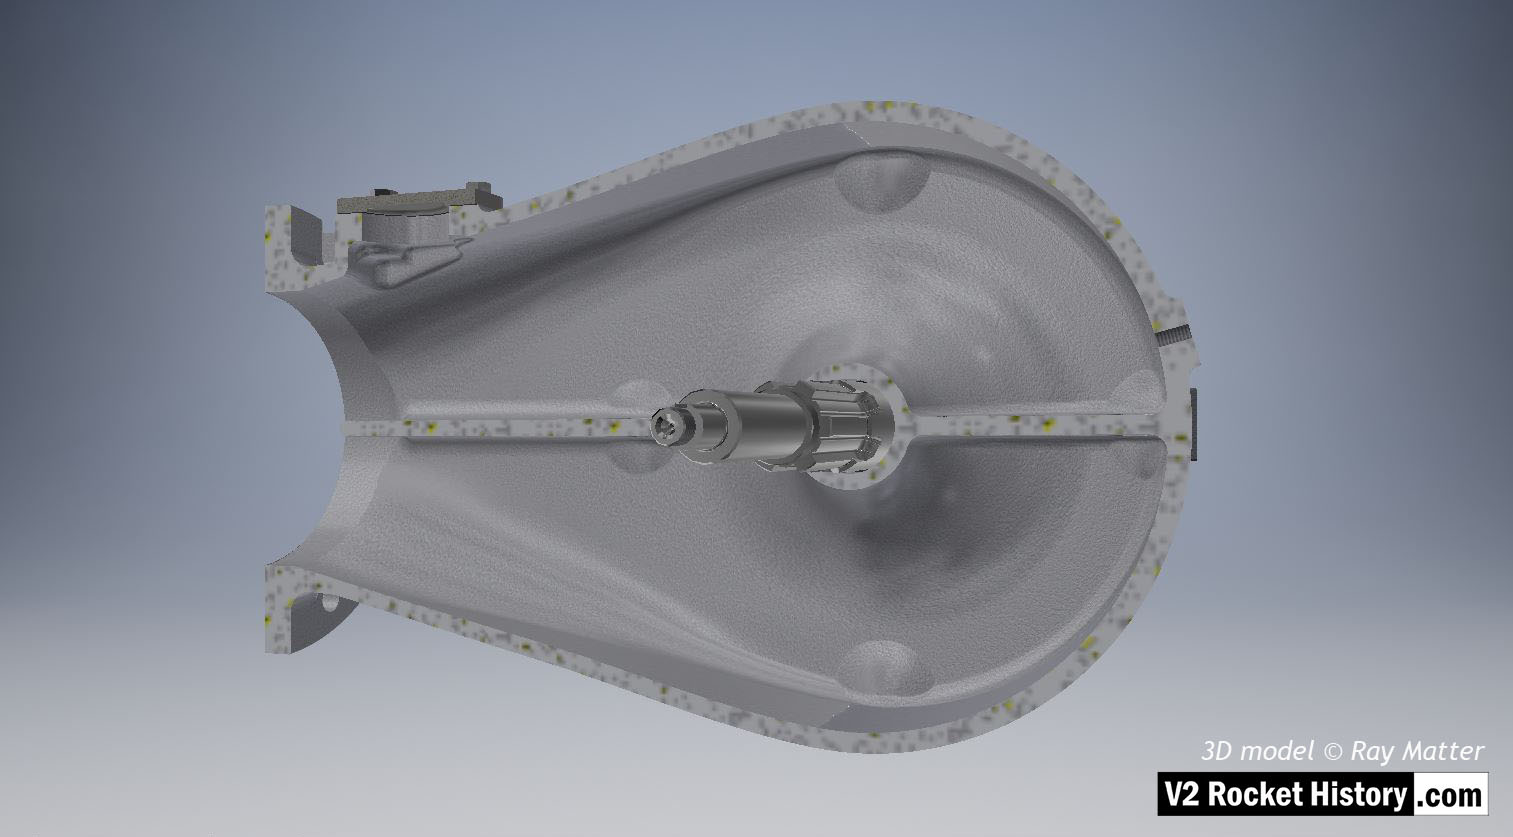
B-Pump sub-assembly casing sectioned to show shaft and fuel inlet chamber details. The throat blanking plate can be seen top left. 3D model Ray Matter
| Album | Turbopump 3D CAD |
| Category | Turbo-pump |
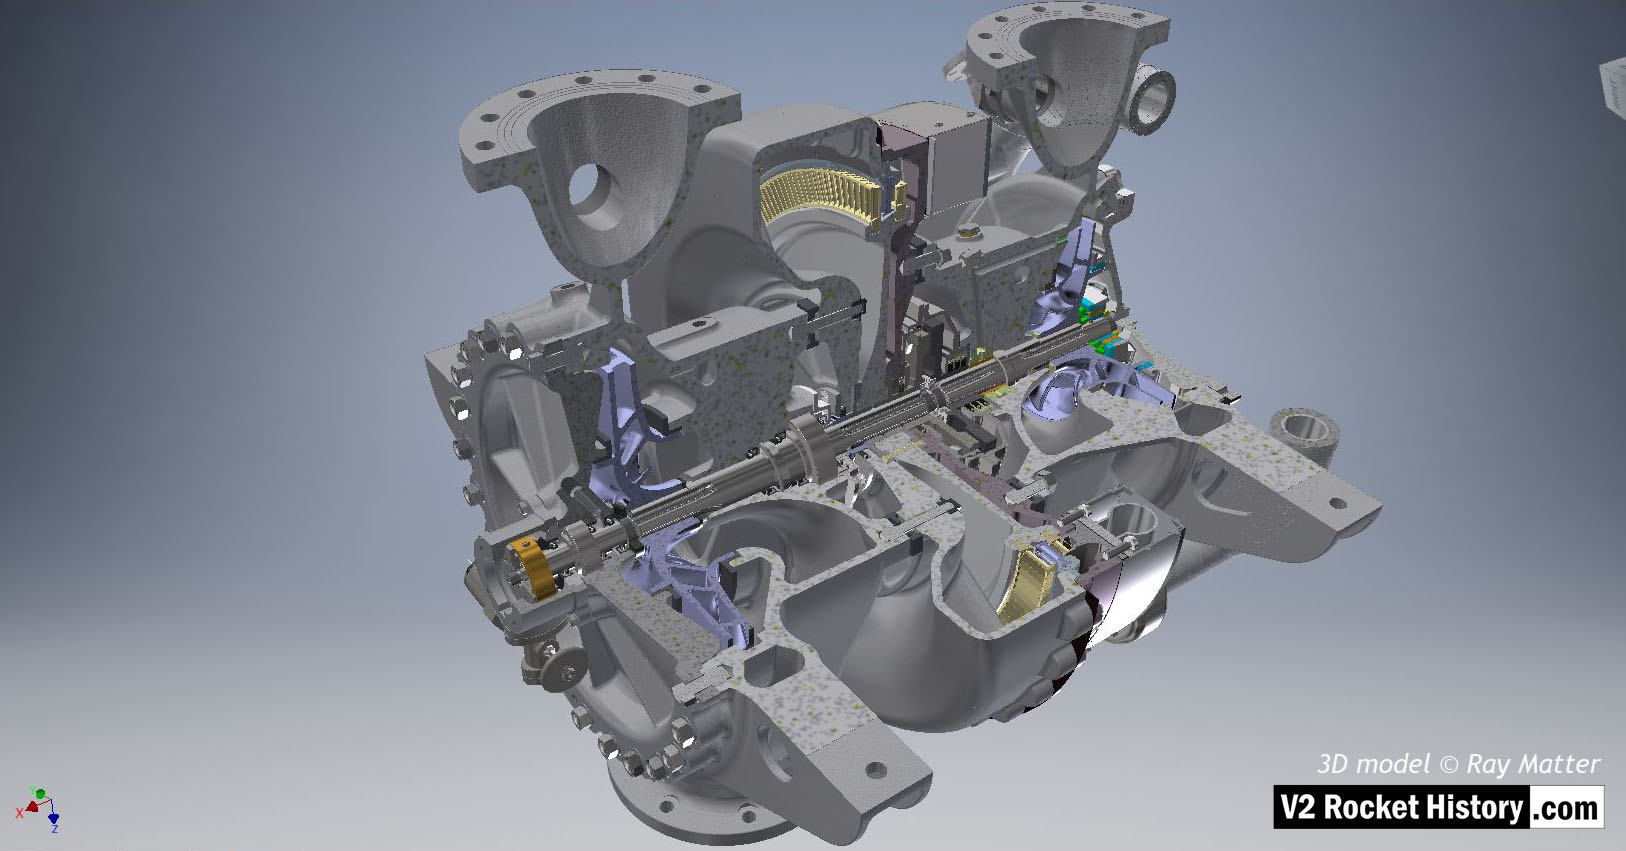
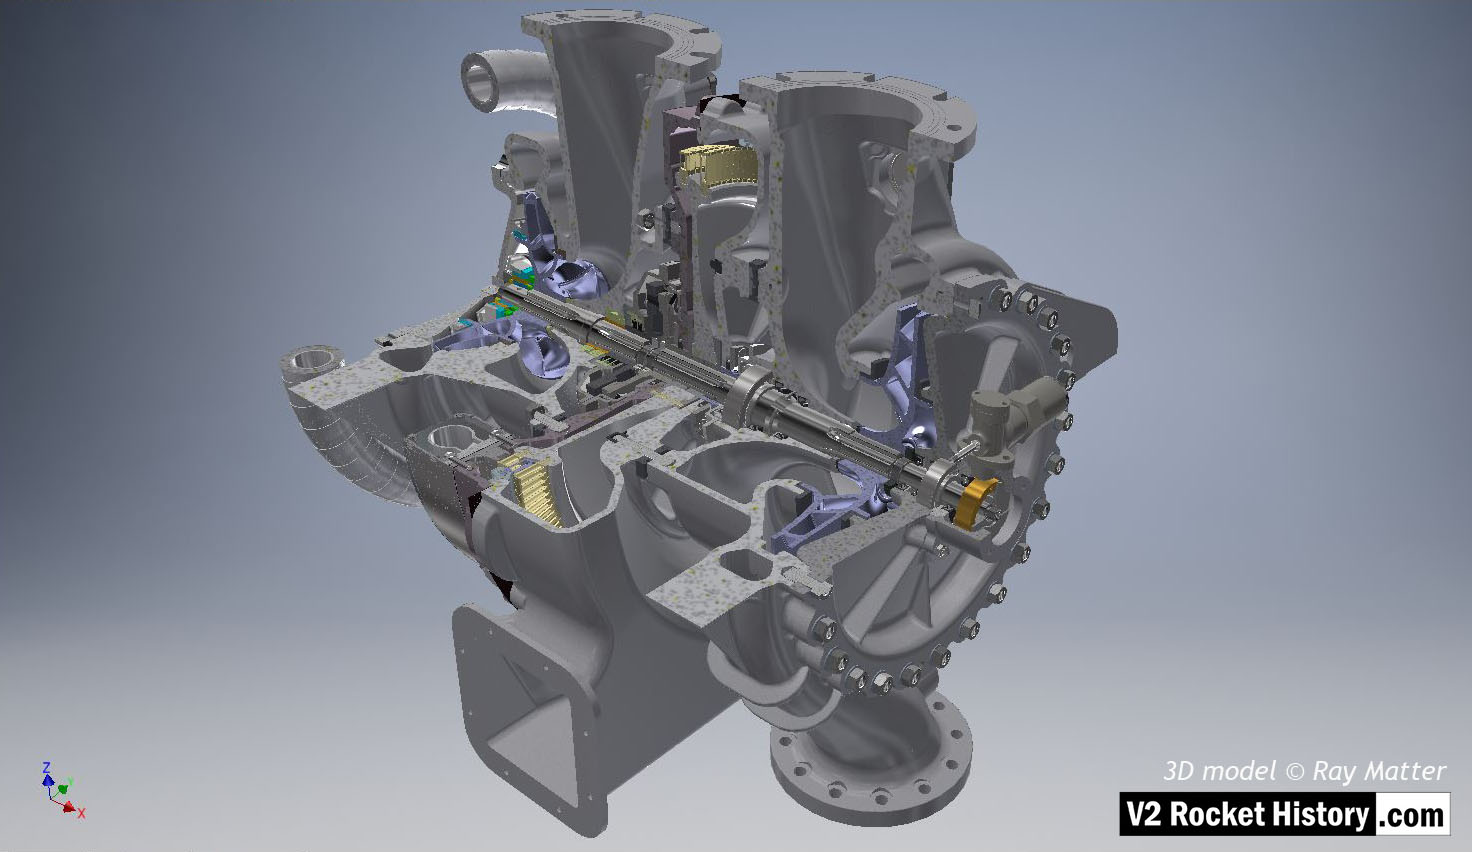
Turbine powered propellant pumps for A4/V2 rocket engine. The assembly is shown quarter sectioned and inverted with the propellant outlet flanges to the top and fuel pump on left, with inlet flanges at btm. The overspeed trip switch can be seen just below center on fuel pump face plate – the copper alloy centrifugal trip rotor is clearly visible in the trip-switch housing. 3D model by Ray Matter
| Album | Turbopump 3D CAD |
| Category | Turbo-pump |
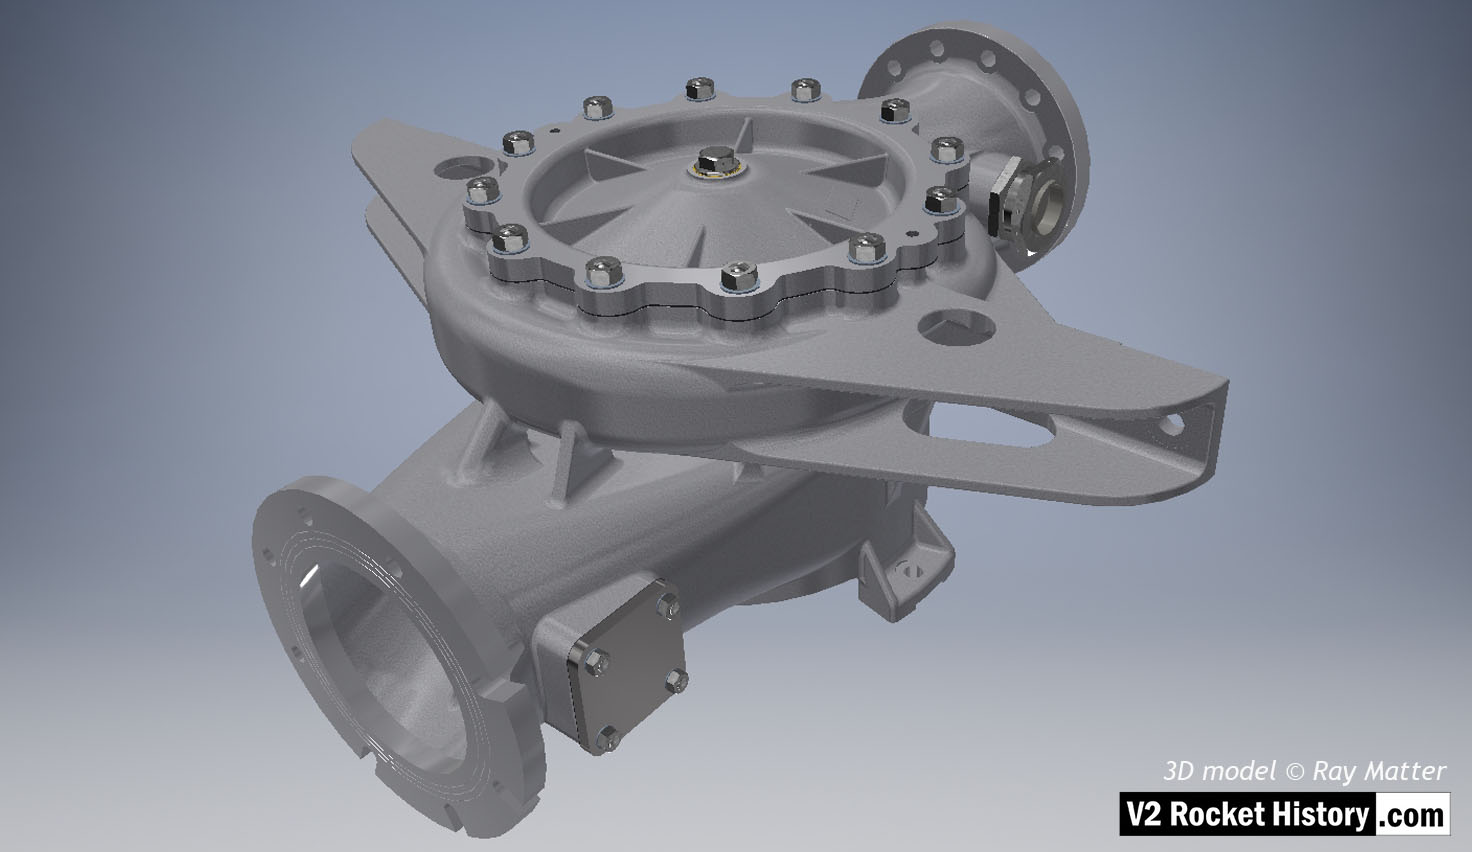
A-Pump LOX sub-assembly complete with face plate and fastenings as well as outlet throat plug. Shows square inlet throat blanking plate.
3D model Ray Matter
| Album | Turbopump 3D CAD |
| Category | Turbo-pump |
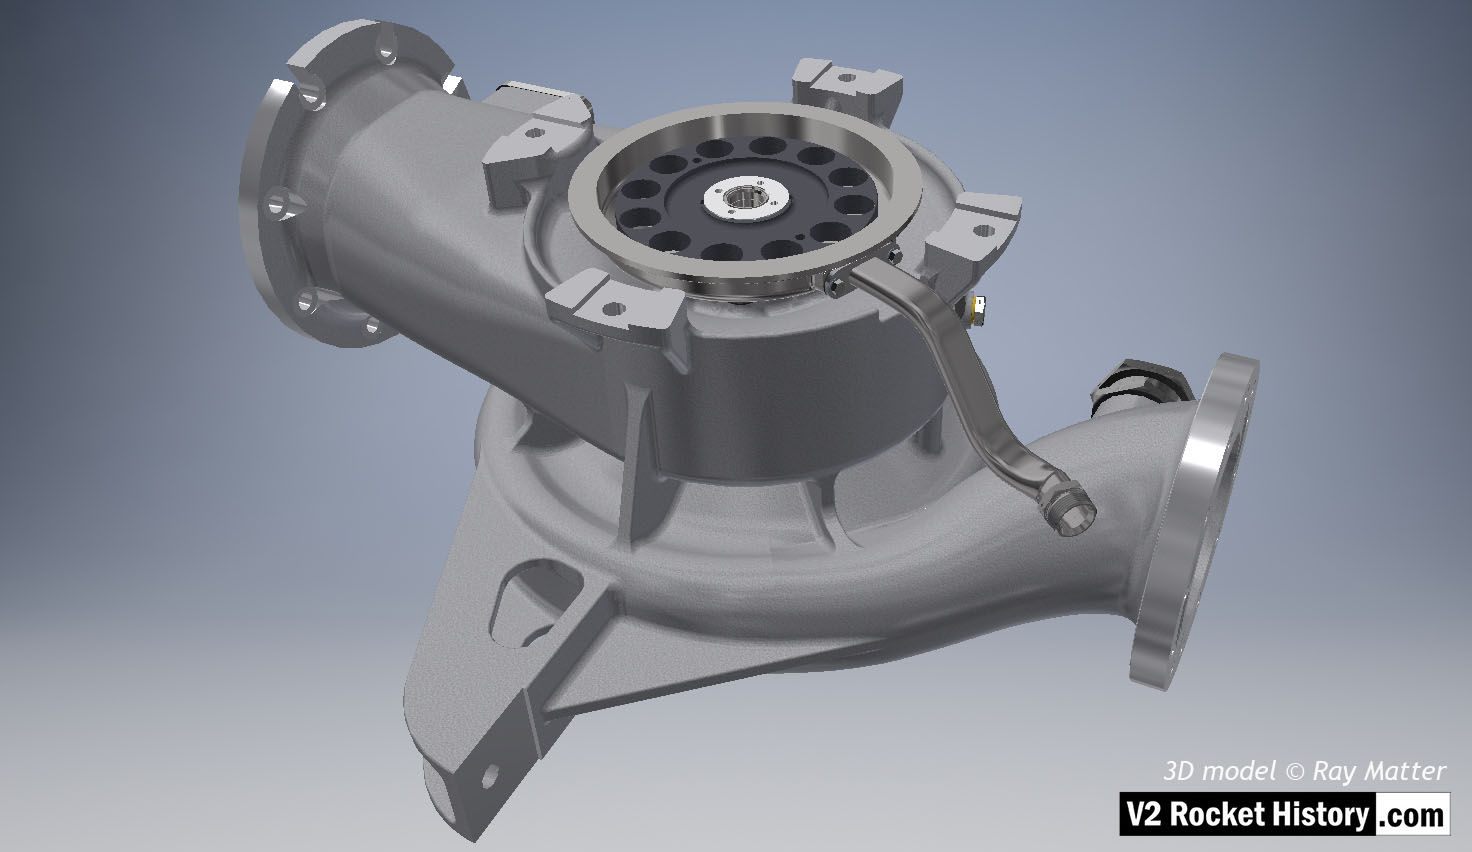
A (LOX) Pump sub-assembly, showing the face nearest the steam turbine. Turbine side of LOX pump showing flexible shaft connection disk (back component with 12 holes). The connection cavity drain pipe is shown (running across the outflow to the btm right). 3D model Ray Matter
| Album | Turbopump 3D CAD |
| Category | Turbo-pump |
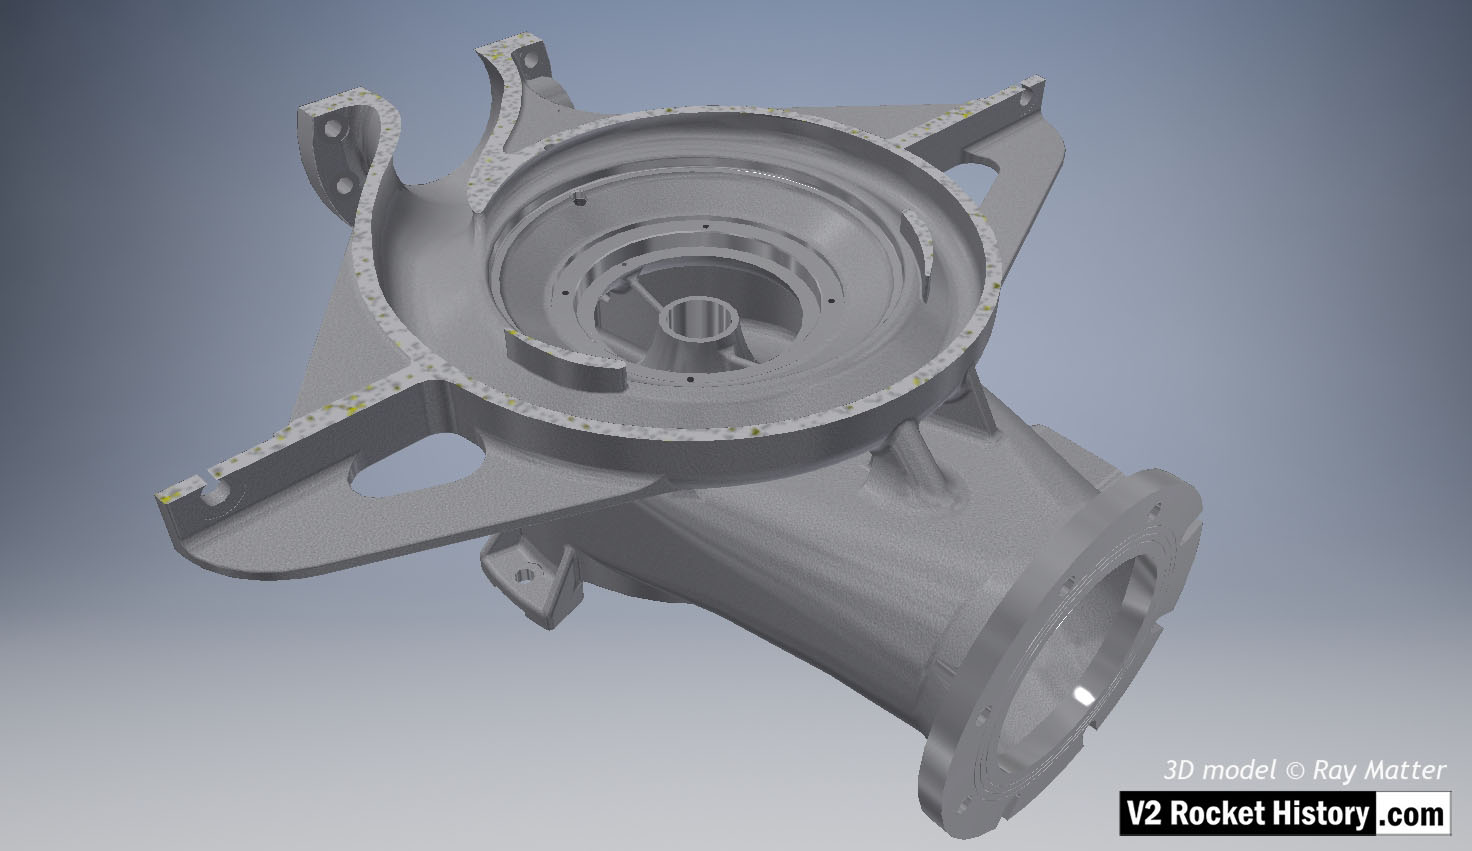
A (LOX) pump housing cutaway to reveal pump rotor side. The casing has been cut to show the internal rotor space detail. The outlet throat, right, and spiral volute space are displayed in this view as is the central LOX inlet. The web with the self-purge passageway can be seen on the outside center of the inlet throat, and connecting to the volute casing. The web or buttress seen to the upper right is to provide additional support between the structures whilst keeping the casting to an even density. 3D model Ray Matter
| Album | Turbopump 3D CAD |
| Category | Turbo-pump |
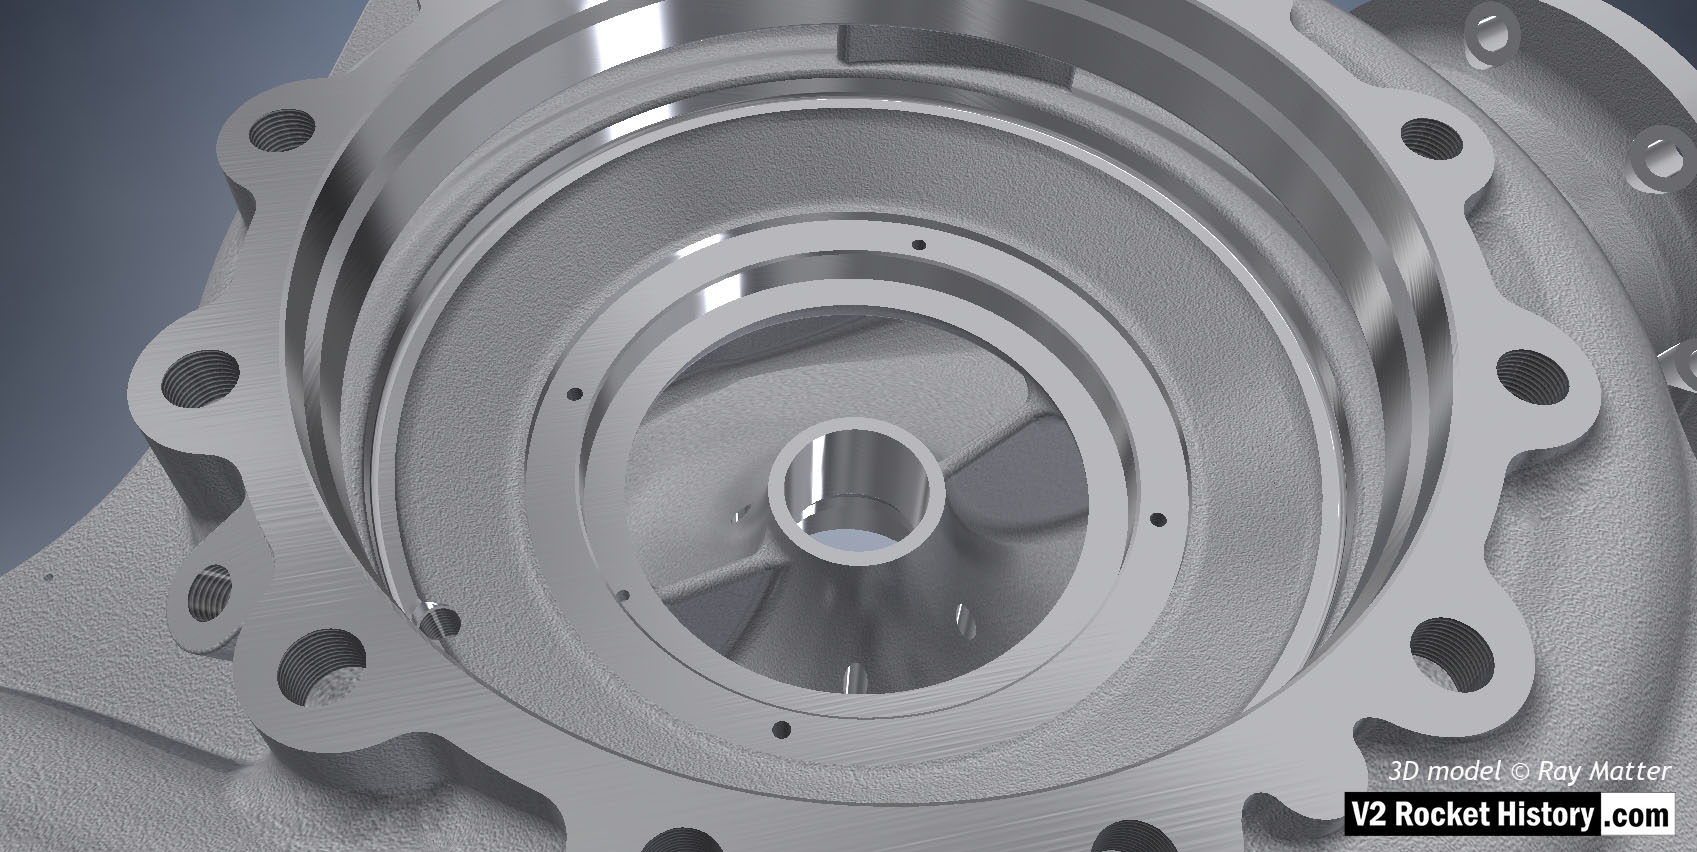
Close-up of ‘A’ LOX pump housing displaying cast and machined surfaces. LOX inlet aperture shown wand external threaded hole for manual bleed plug shown on far right. 3D model by Ray Matter
| Album | Turbopump 3D CAD |
| Category | Turbo-pump |
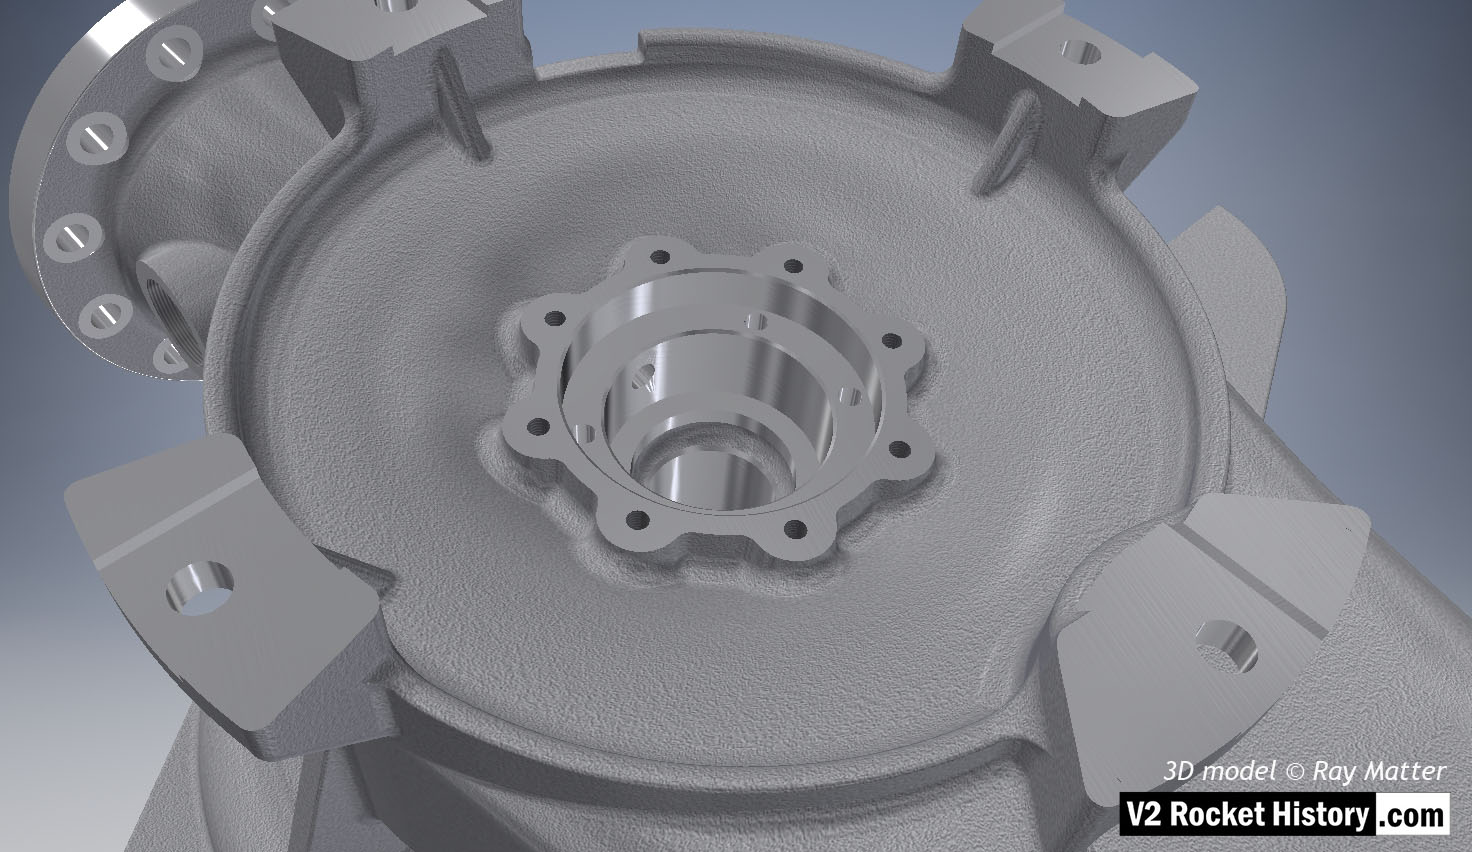
A (LOX) Pump sub-assembly, showing the face nearest the steam turbine. Single piece casting showing machined (milled) areas and detail of bearing and seal cavity. The four turbine case fitting brackets are displayed. 3D model Ray Matter
| Album | Turbopump 3D CAD |
| Category | Turbo-pump |
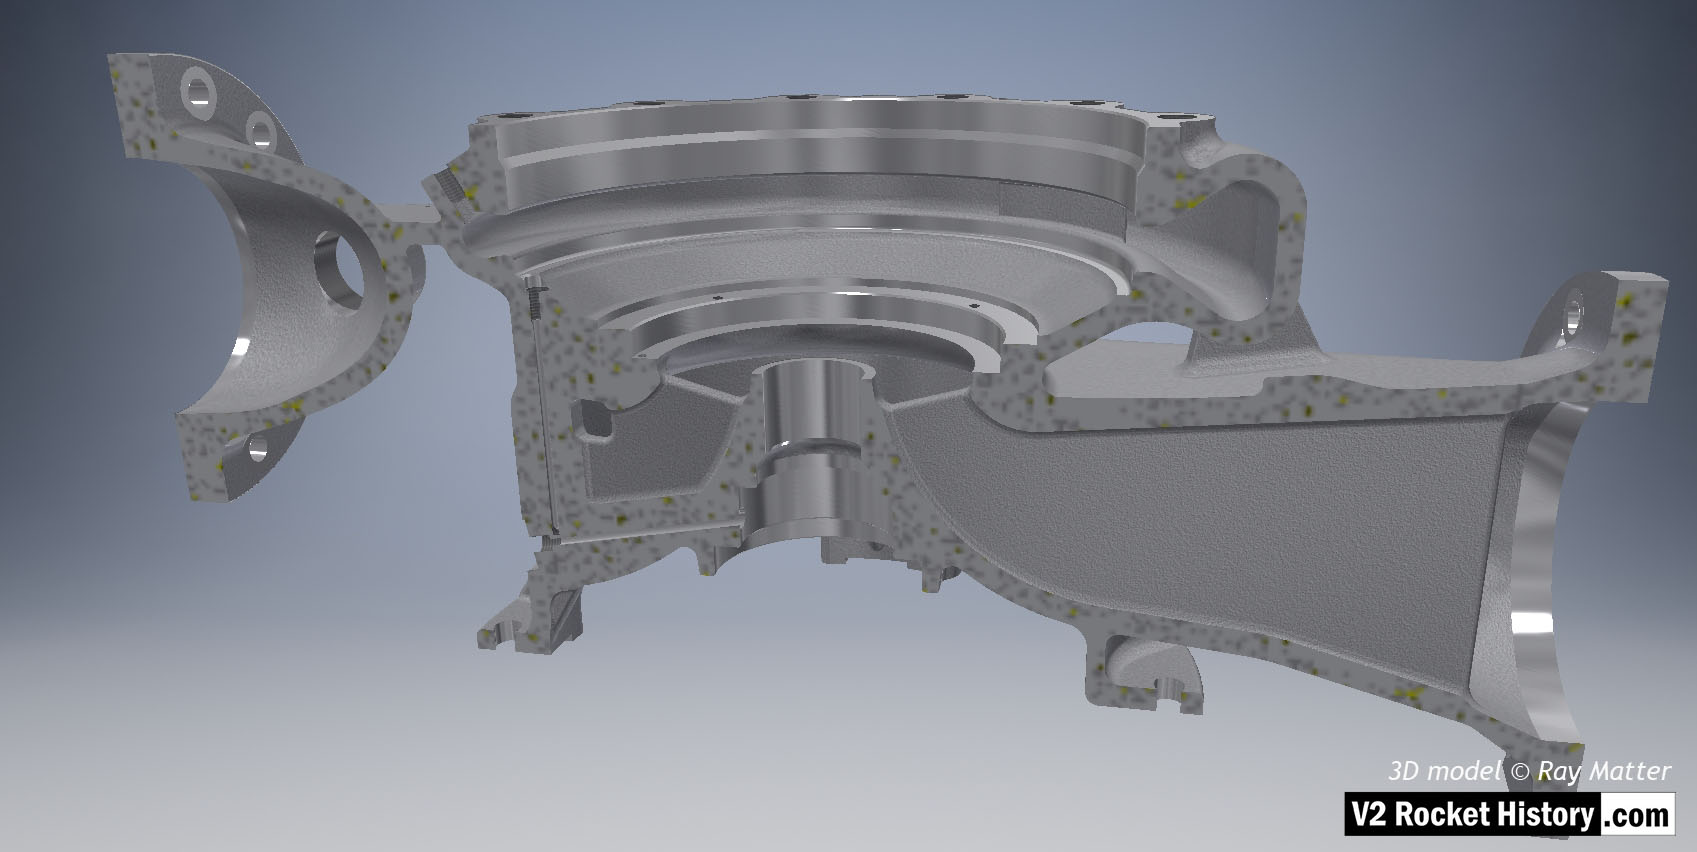
A (LOX) Pump housing sectioned to show baffle and volute space area expansion as flow passes from inlet (right) to outlet (left). Note cast and machined (milled) areas shown in this image – especially inlet aperture. 3D model Ray Matter
| Album | Turbopump 3D CAD |
| Category | Turbo-pump |
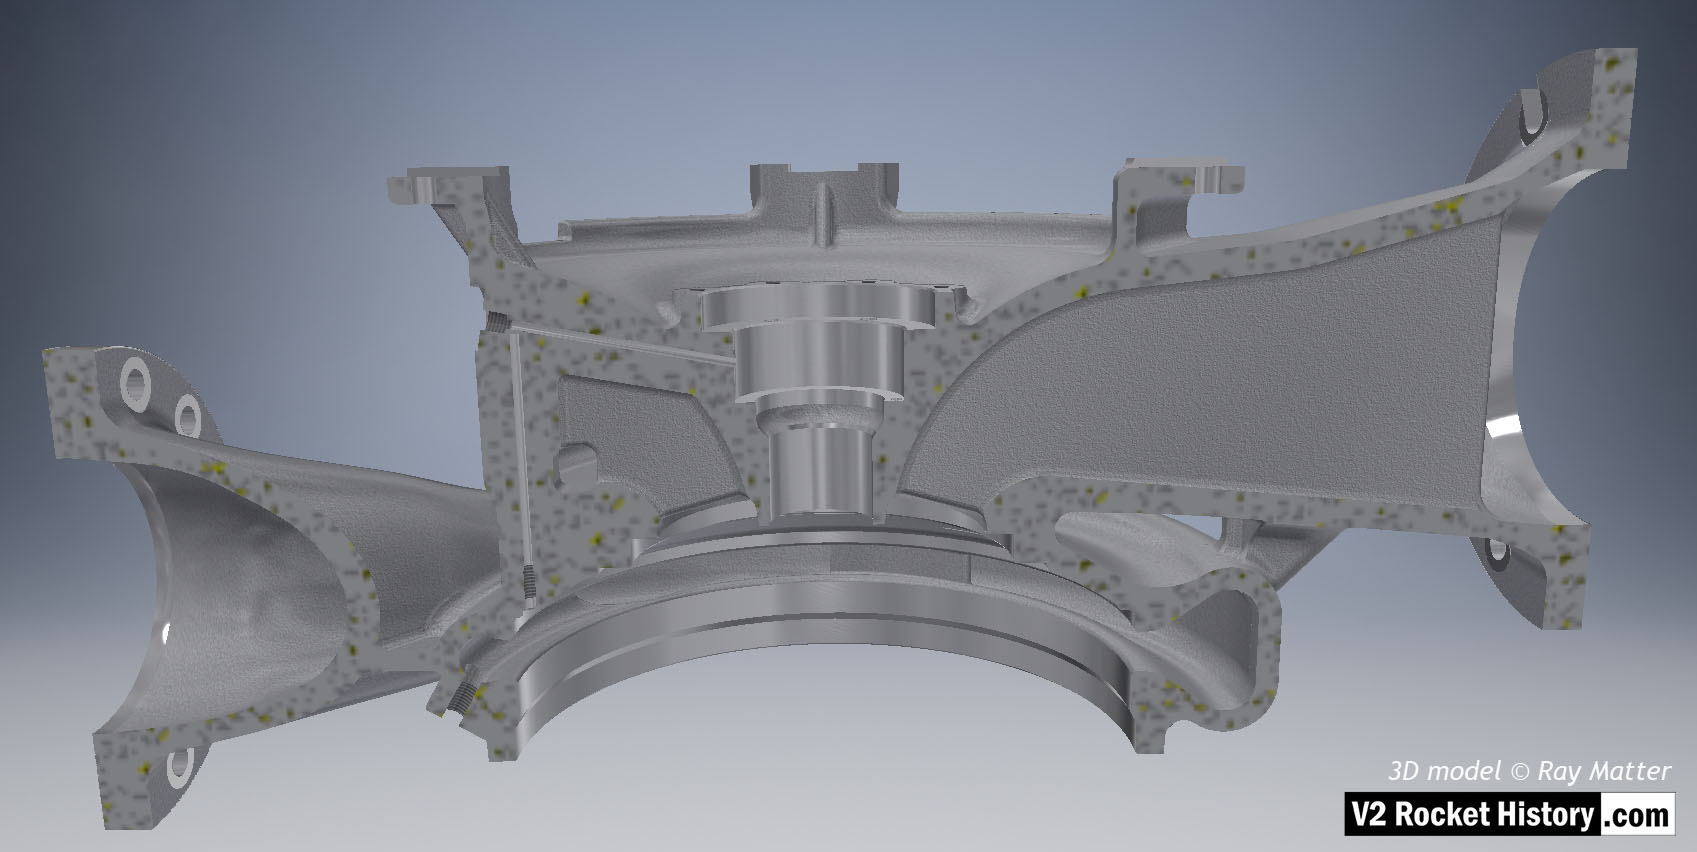
A (LOX) Pump housing sectioned to show baffle and volute space area expansion as flow passes from inlet (right) to outlet (left). Note the small LOX passageways on left from high-pressure volute space to bearing cavity. 3D model Ray Matter
| Album | Turbopump 3D CAD |
| Category | Turbo-pump |
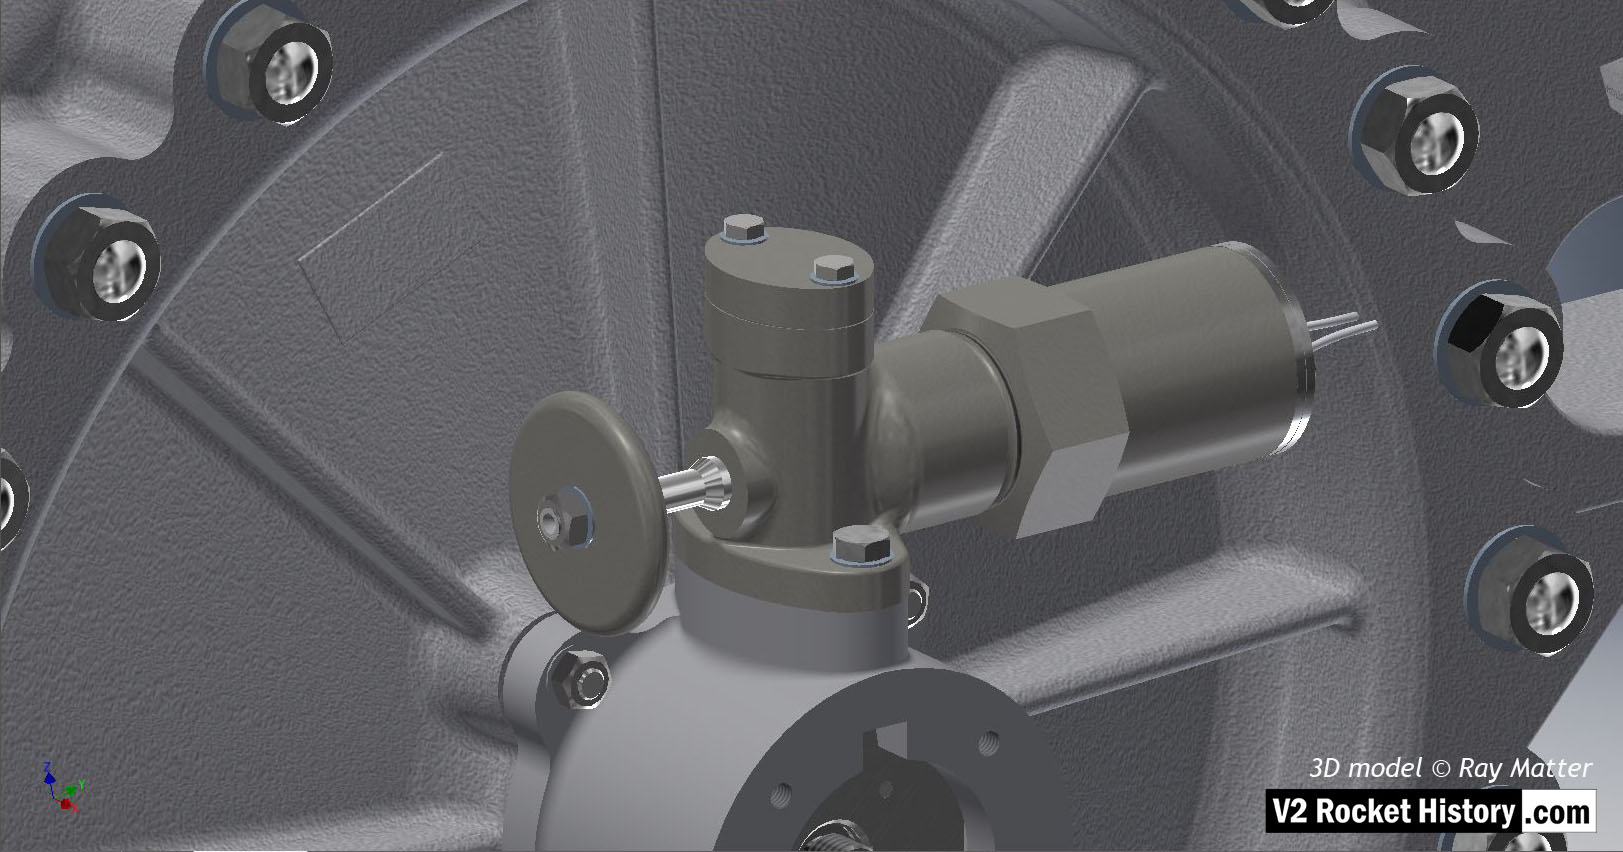
Detail of fuel pump face plate showing over-speed switch and mounting. The switch plunger (part with disc shaped hand knob on left) is shown in the out or armed position. The RPM of the tubo-pump (TP) was not governed but this safety mechanism shut the TP down permanently when the RPM reached 5000. Although rarely changed, thin shims could be used to reduce or increase this speed. 3D model Ray Matter
| Album | Turbopump 3D CAD |
| Category | Turbo-pump |
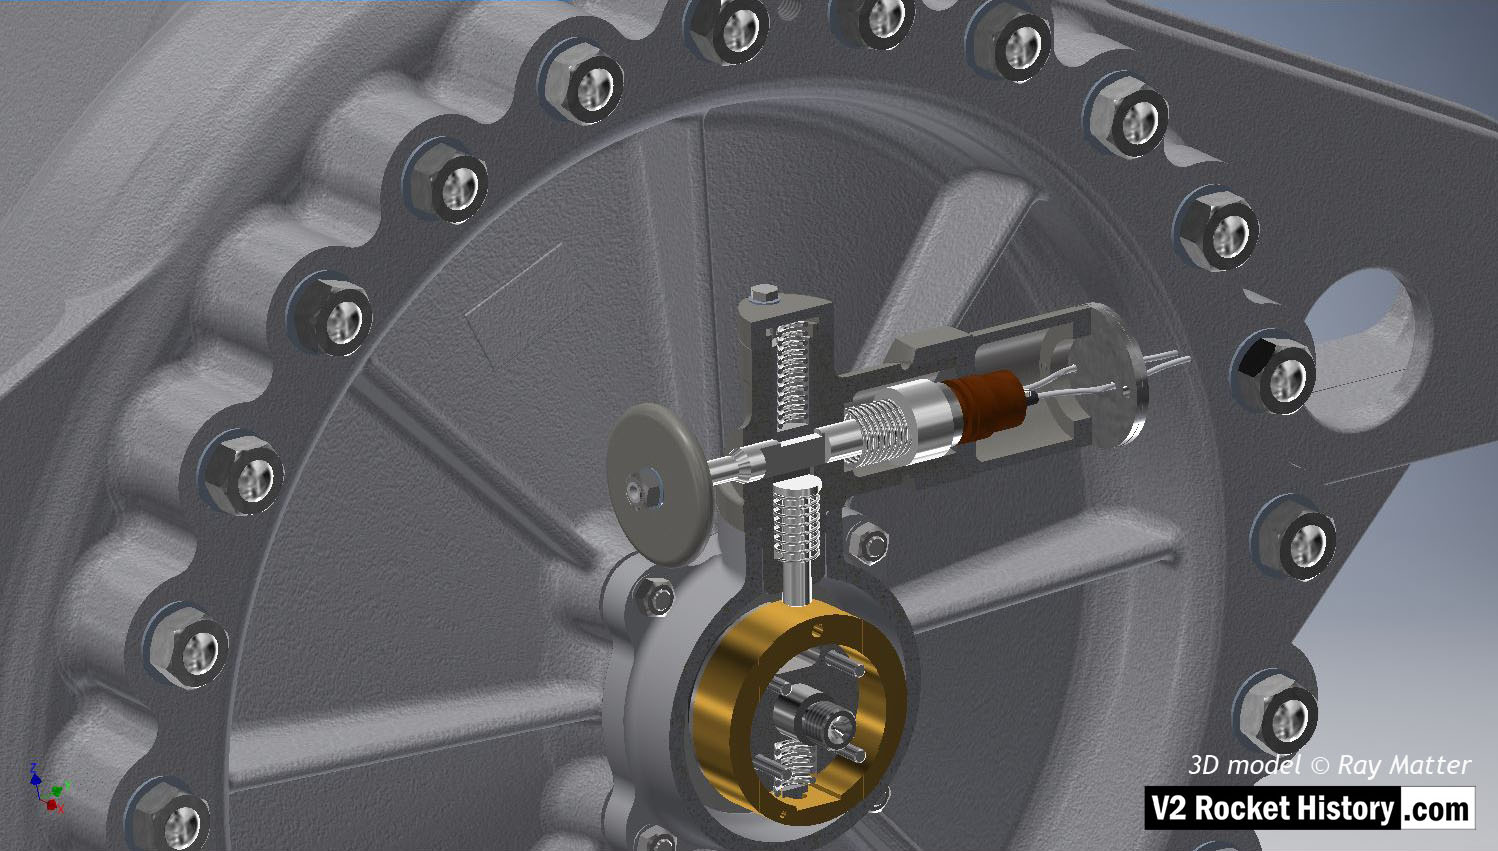
Detail of fuel pump face plate showing over-speed switch and mounting. The eccentric centrifugal rotor can be seen (brass coloured part). This unbalanced part rotates against a spring load that allows the thicker (proportionally heavier) section of the rotor to move outwards from the center as the rotational speed rises and push the release rod clear of a keyed section of the plunger shaft (part with disc shaped knob on left) thus operating a relay switch that shuts down the flow of steam to the turbine. 3D model Ray Matter
| Album | Turbopump 3D CAD |
| Category | Turbo-pump |
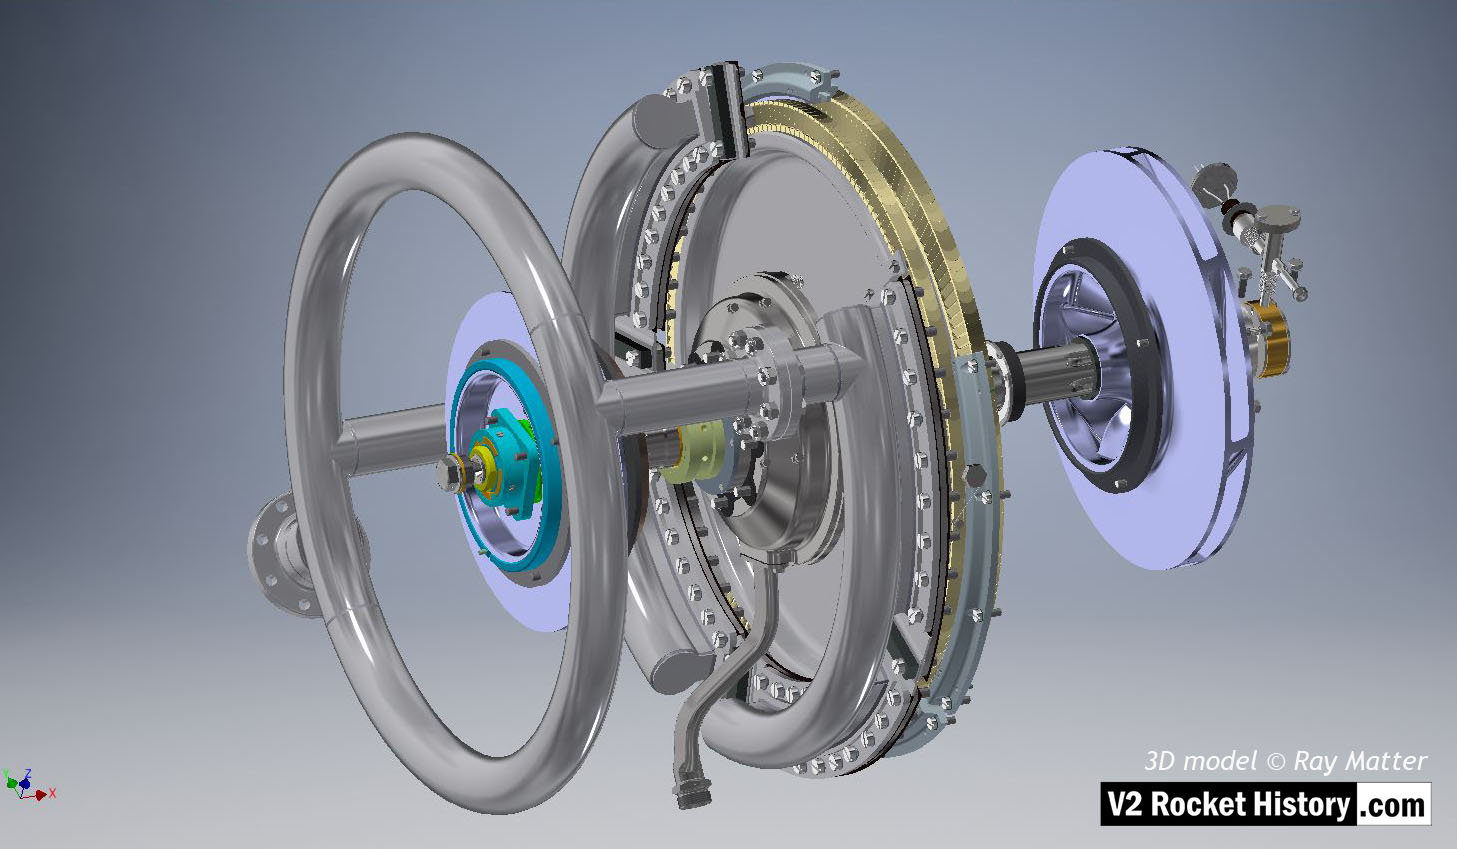
V2 turbo-pump turbine and pump impeller shaft assembly showing steam turbine rotor with nozzle assembly and steam inlet manifold distributor ring. The two rows of steam buckets can seen on rotor rim. Fuel pump impeller (purple) and over-speed switch are shown to the right. LOX pump impeller (purple) with journal bearing box and four sectional bronze bearings visible. An overboard dump pipe can be seen lower left of steam rotor. 3D model Ray Matter
| Album | Turbopump 3D CAD |
| Category | Turbo-pump |
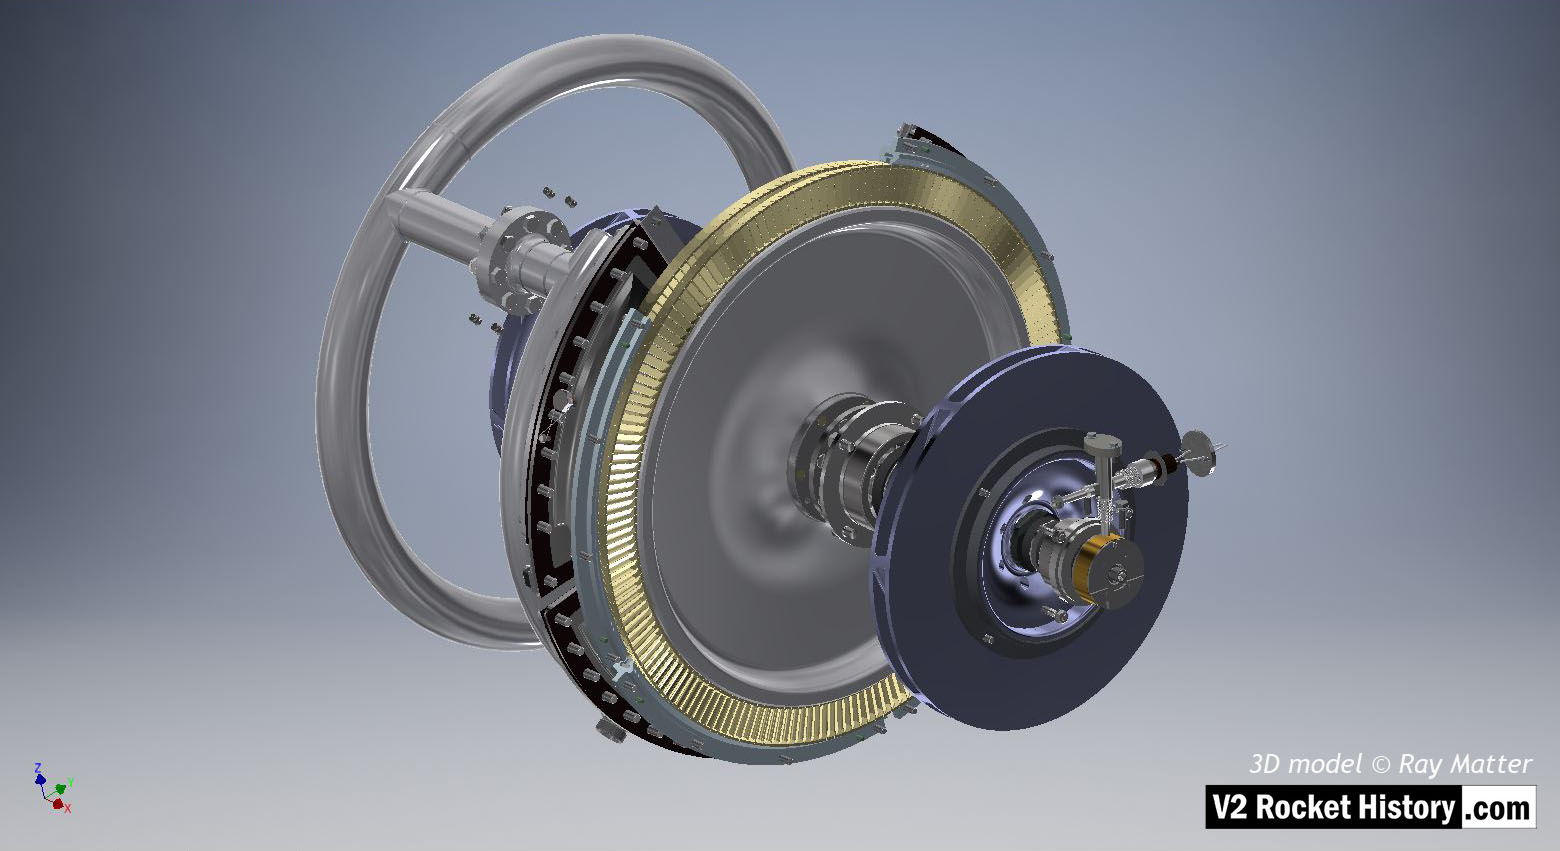
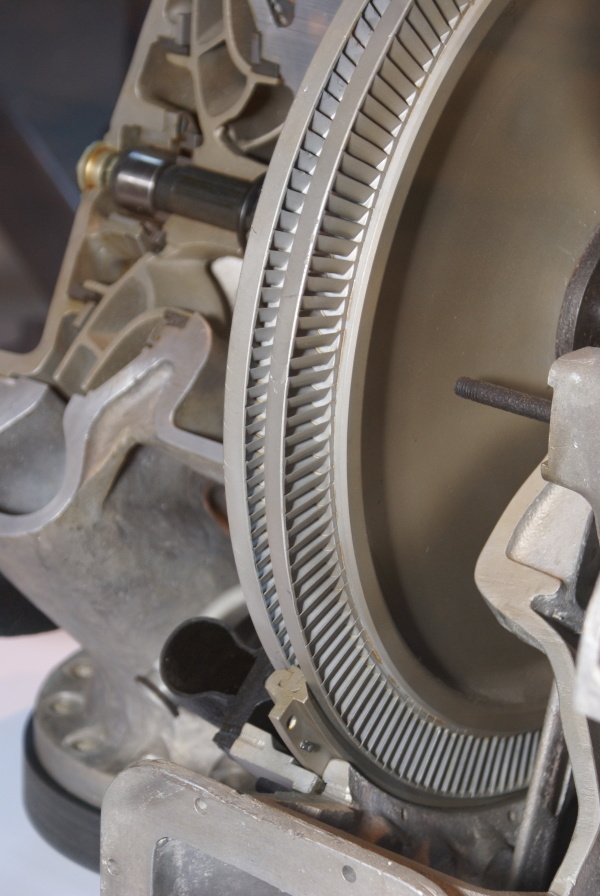
V2 turbo-pump turbine and pump impeller shaft assembly showing steam turbine rotor with nozzle assembly and steam inlet manifold distributor ring to left. The two rows of steam buckets can seen on rotor rim as well as three of the four sets of stationary steam return blades. Fuel pump impeller and over-speed switch are shown to the right. 3D model Ray Matter
| Album | Turbopump 3D CAD |
| Category | Turbo-pump |
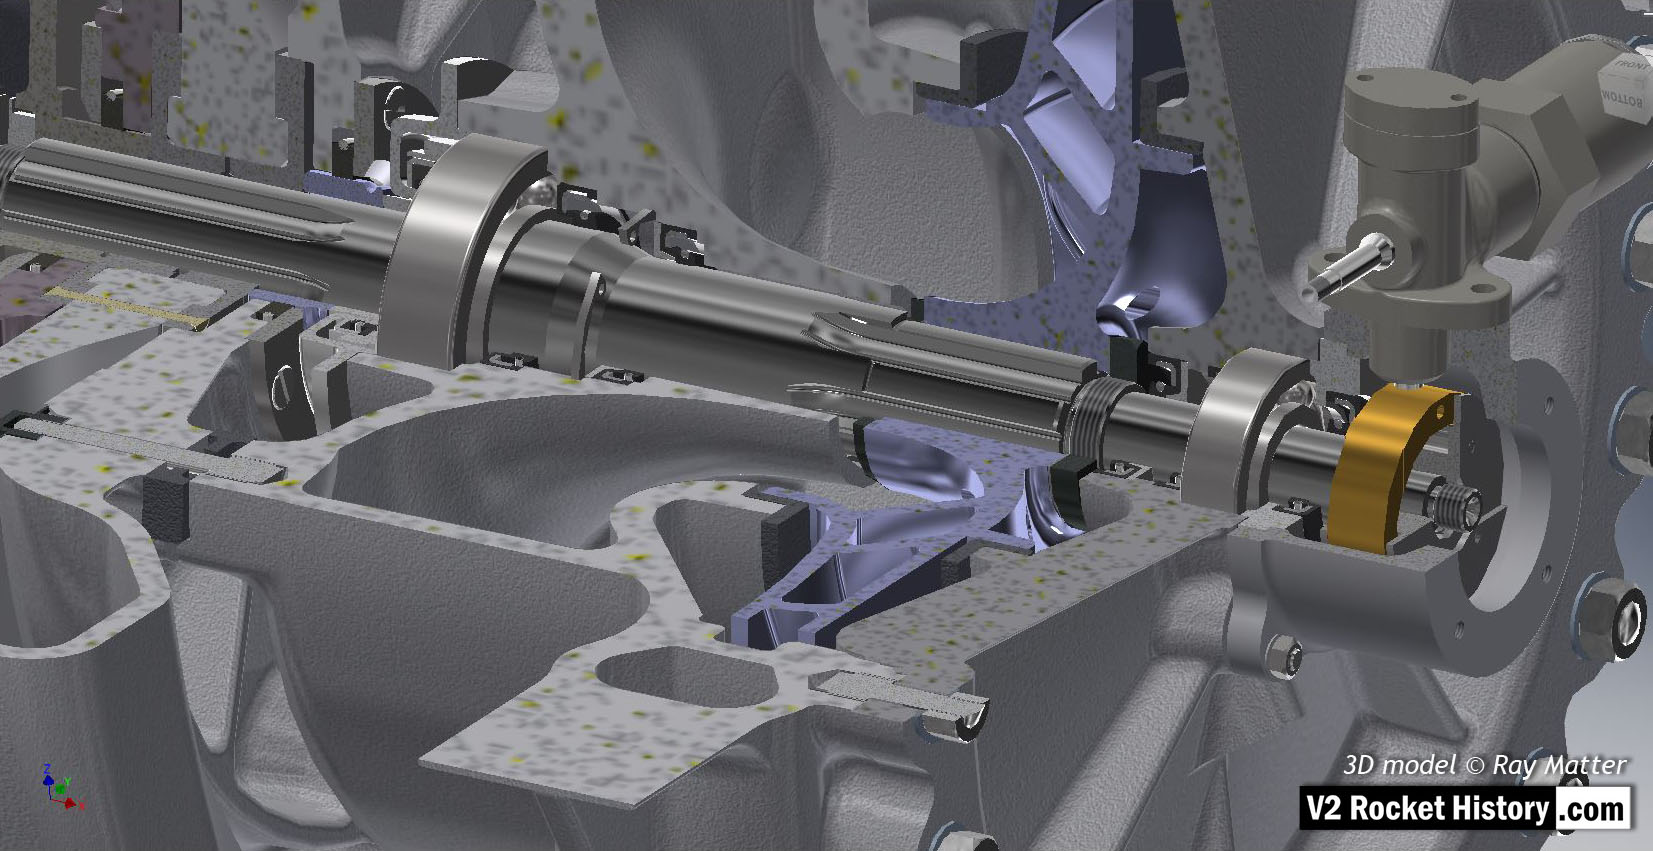
B (fuel) Pump: Close-up of sectioned turbine and pump impellers. Pump impeller (purple) and turbine rotor, top left, showing, seals, bearings and over-speed centrifugal rotor assembly. 3D model Ray Matte
| Album | Turbopump 3D CAD |
| Category | Turbo-pump |
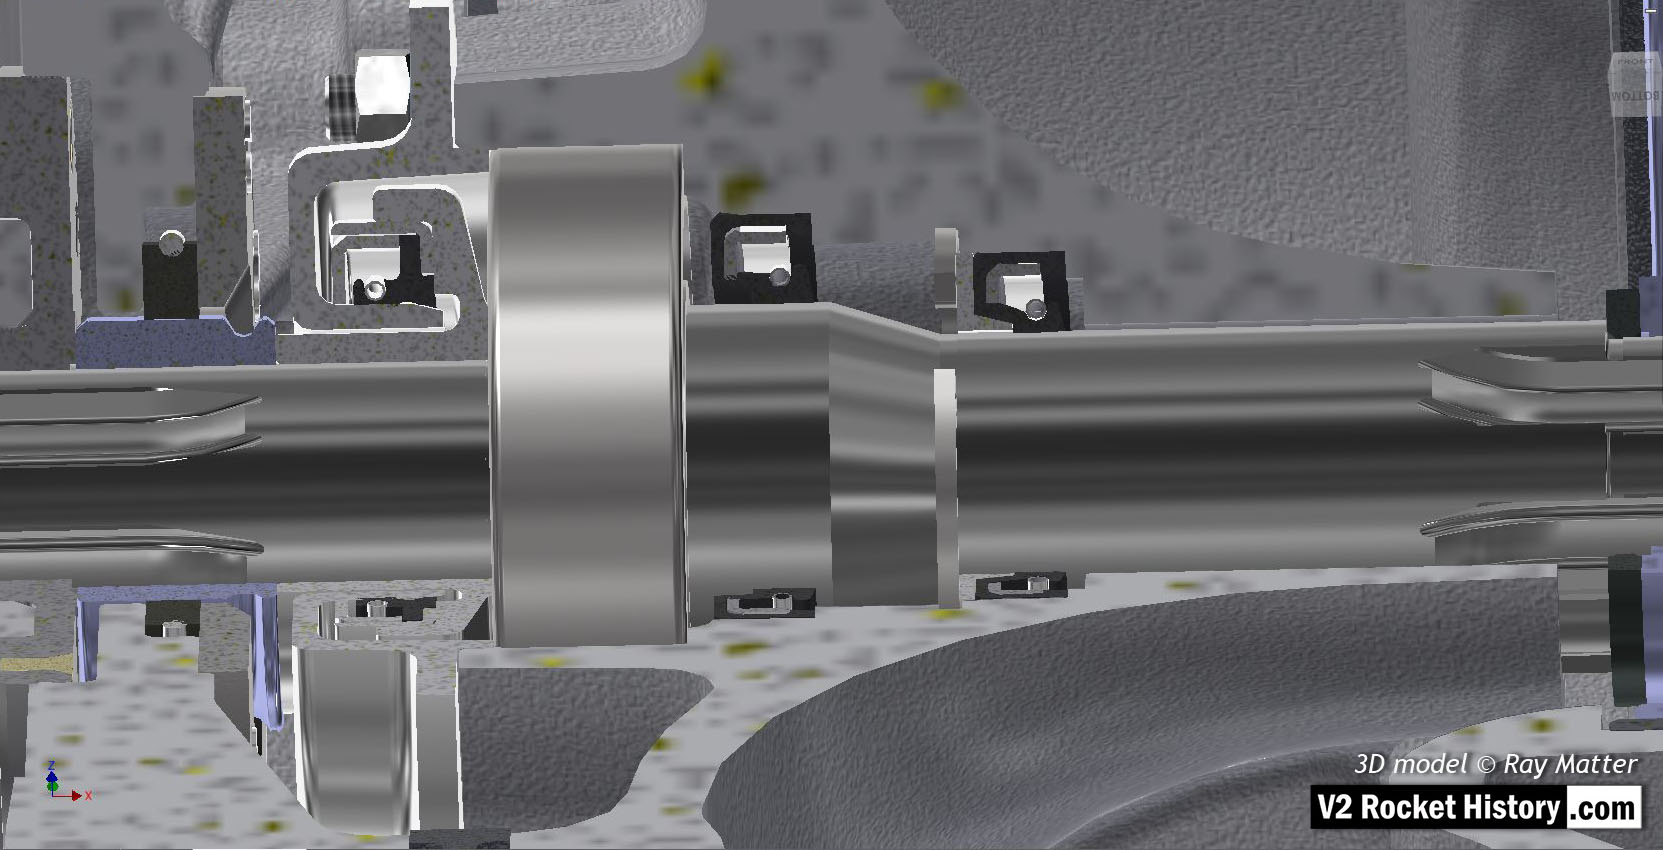
06 B Pump close-up showing shaft bearing and isolation seals at at pump to turbine mating point. 3D model Ray Matter
| Album | Turbopump 3D CAD |
| Category | Turbo-pump |
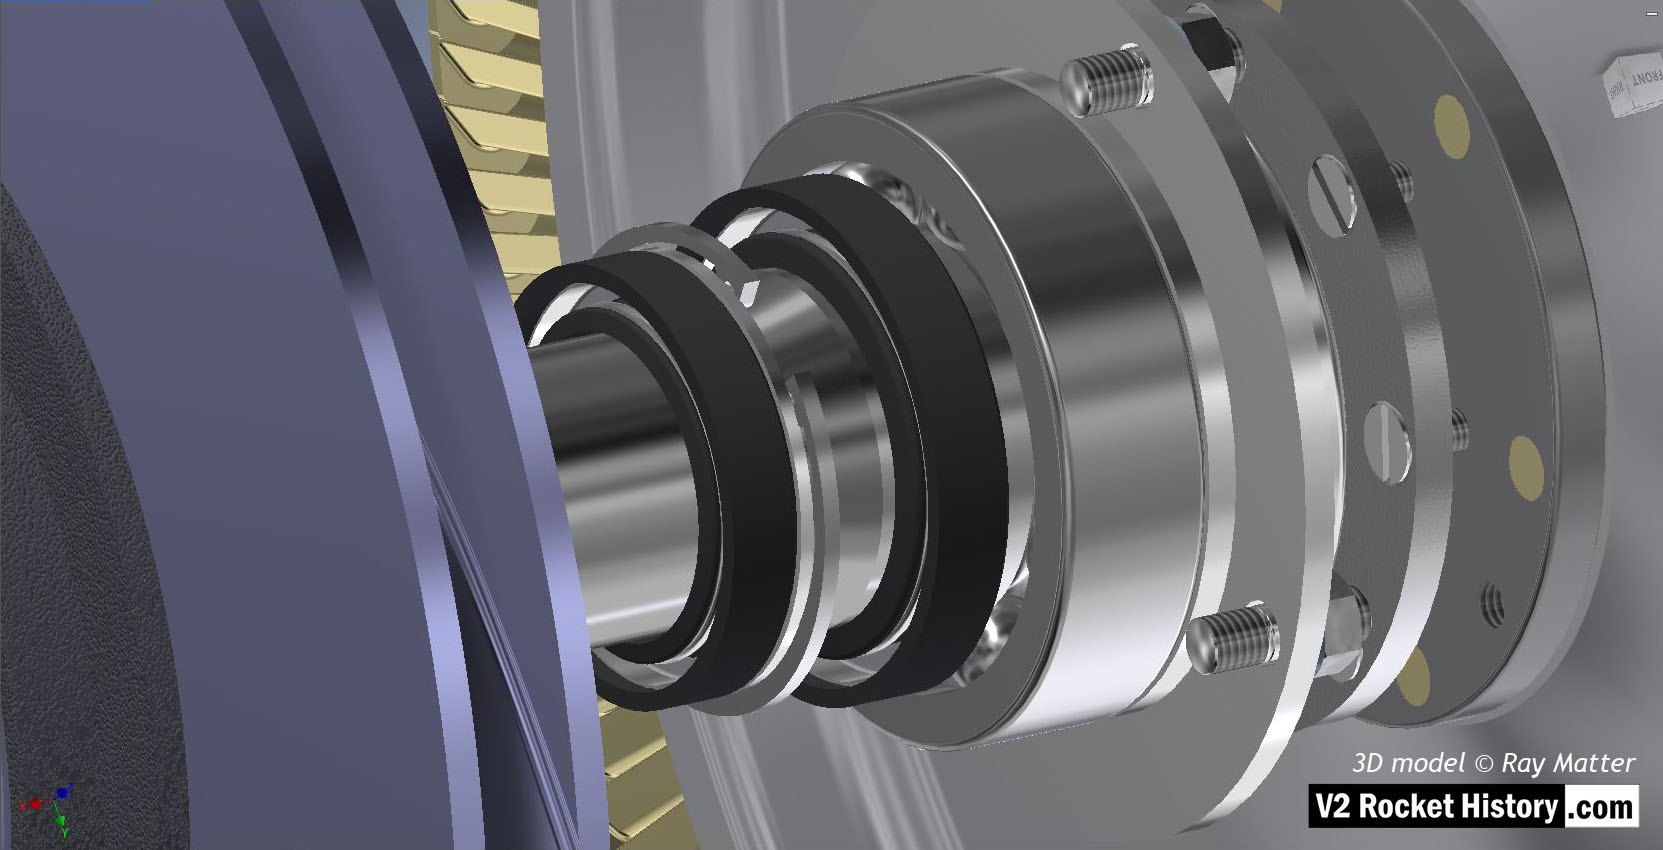
06 B Pump showing shaft area from fuel pump impeller, left (purple), to steam rotor. Shows seals, packer, circlip, and steam rotor hub. 3D model Ray Matter
| Album | Turbopump 3D CAD |
| Category | Turbo-pump |
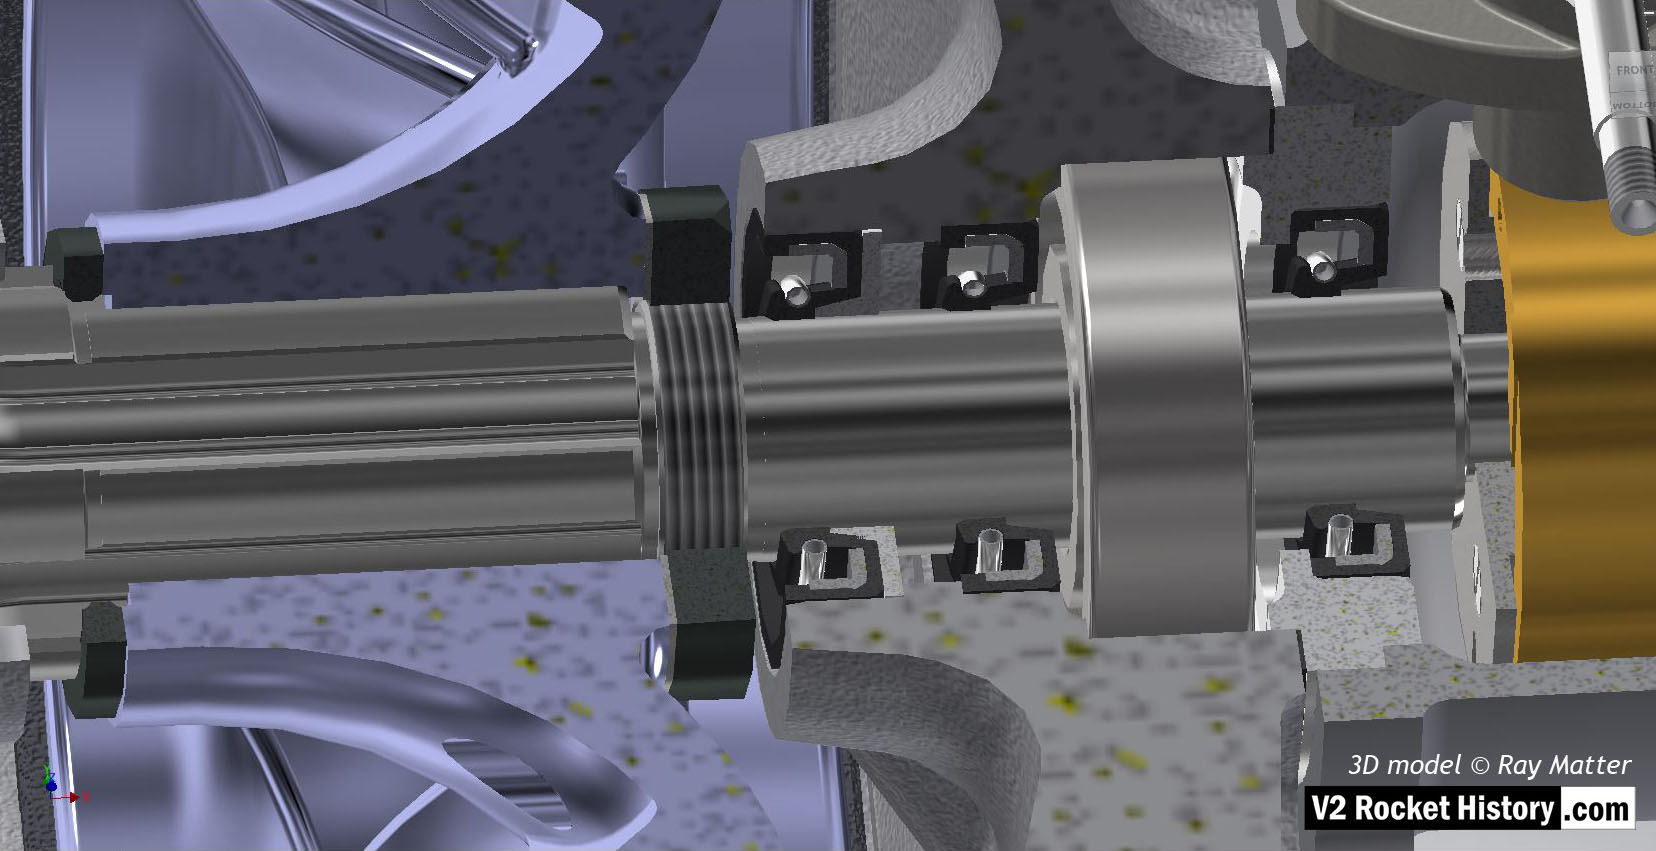
B (fuel) Pump: Close-up of sectioned pump impeller hub (purple) showing, left to right, seals, bearing and over-speed centrifugal rotor. 3D model Ray Matter
| Album | Turbopump 3D CAD |
| Category | Turbo-pump |
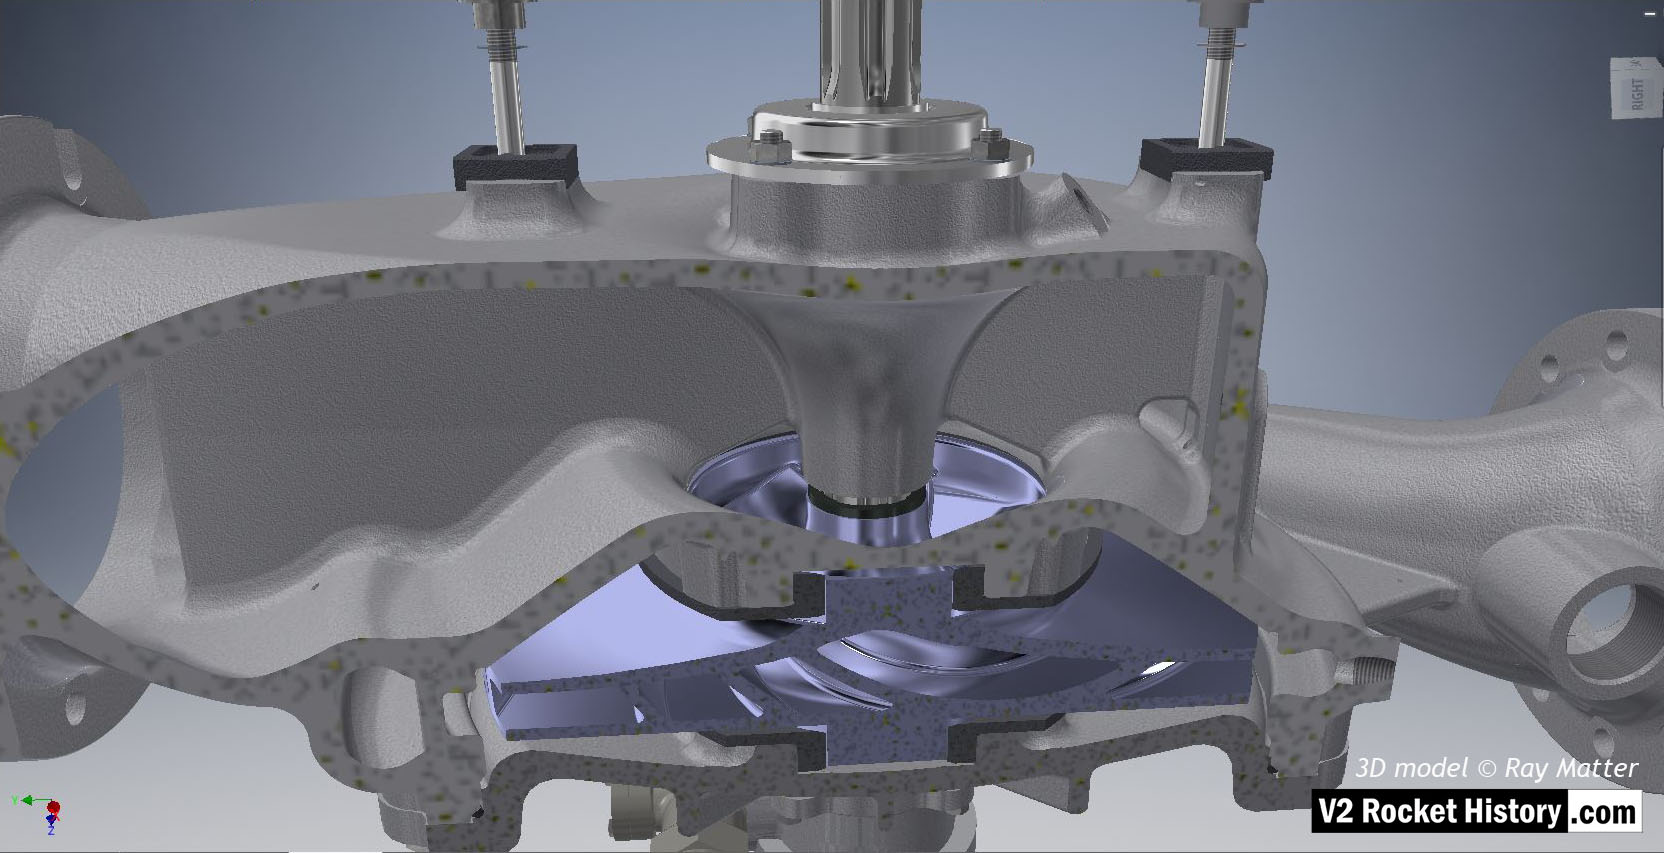
B (fuel) pump sub-assembly showing sectioned casing to reveal centrifugal pump impeller (in light purple for visibility). Outlet to right. Note inlet throat purge aperture of left. 3D model Ray Matter
| Album | Turbopump 3D CAD |
| Category | Turbo-pump |
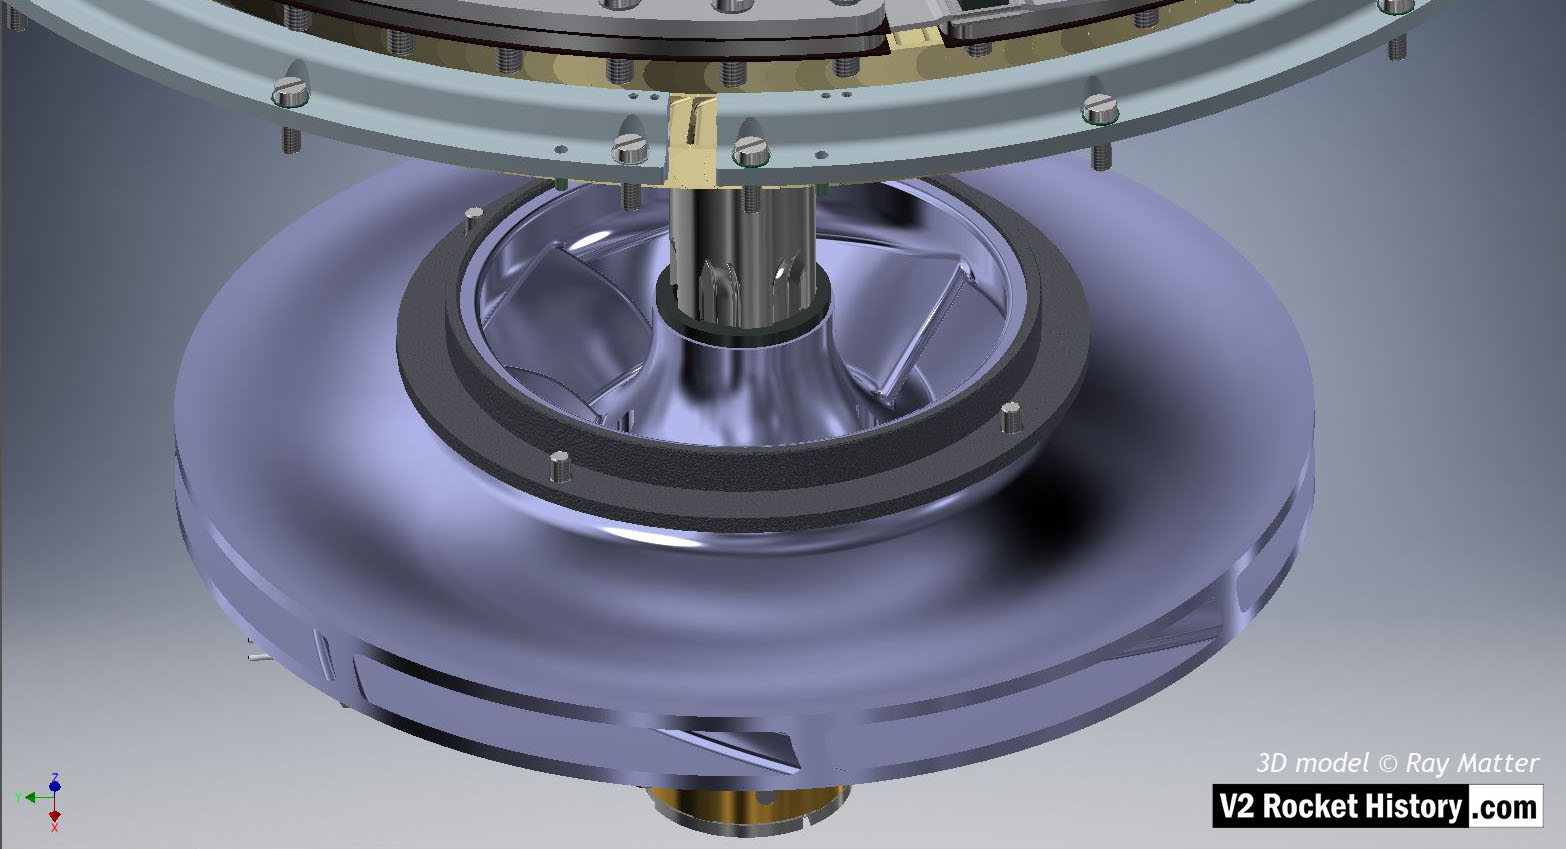
B pump casing removed to show fuel pump impeller and bearing ring. The steam rotor assembly can be seen at the top of the image and two sets of the stationary steam blades, or stators, are also visible.
| Album | Turbopump 3D CAD |
| Category | Turbo-pump |
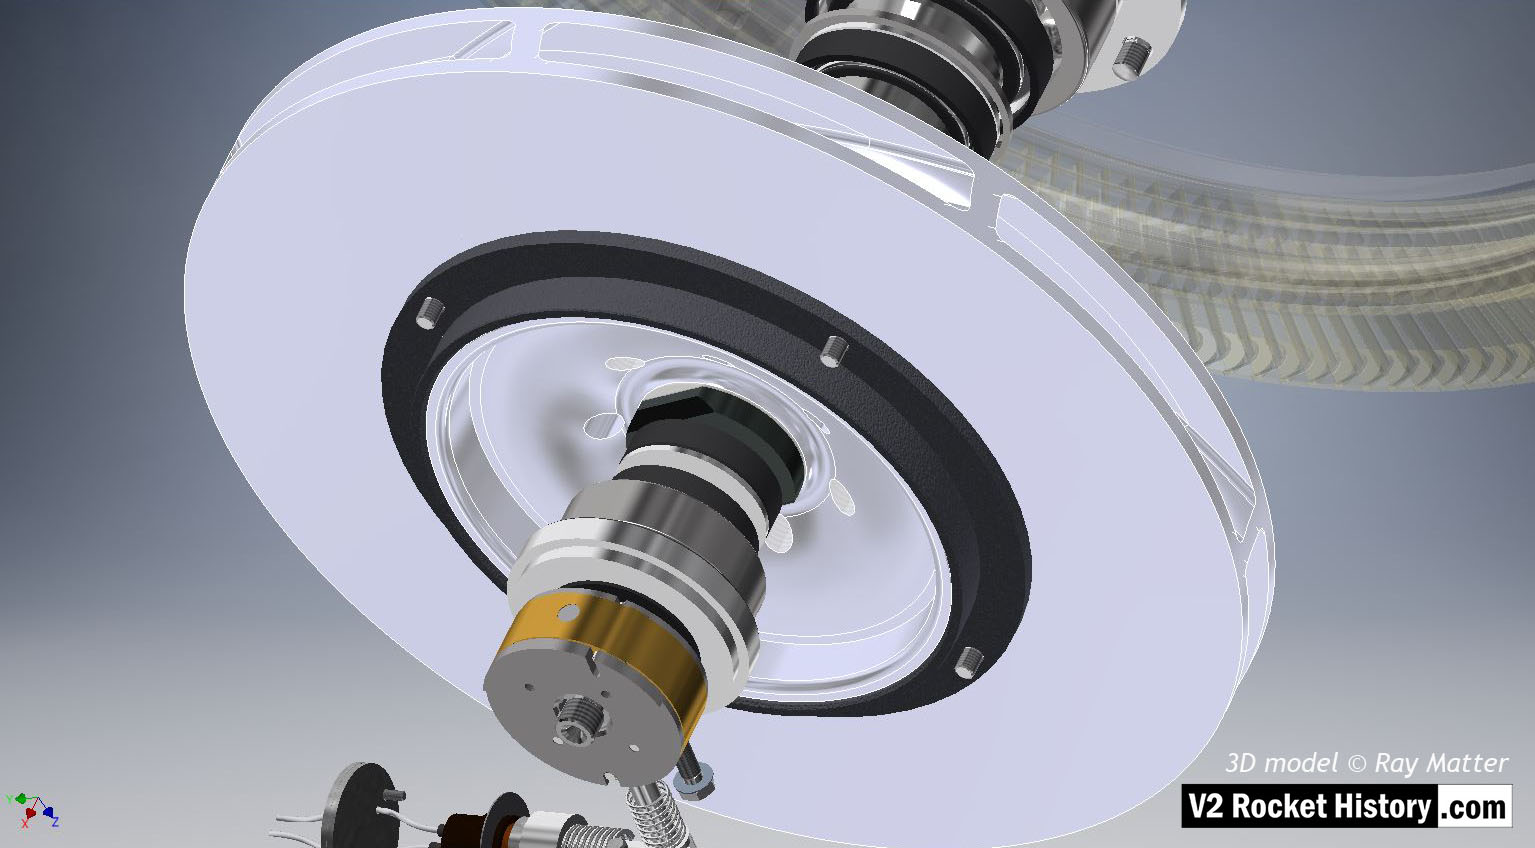
B (fuel) Pump exposed to show pump impeller, large bearing surface, and parts of over-speed device. 3D model Ray Matter
| Album | Turbopump 3D CAD |
| Category | Turbo-pump |
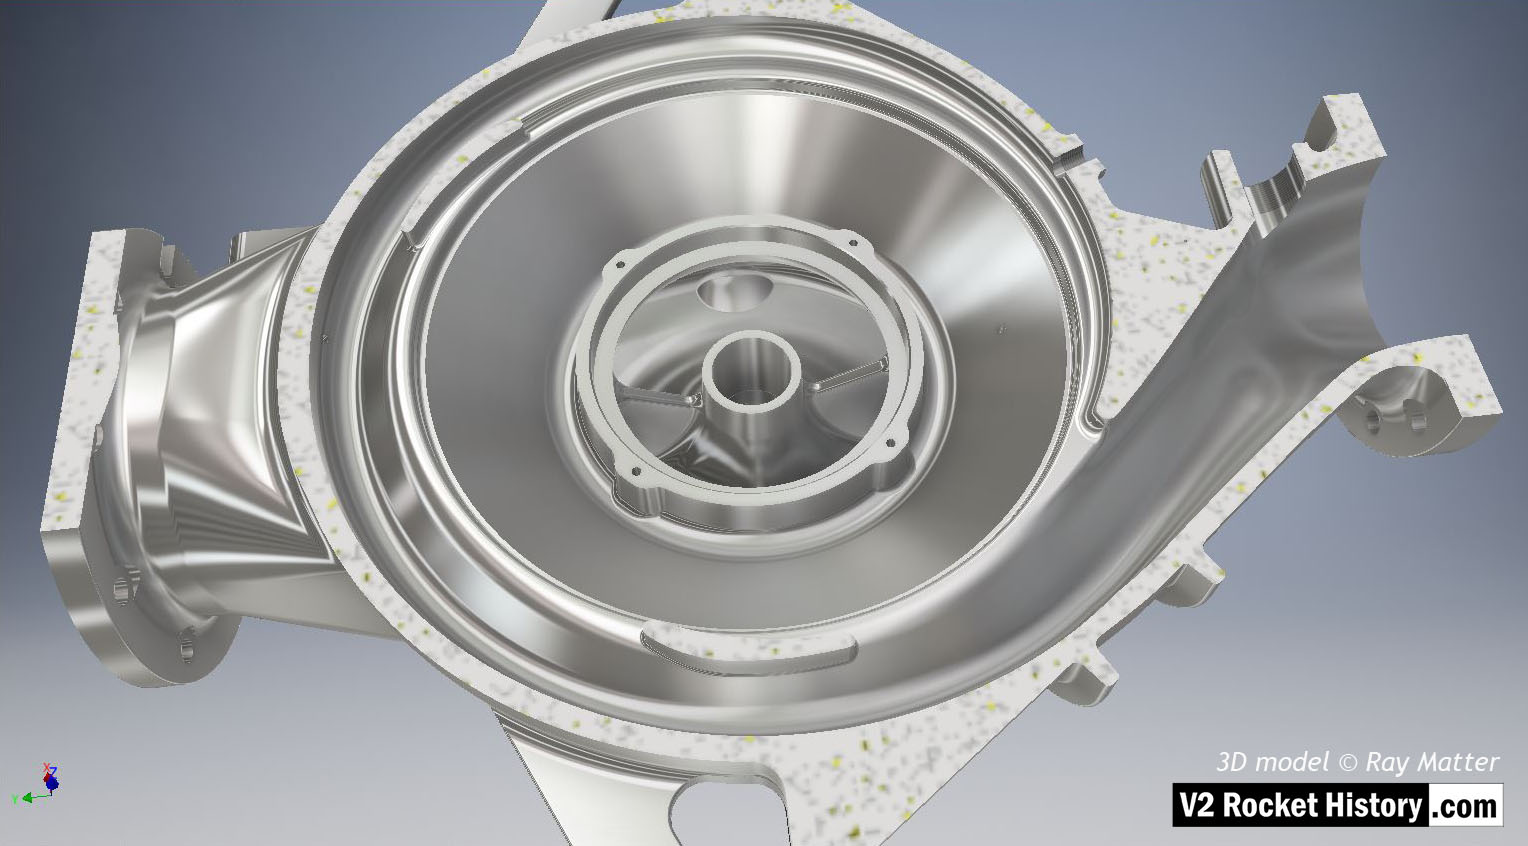
B pump housing from pump rotor side – notional surface polish to show shape and detail (such a surface was not used on the actual pump parts). The casing has been cut to show the internal rotor space detail. The outlet throat, right, and spiral volute space are displayed in this view as is the central fuel inlet. 3D model Ray Matter
| Album | Turbopump 3D CAD |
| Category | Turbo-pump |
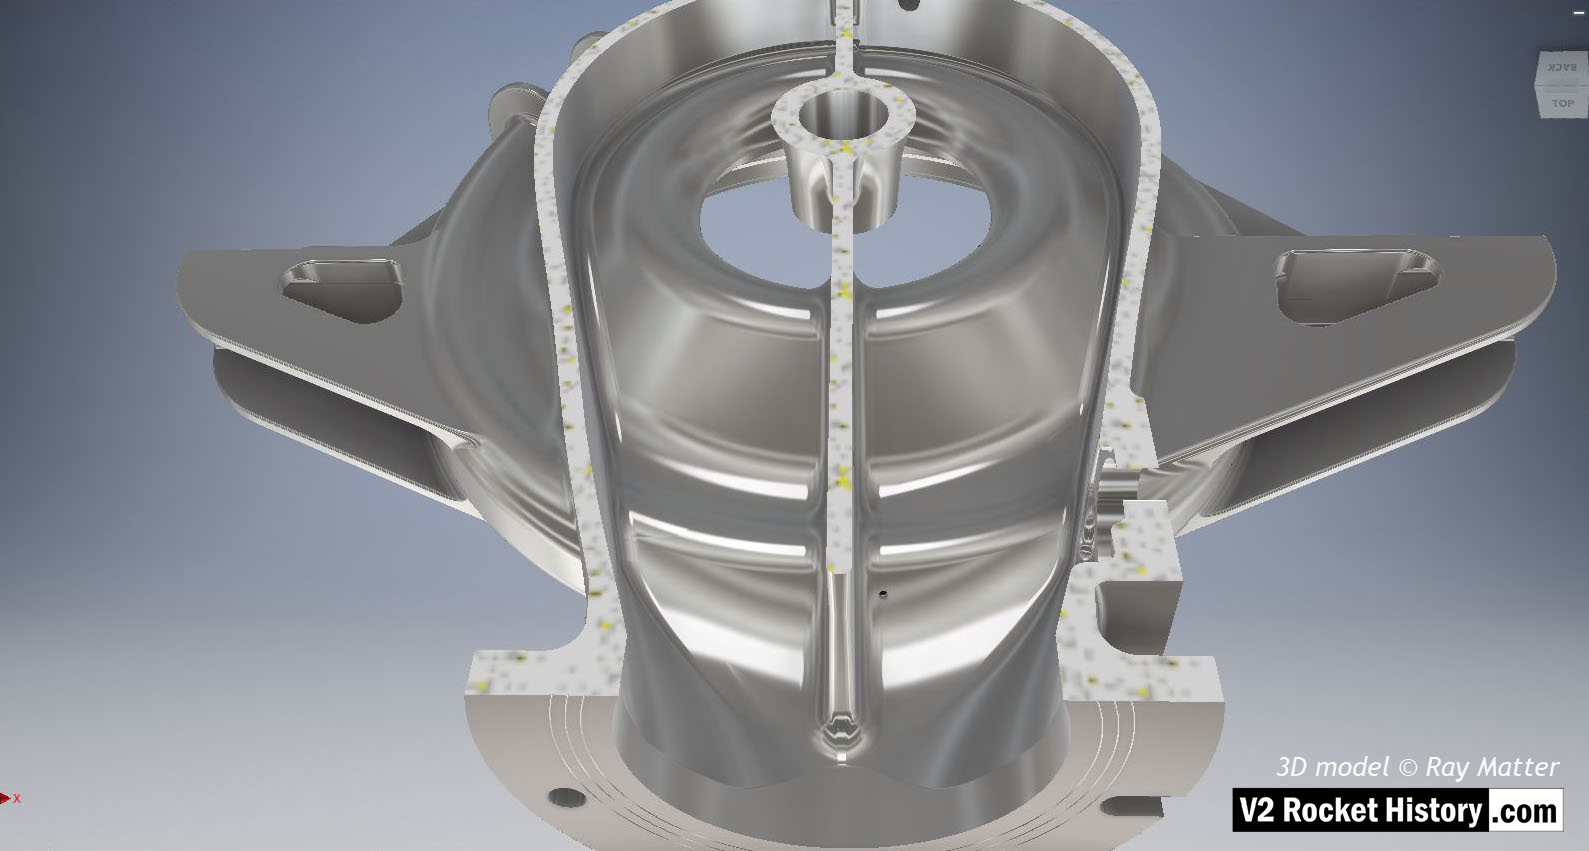
B pump housing with notional surface polish to show shape and detail (such a surface was not used on the actual pump casing). The casing nearest the turbine has been cutaway to reveal internal detail. The small self-purge orifice can be seen in this view, lower middle to the right of separator. 3D model Ray Matter
| Album | Turbopump 3D CAD |
| Category | Turbo-pump |
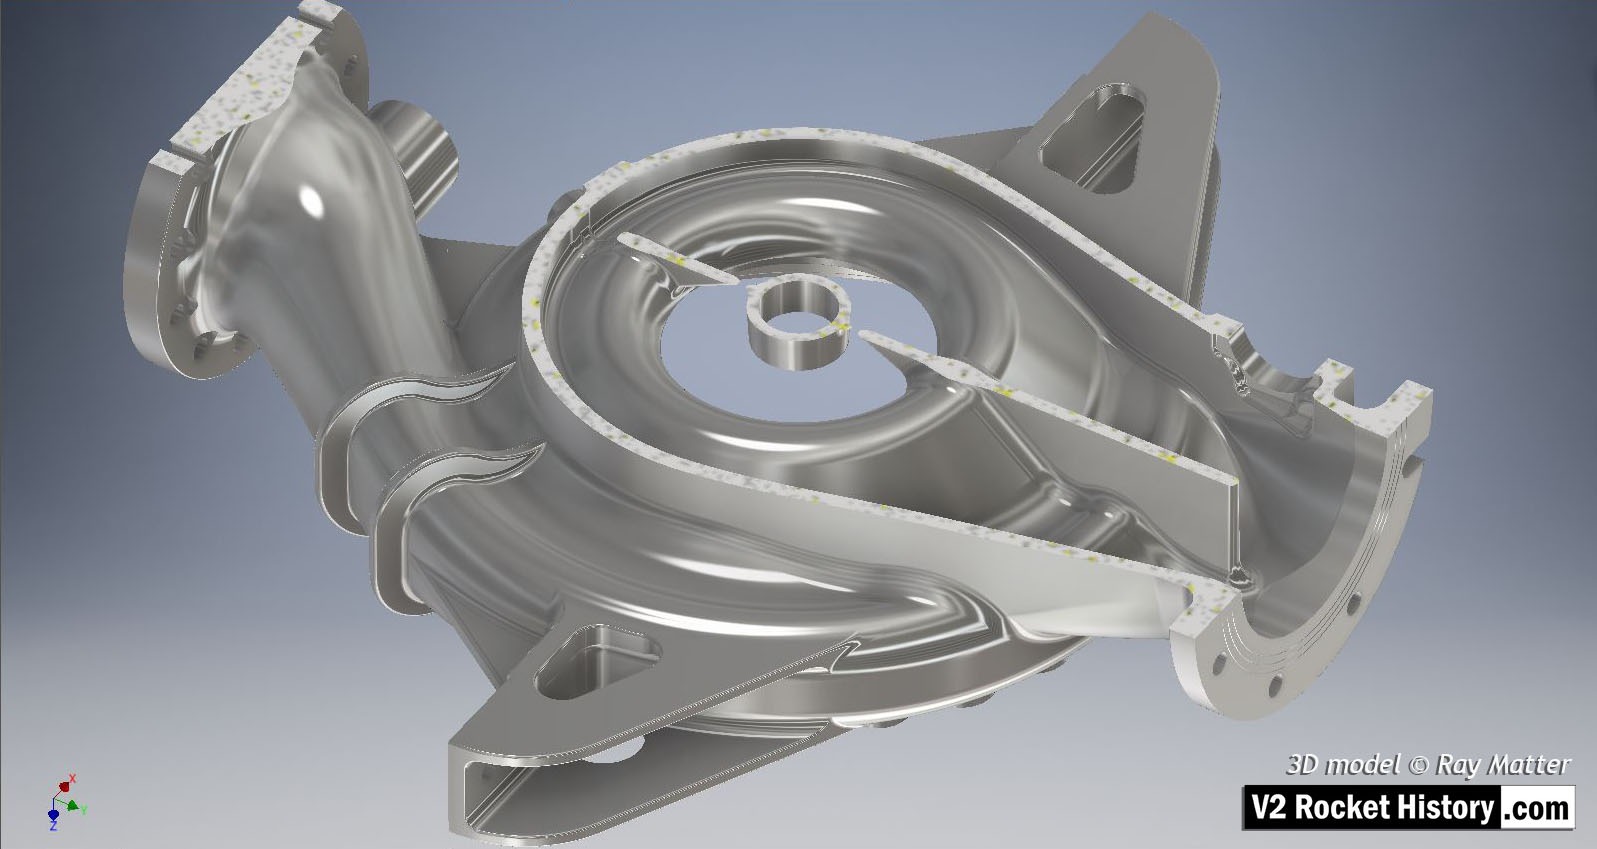
B pump housing with notional surface polish to show shape and detail (such a surface was not used on the actual pump casing). The casing nearest turbine has been cut to show internal detail. Inlet flange and split throat detail are clear in this view.
| Album | Turbopump 3D CAD |
| Category | Turbo-pump |

Valves
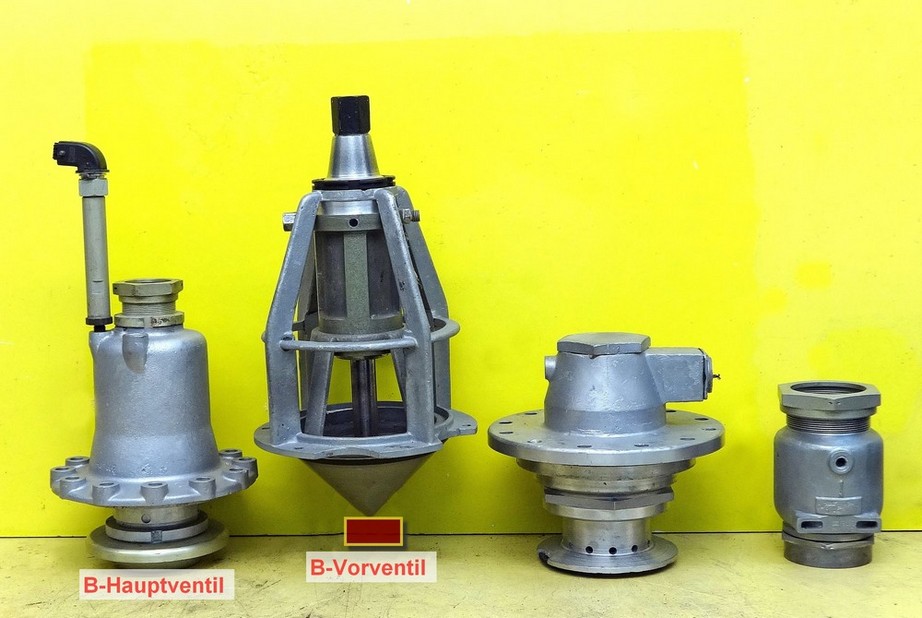
Images of the main valves involved in the propellant flow of the A4 / V2 liquid fuelled rocket engine
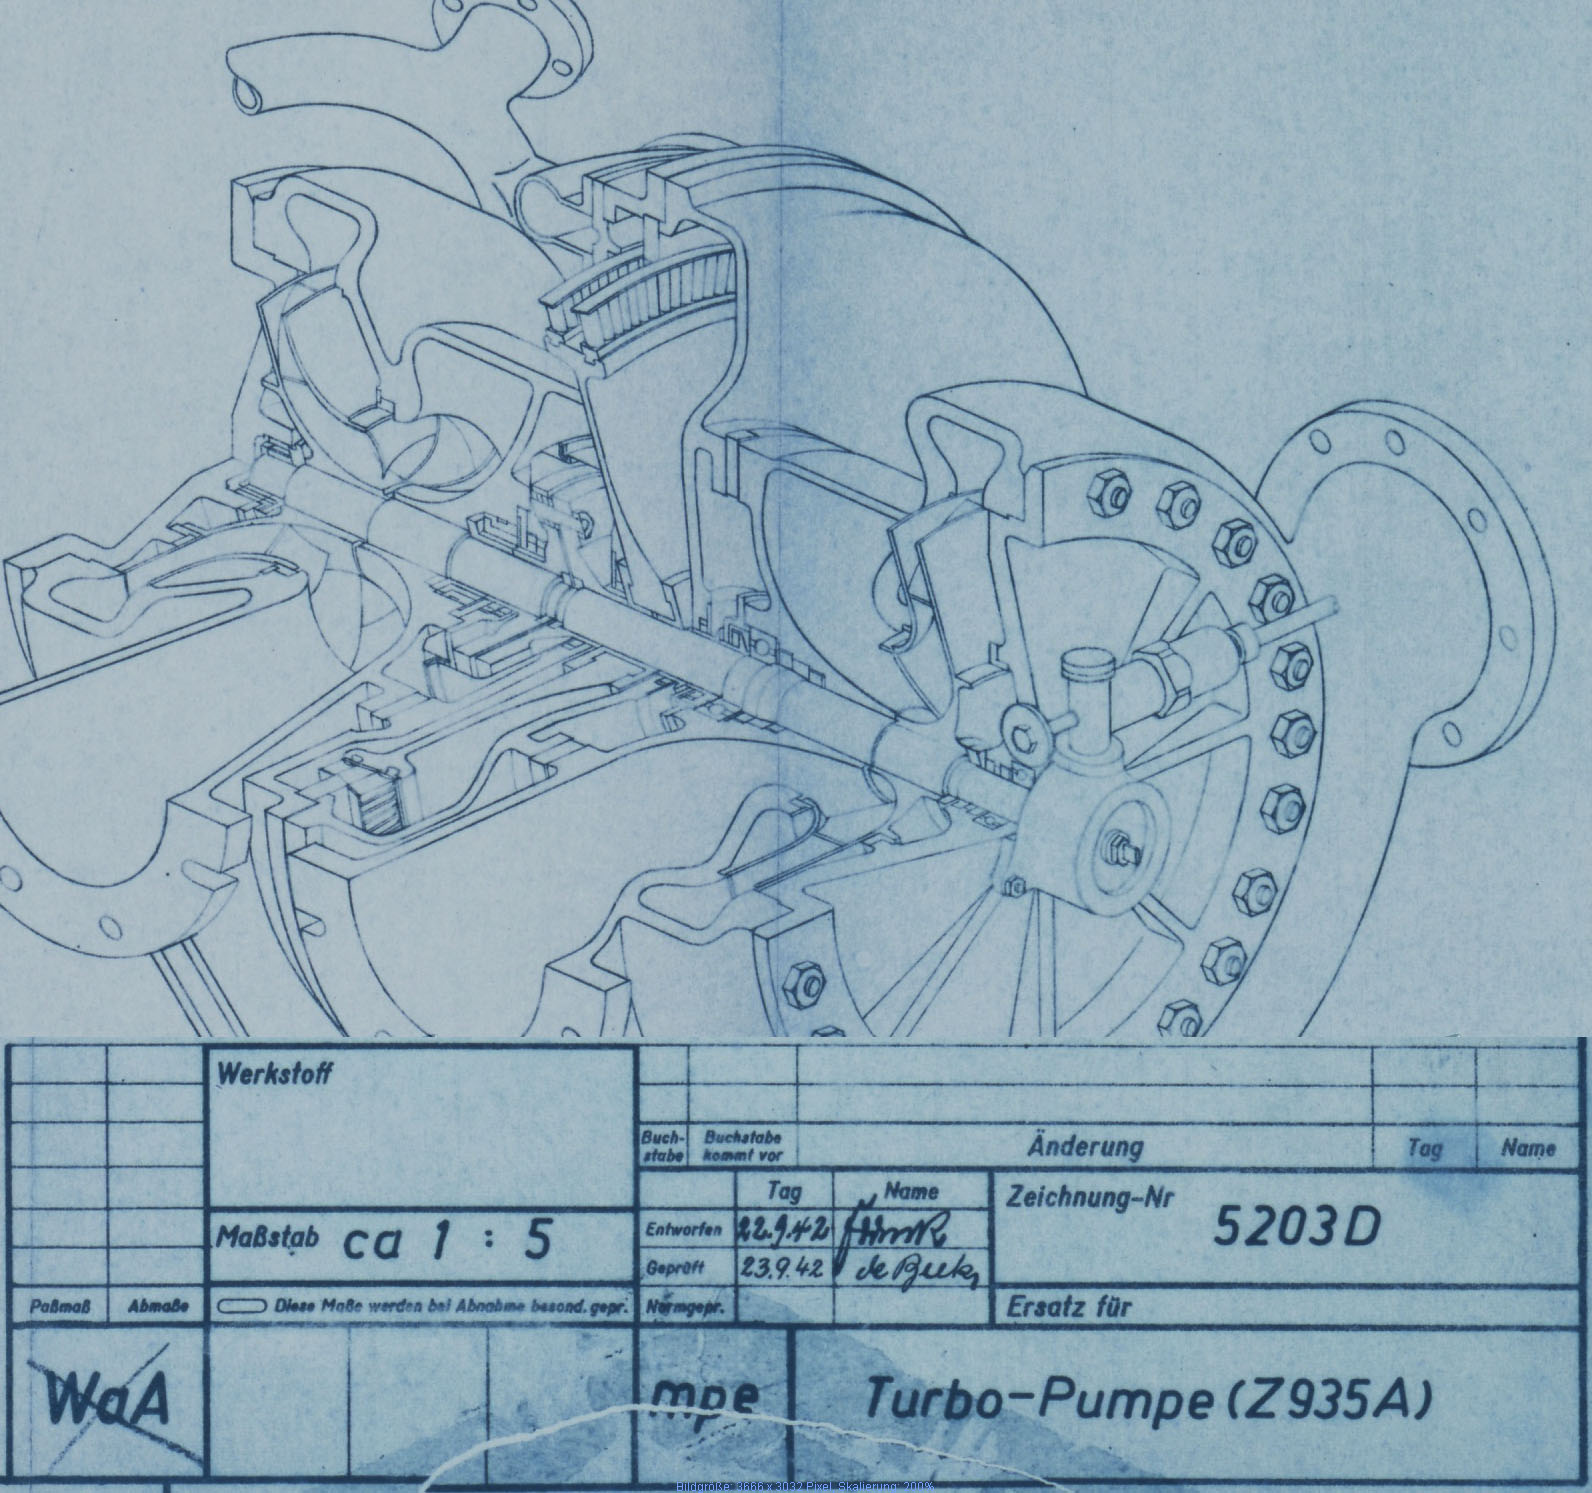
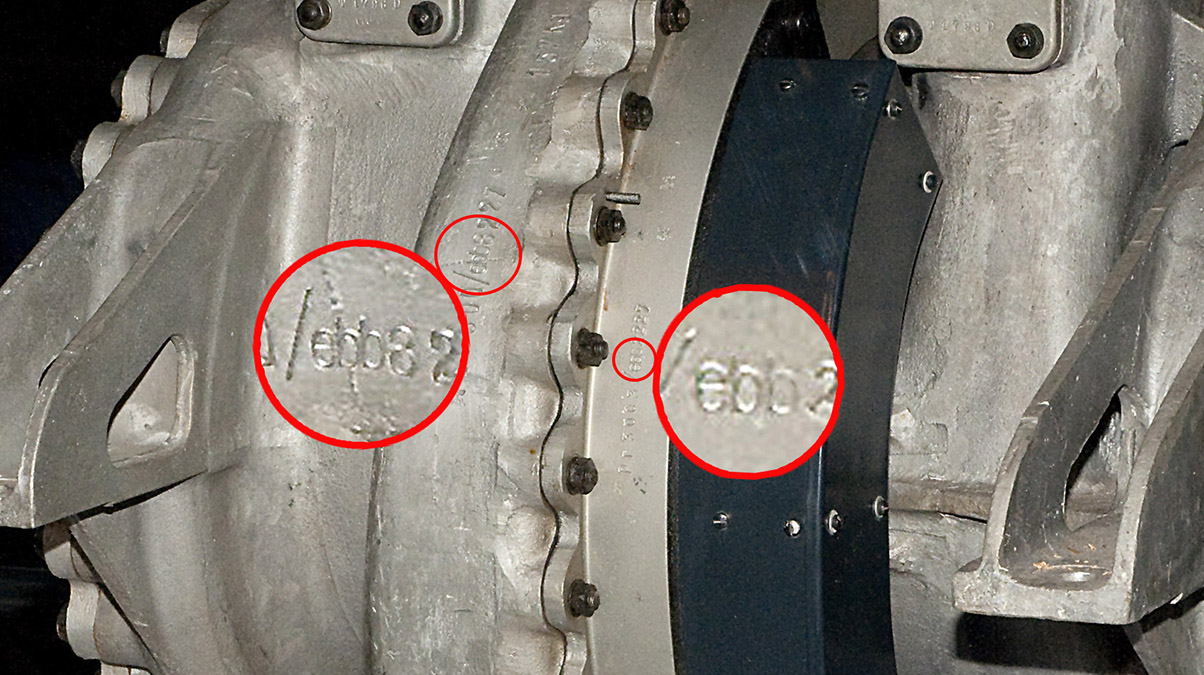

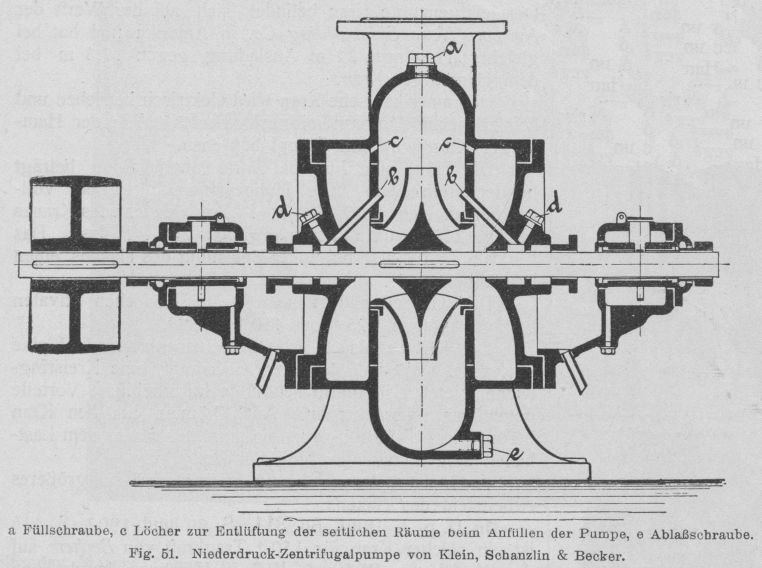
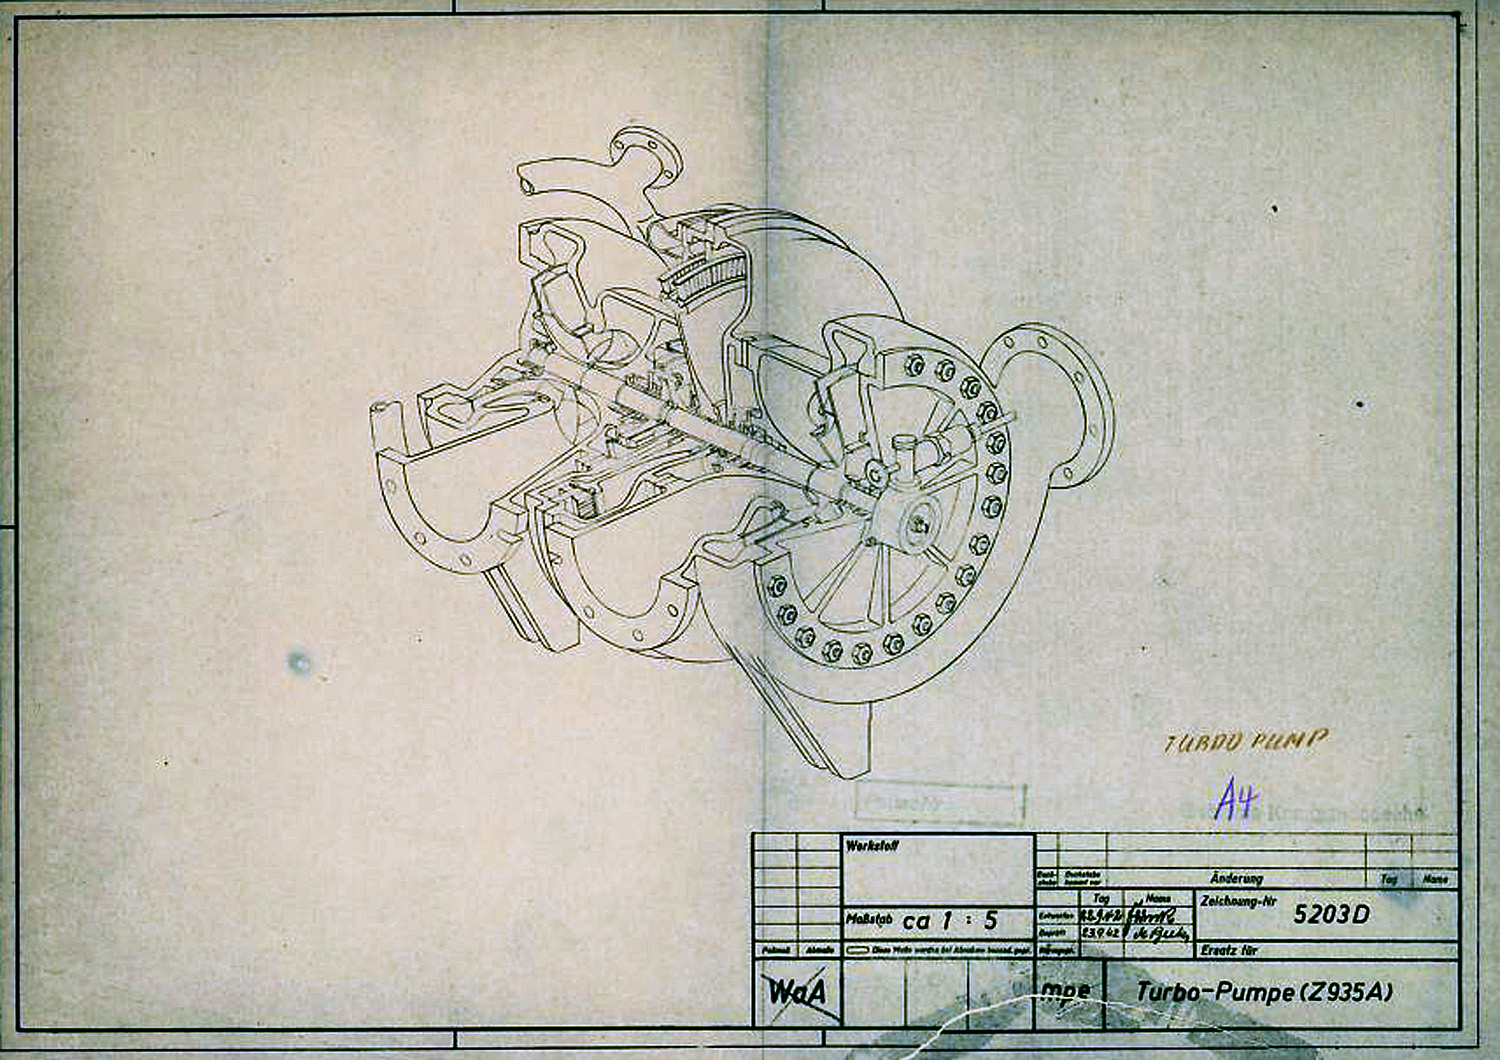
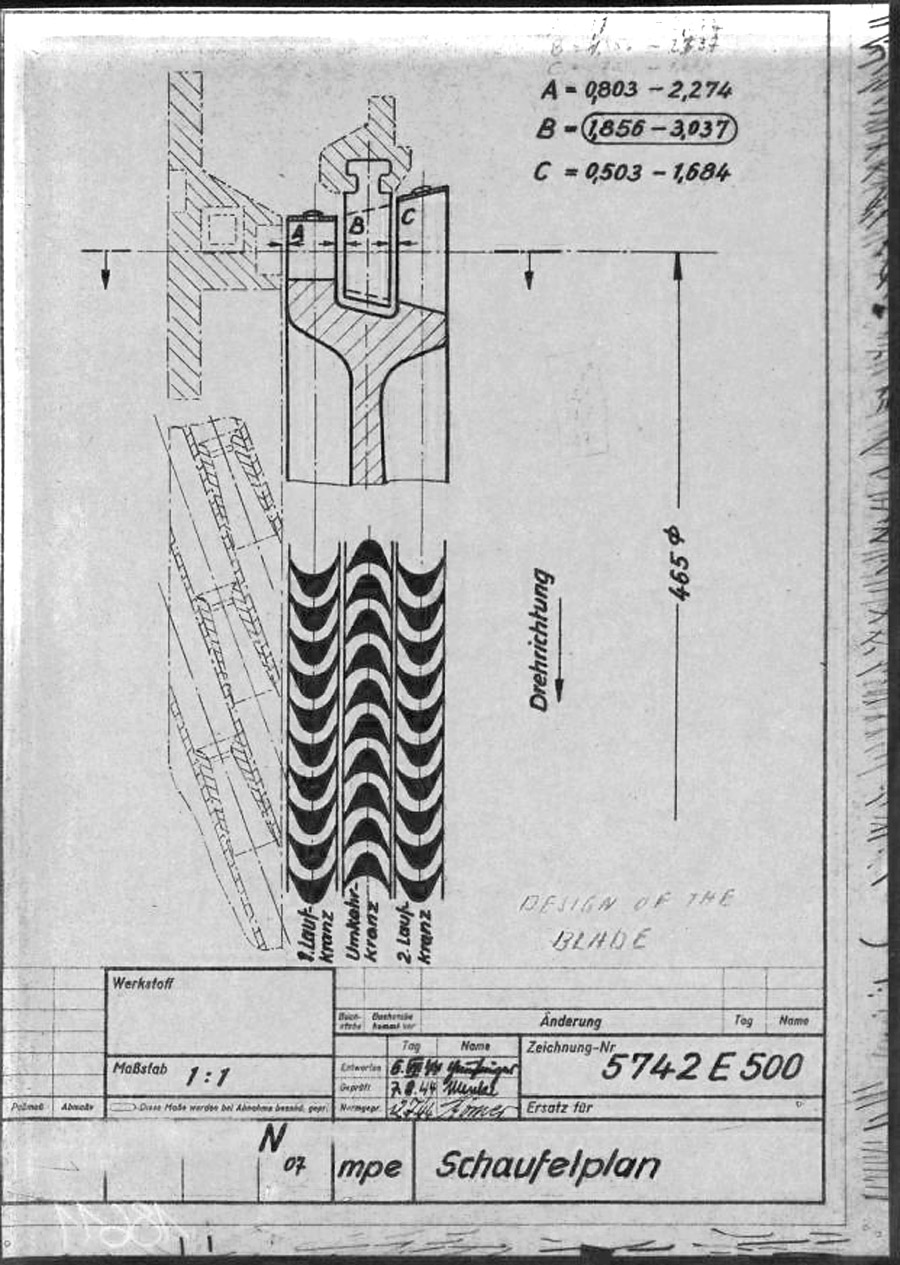
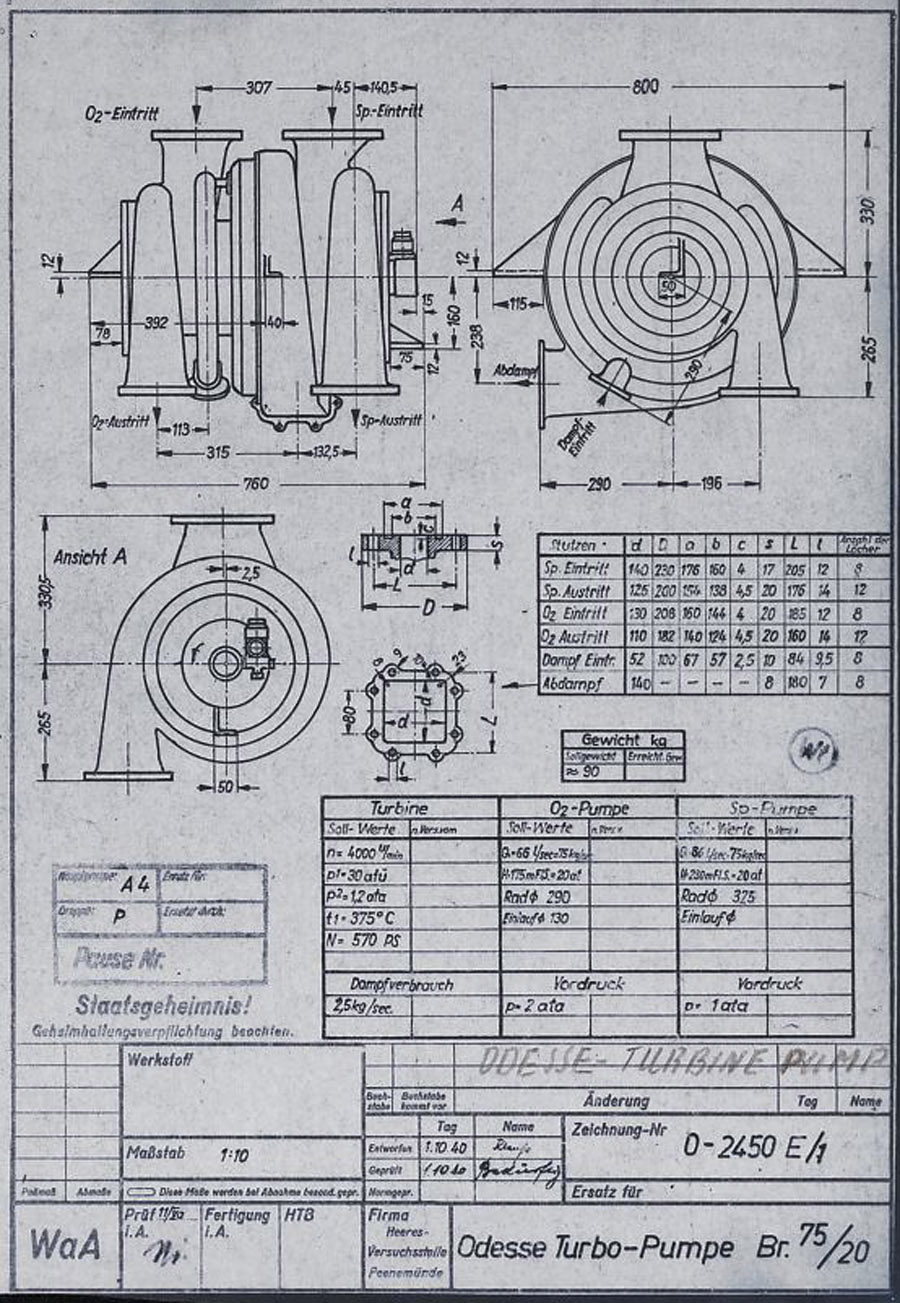
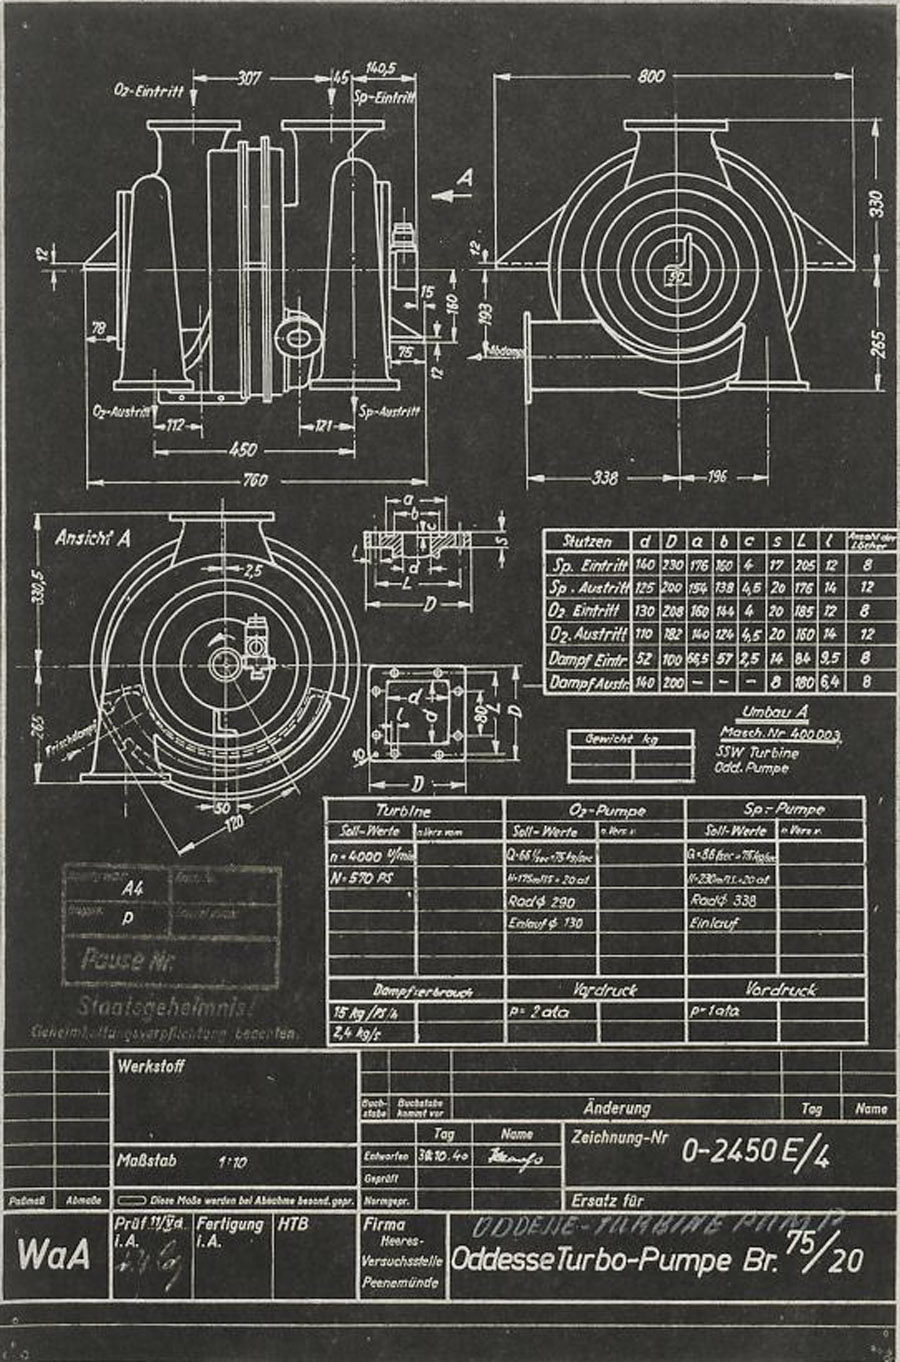
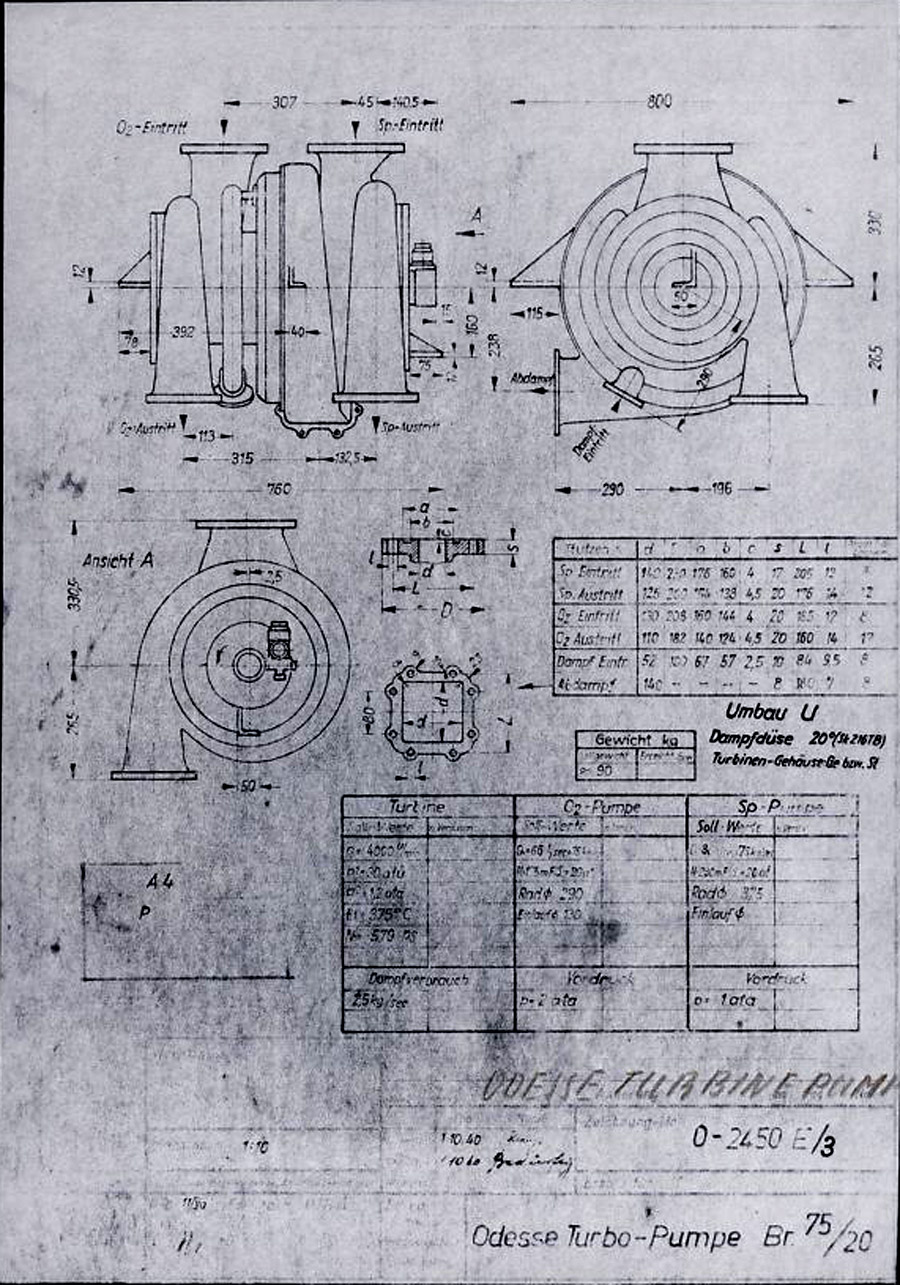
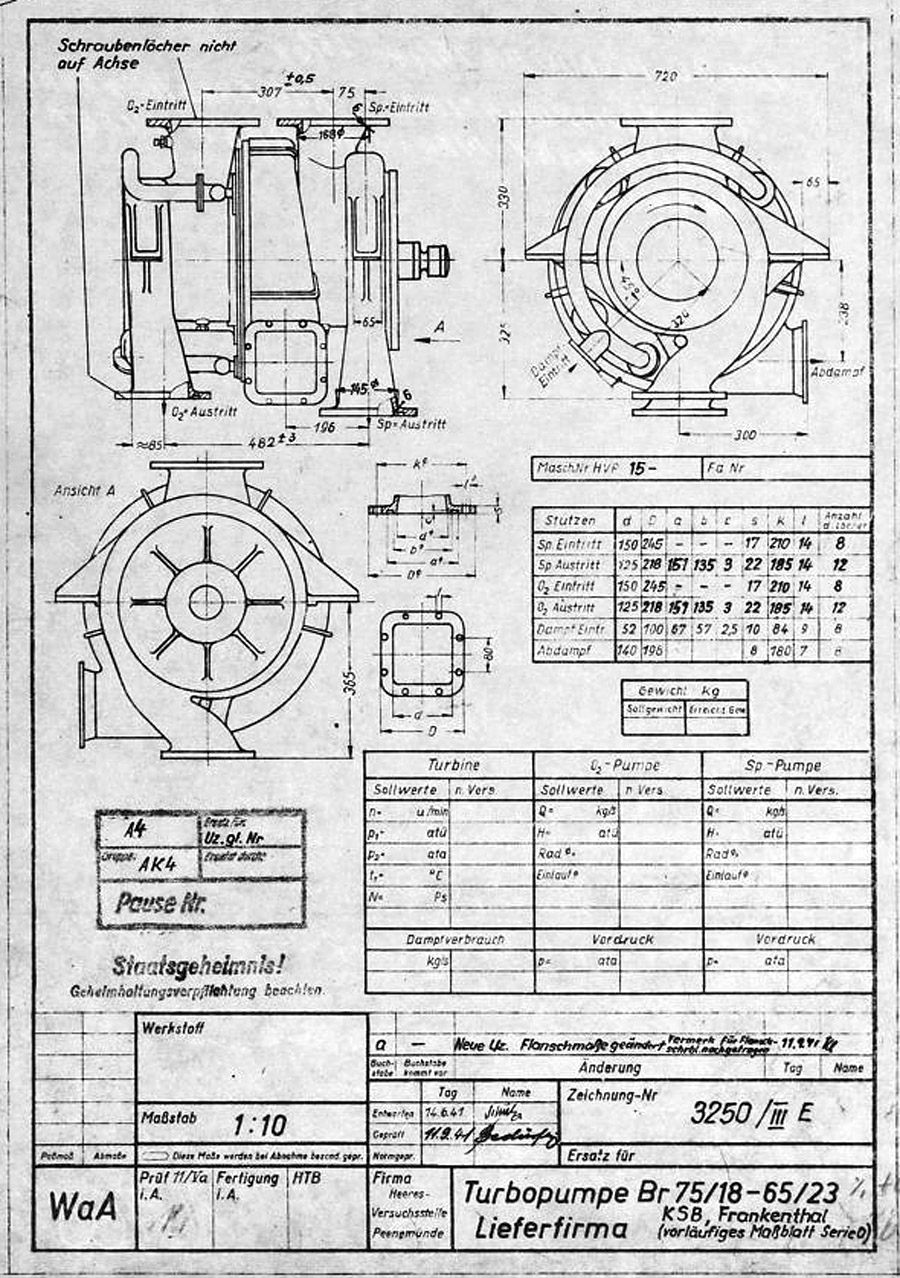
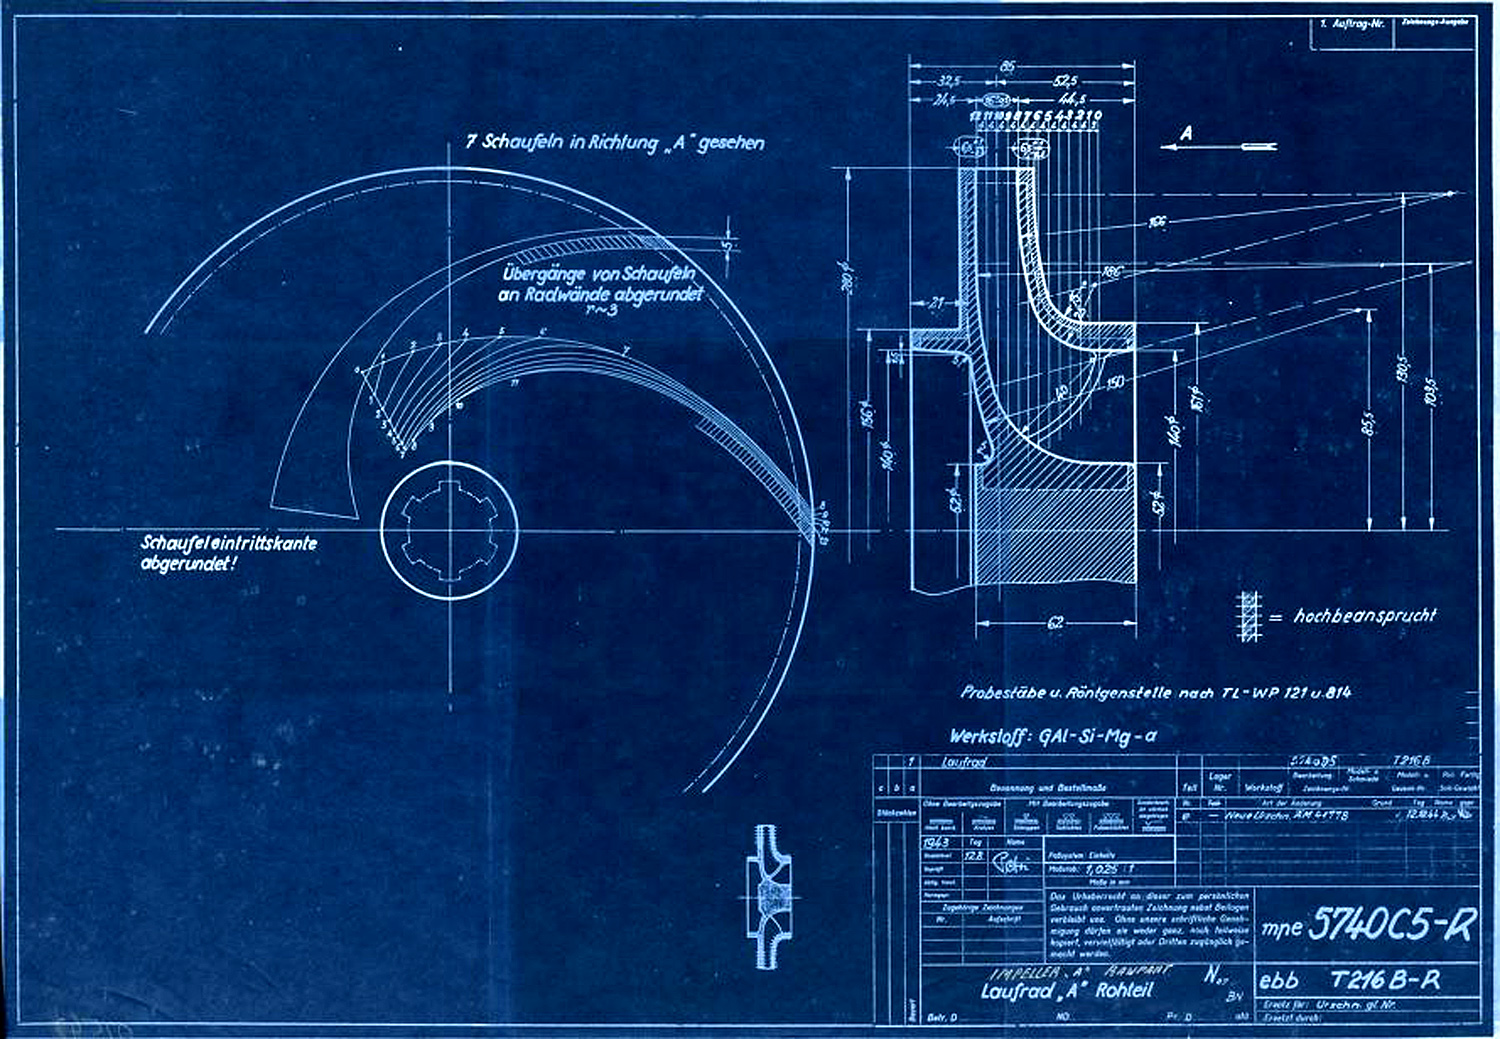
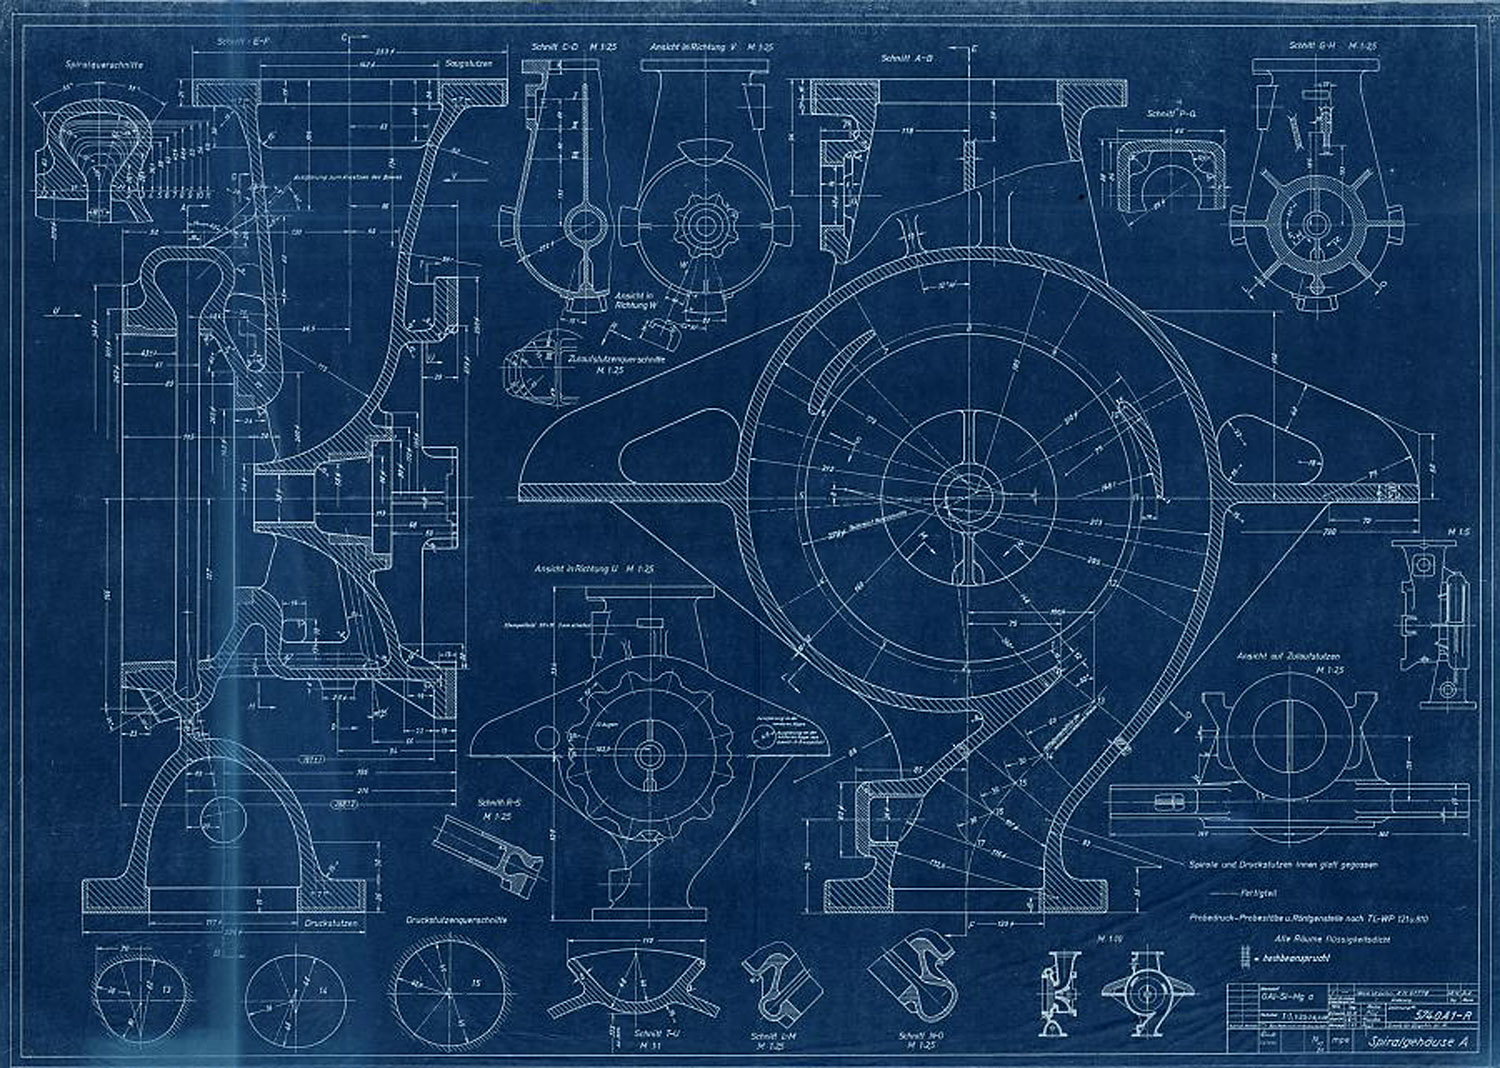
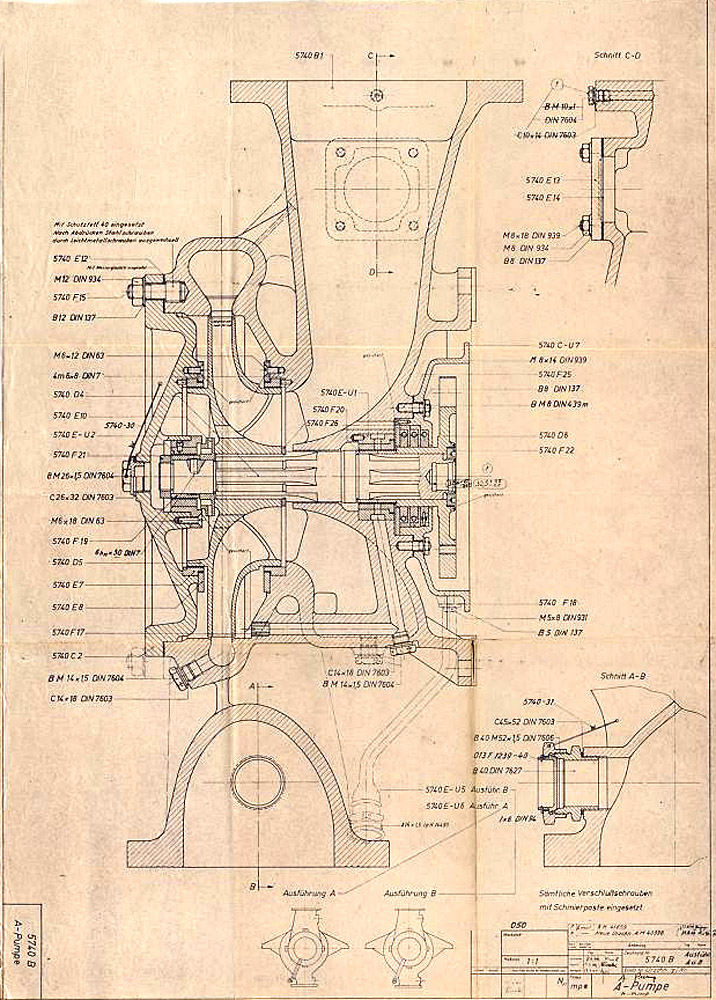


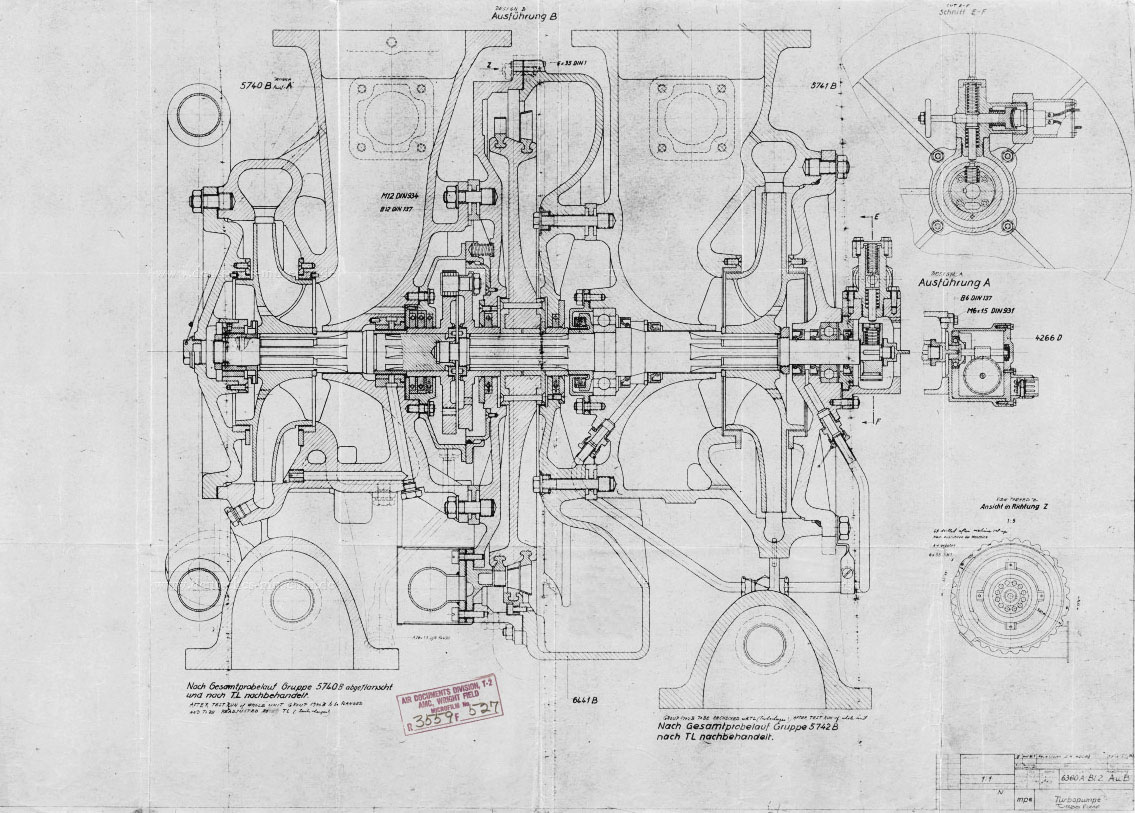
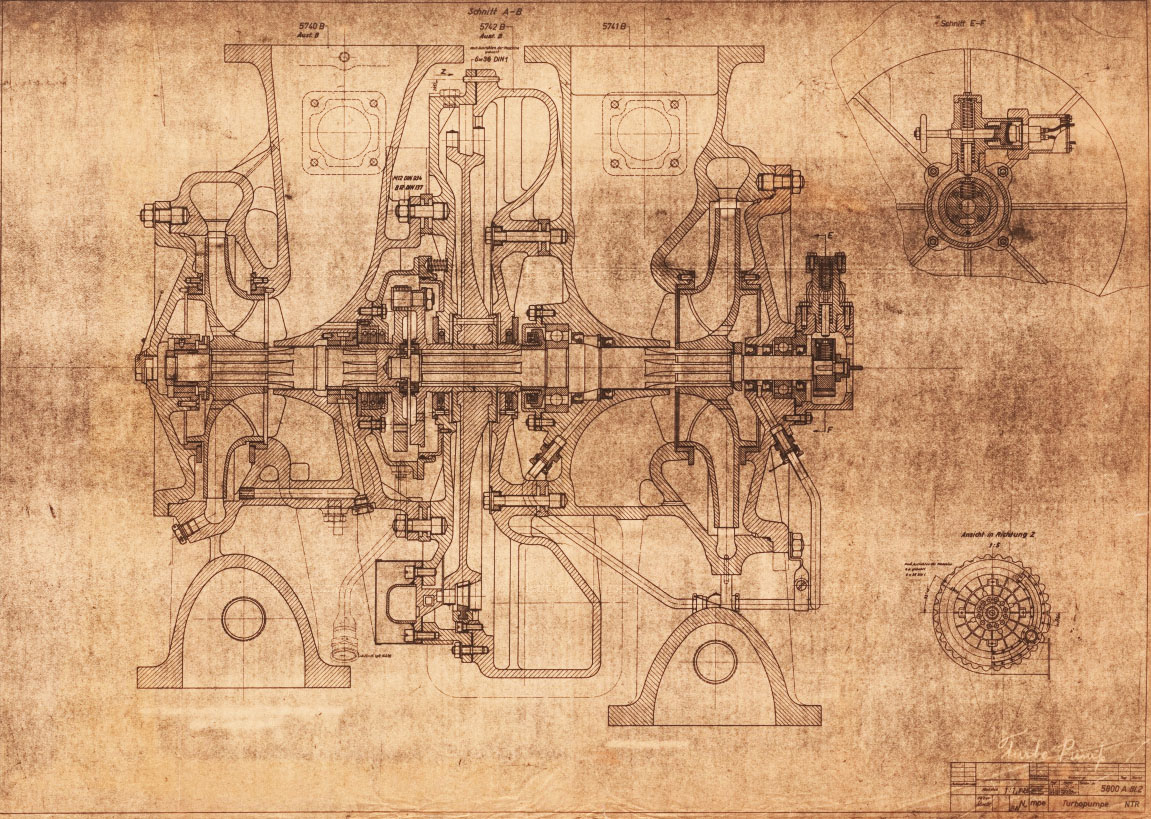
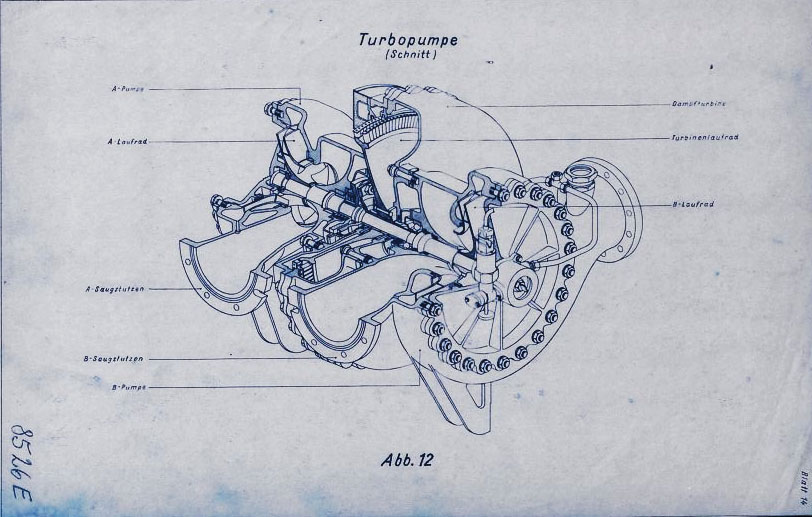
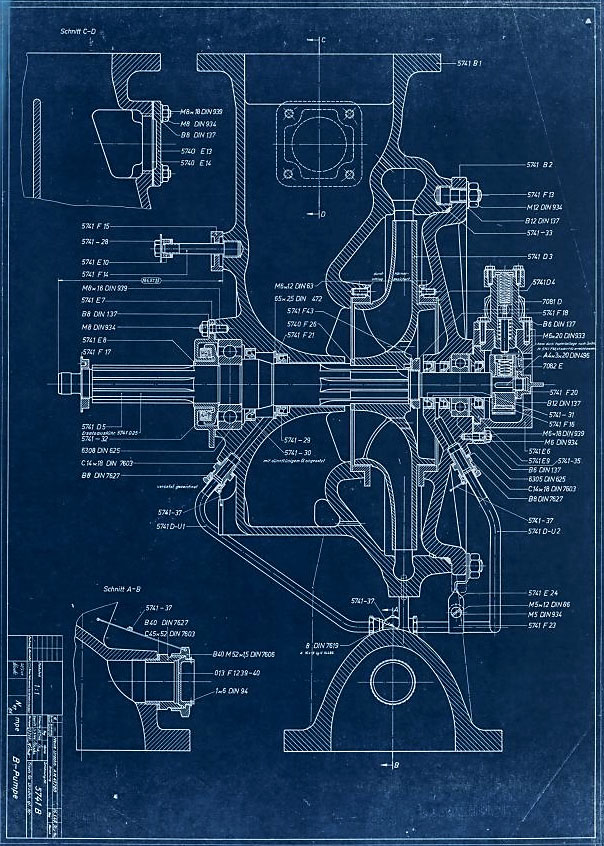
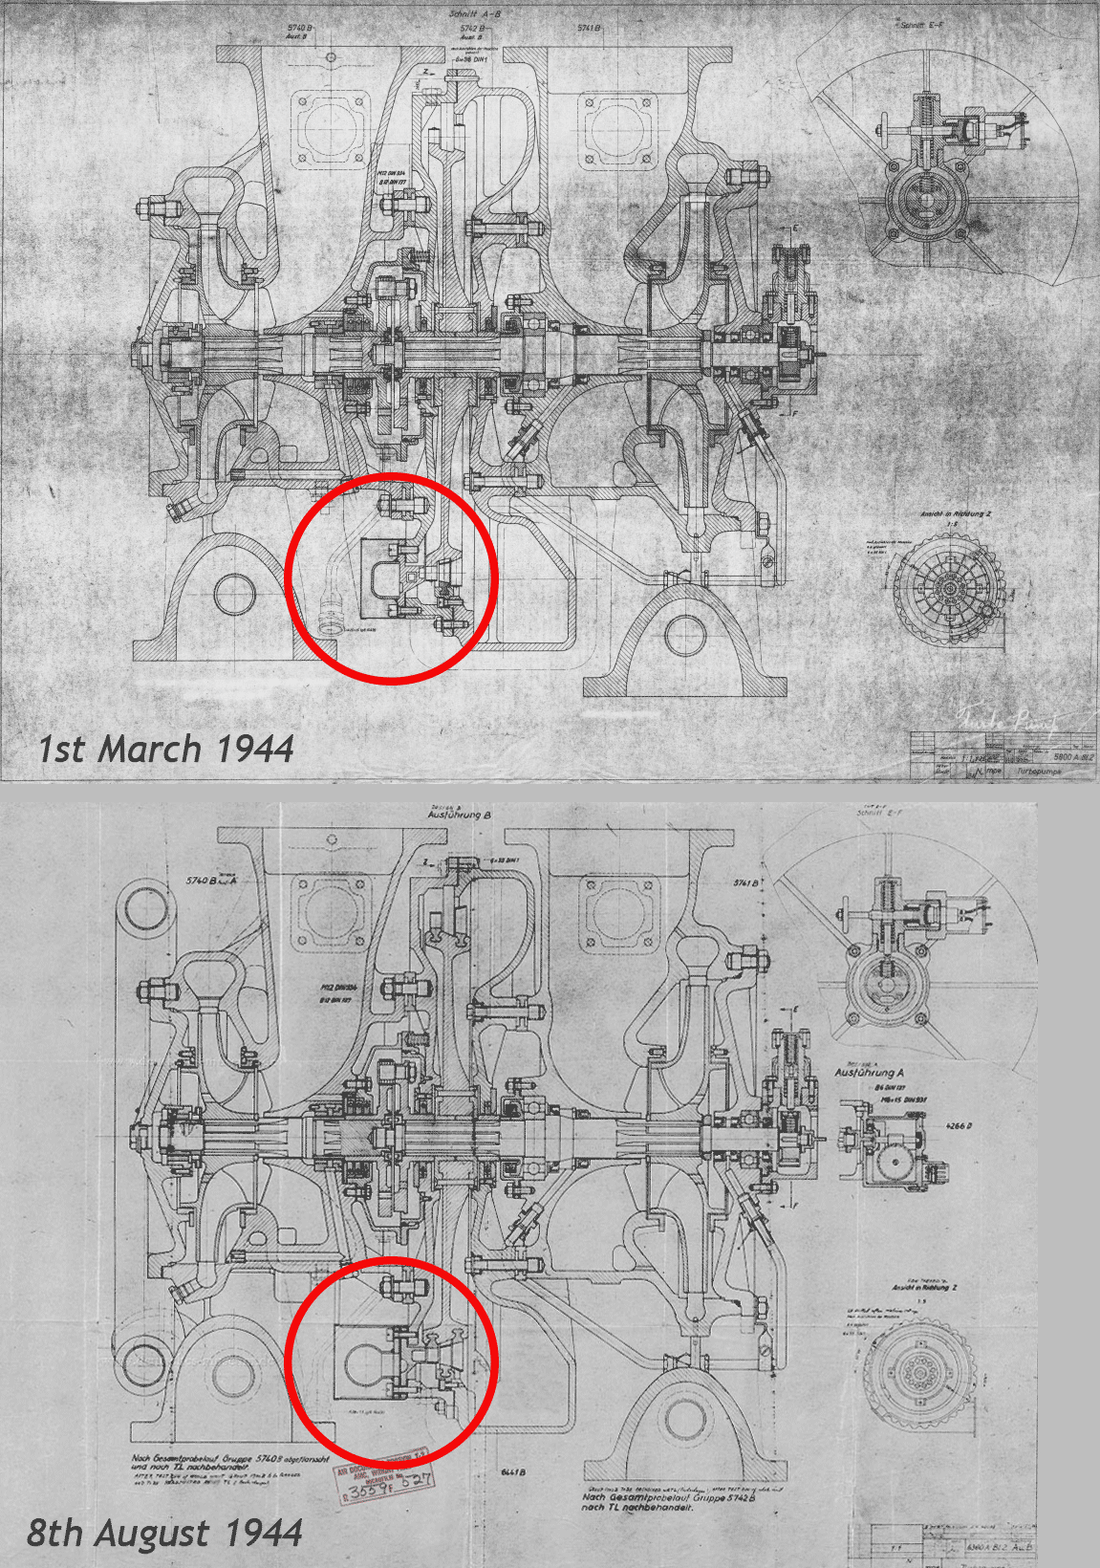
Sectioned general assembly view of the V2 turbo-pump (TP) dated September 1942. This image has been edited to show TP and document data closer together than the original.

Anatomy of the V2: 18-pot injector head
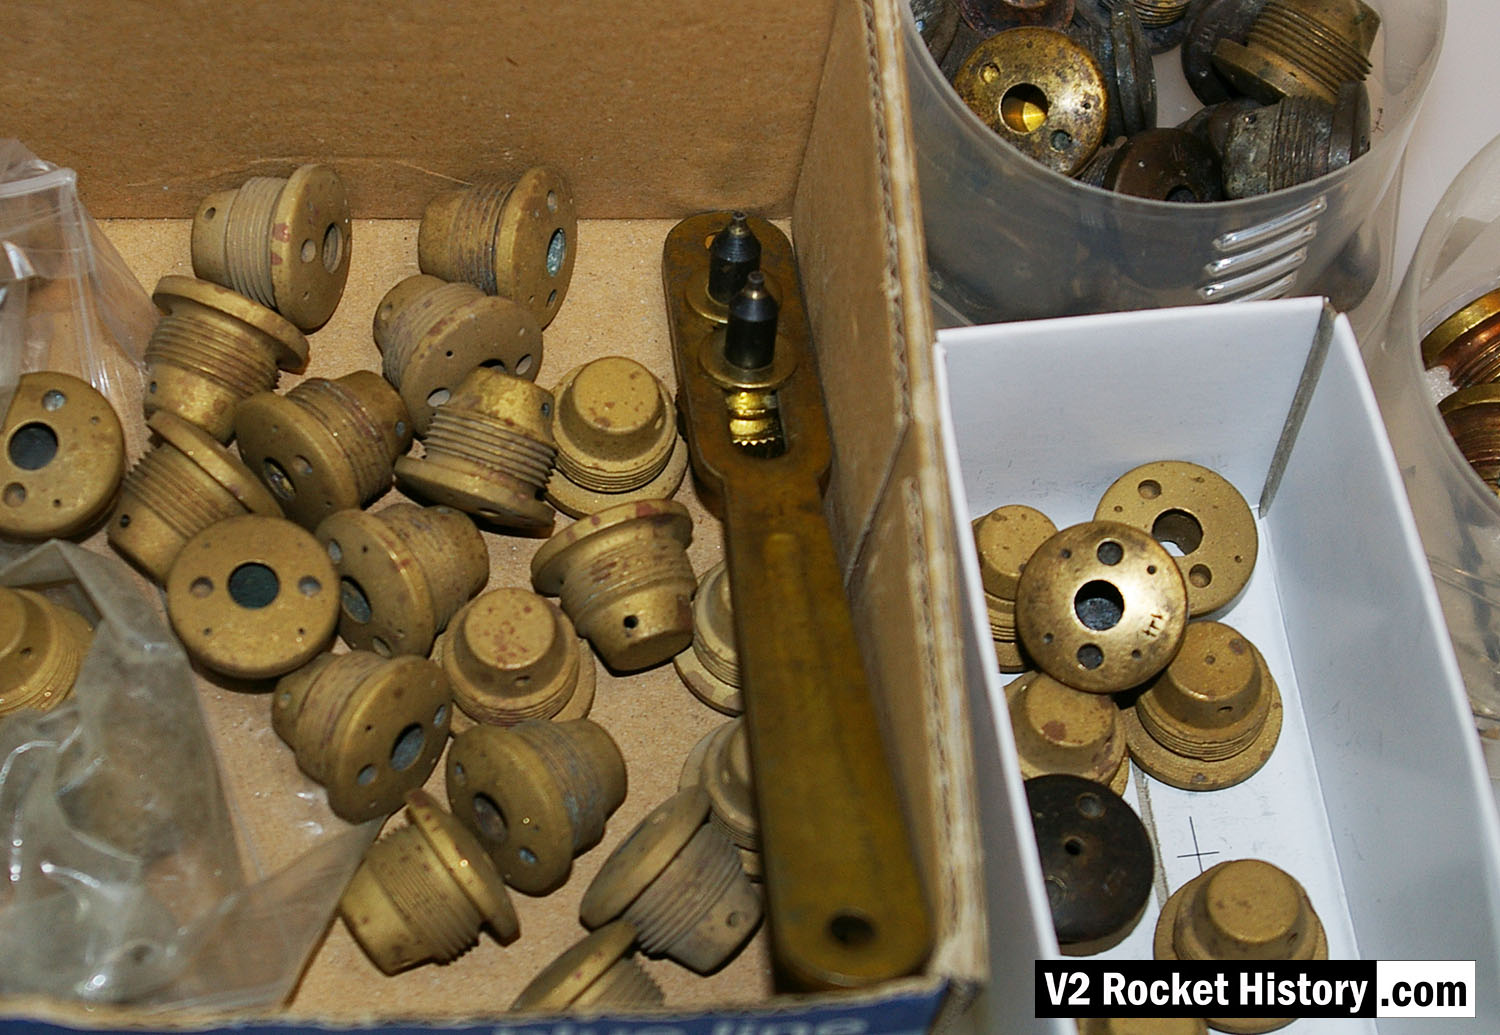
V2 rocket engine fuel injector inserts – a part of our collection used for the water tests with various types shown. The tool shown is a pin-wrench used to fit the inserts into the test apparatus. V2RH collection image

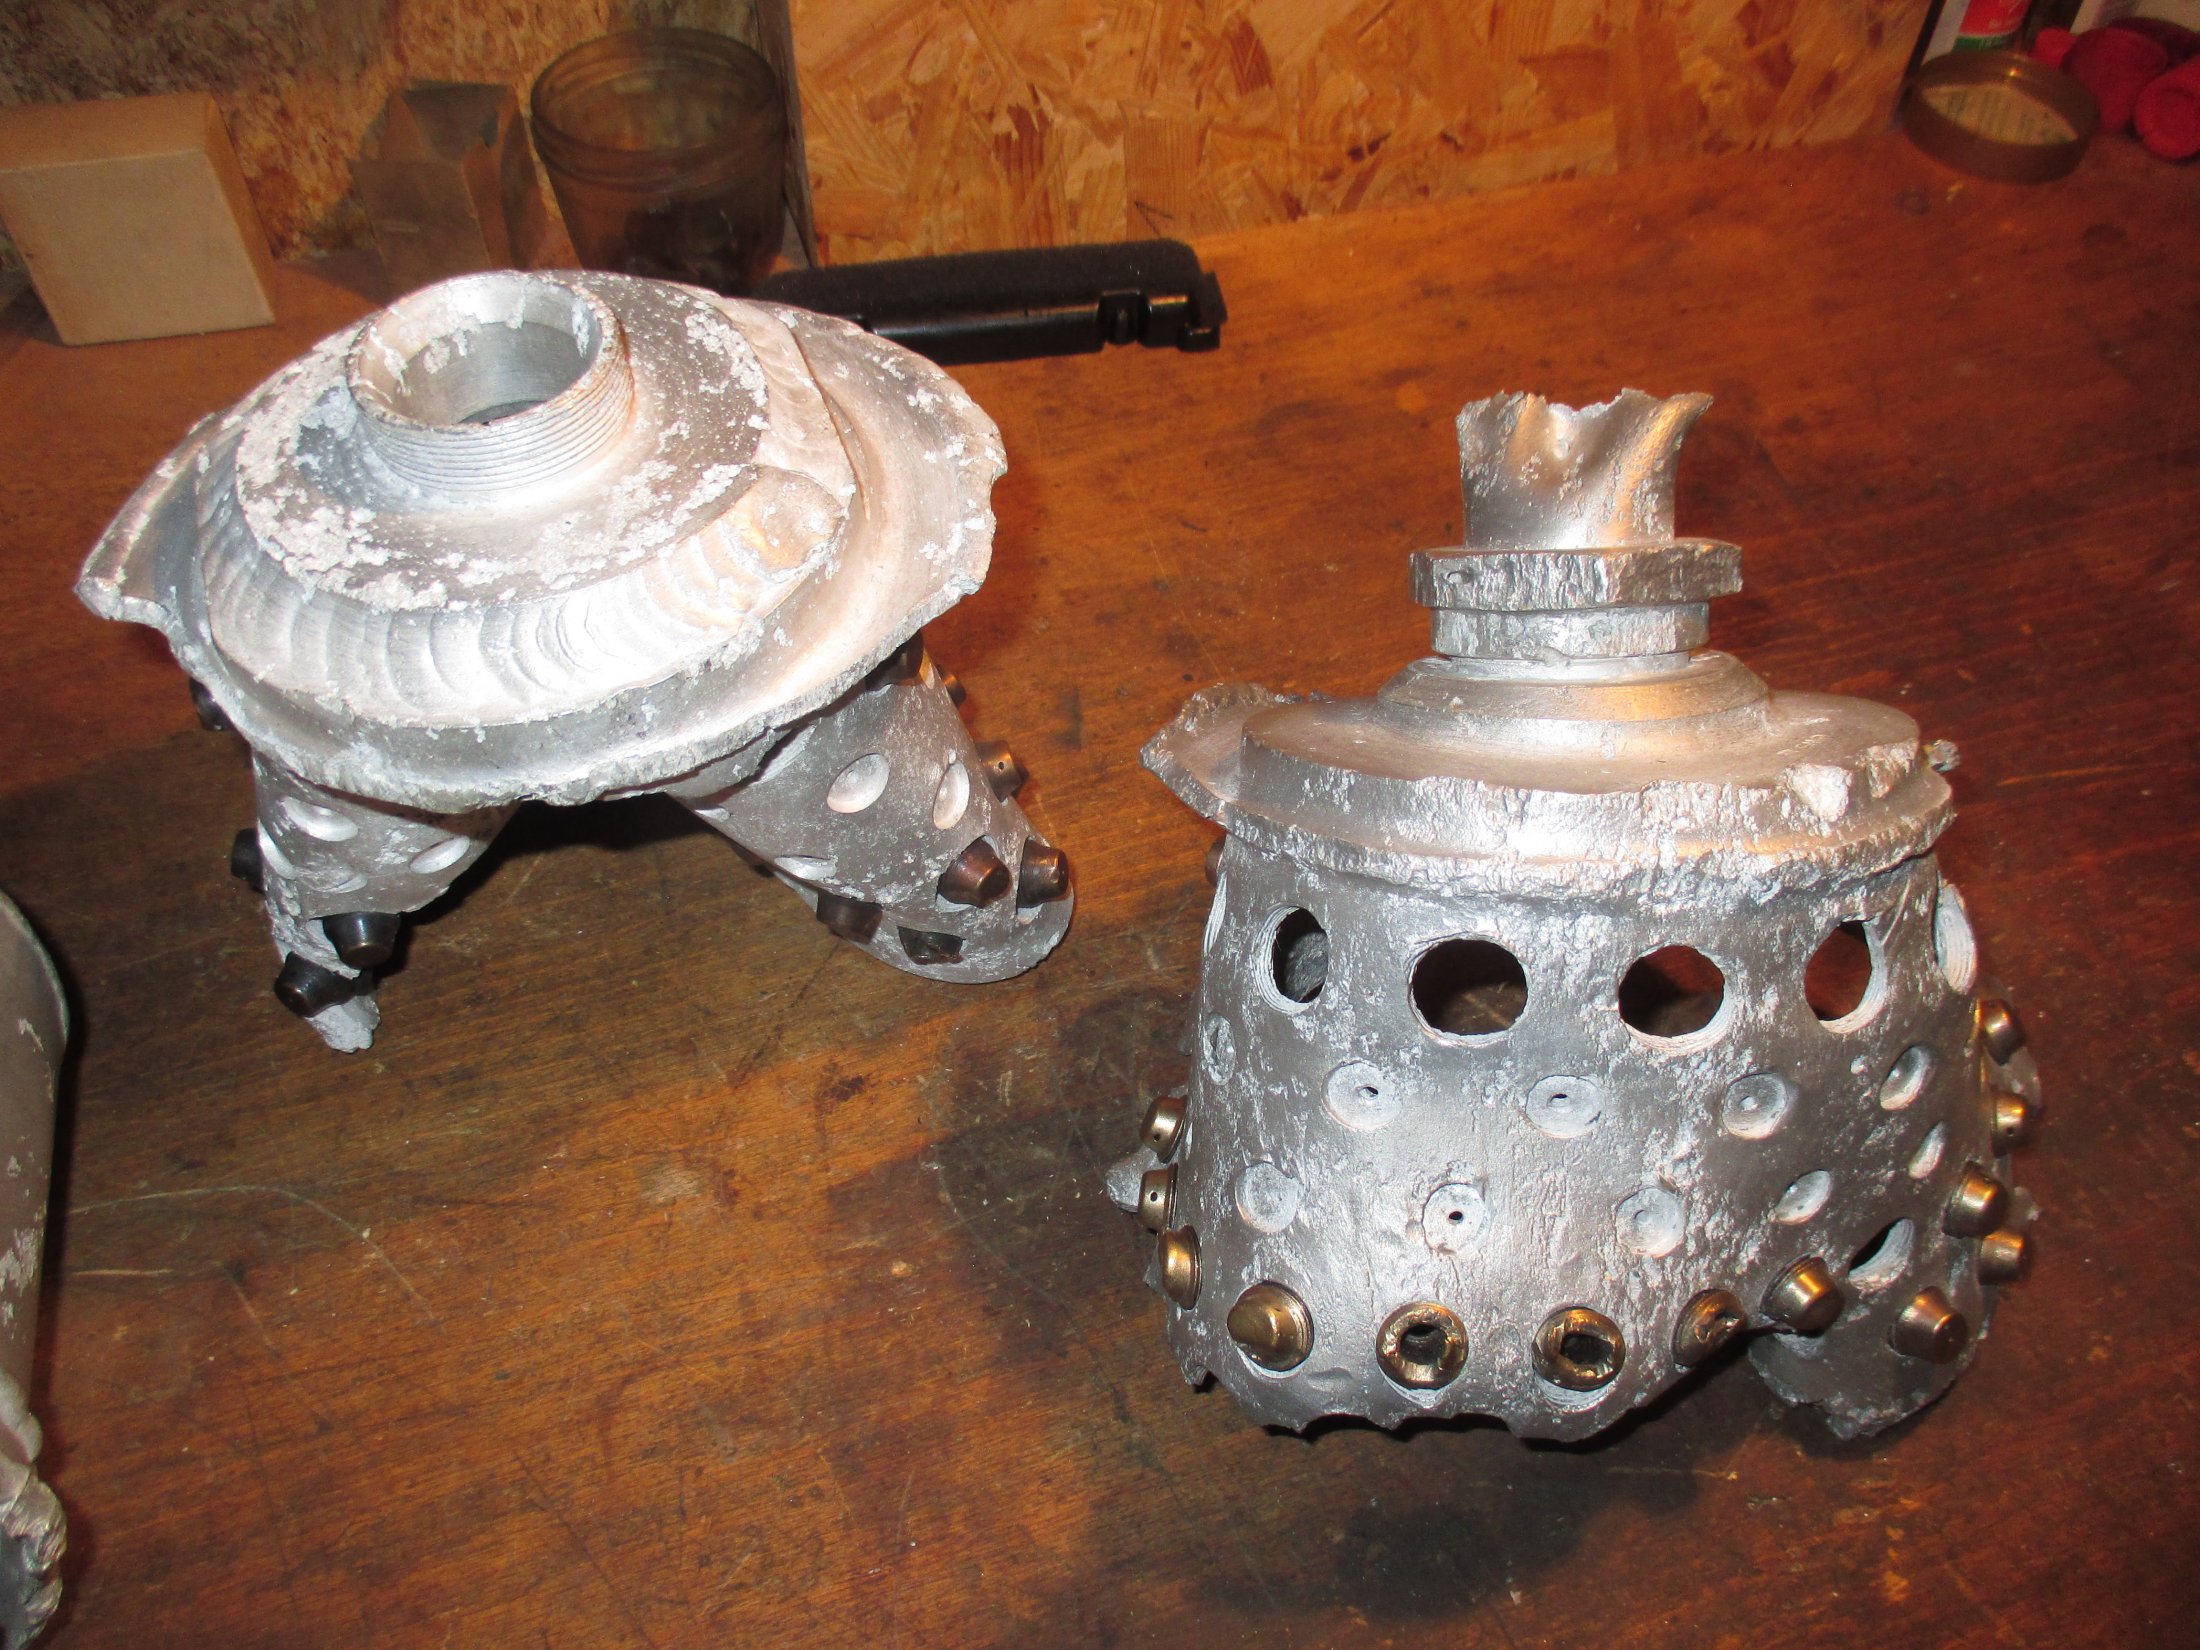
The injector head fragment shown here, is from an 4B 1000 kg thrust engine that was developed at Kummersdorf in 1938/39 by Dr Walter Thiel’s combustion research group. The fragment, clearly the remains of an explosion, was actually found in a scrap pile in Peenemüde but the engine was probably tested (and destroyed) at the Kummersdorf army testing station. V2RH collection image.
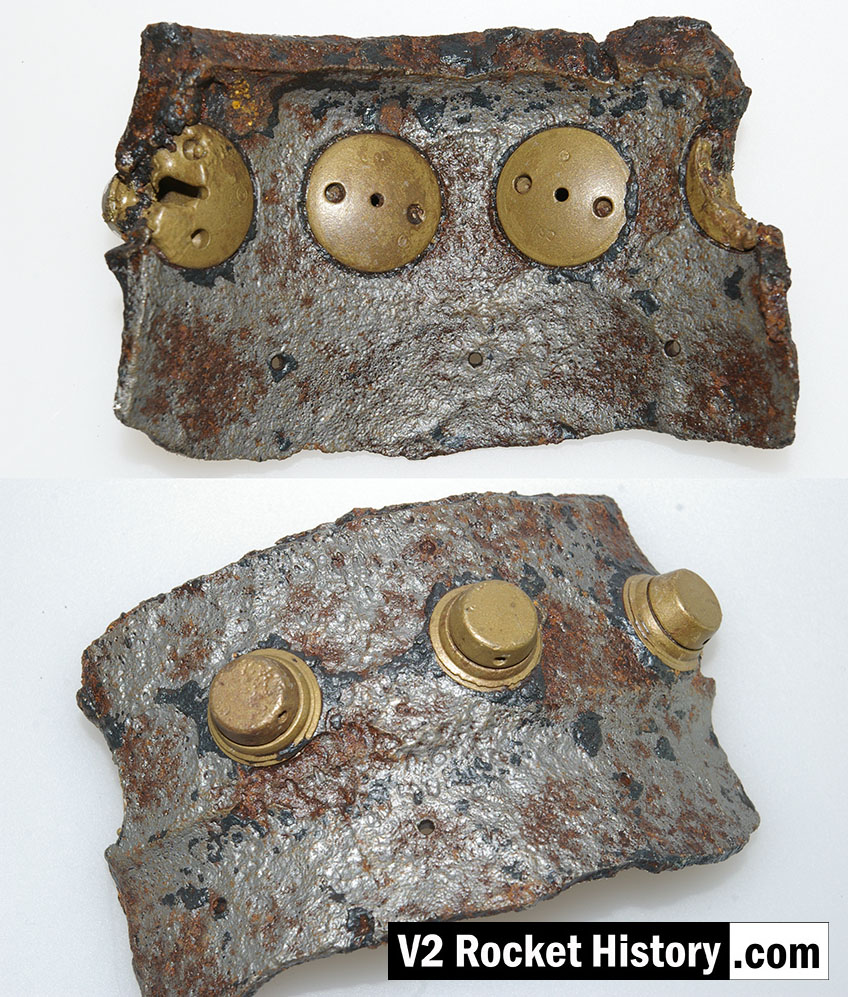
Photo shows a small section of the burner cup with row A (2131E) fuel injector inserts with three row B drilled holes below. The two undamaged inserts carry the armament code ‘csl’. The relic was found near a workshop in the Development works Pennemünde. Slag from the cutting flame and damage to the inserts at both ends of the relic would indicate that the section was cut from a steel burner cup using a gas cutter (fuel and oxygen) for purposes unknown. V2RH collection image
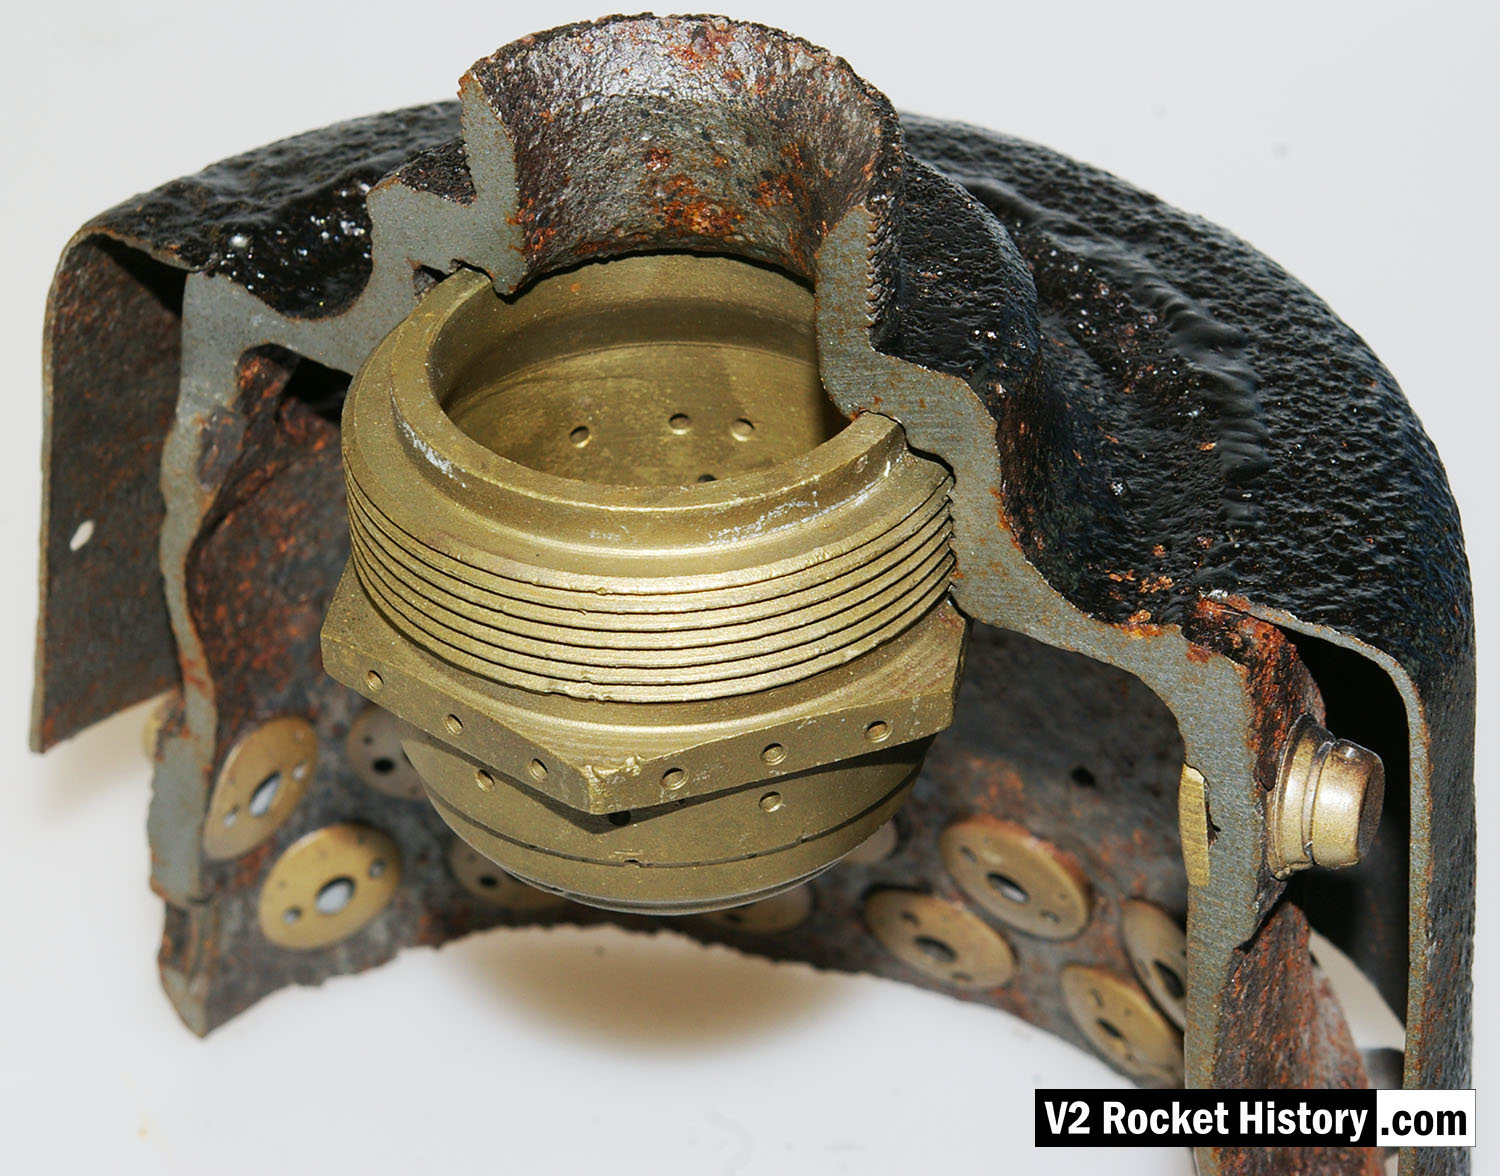
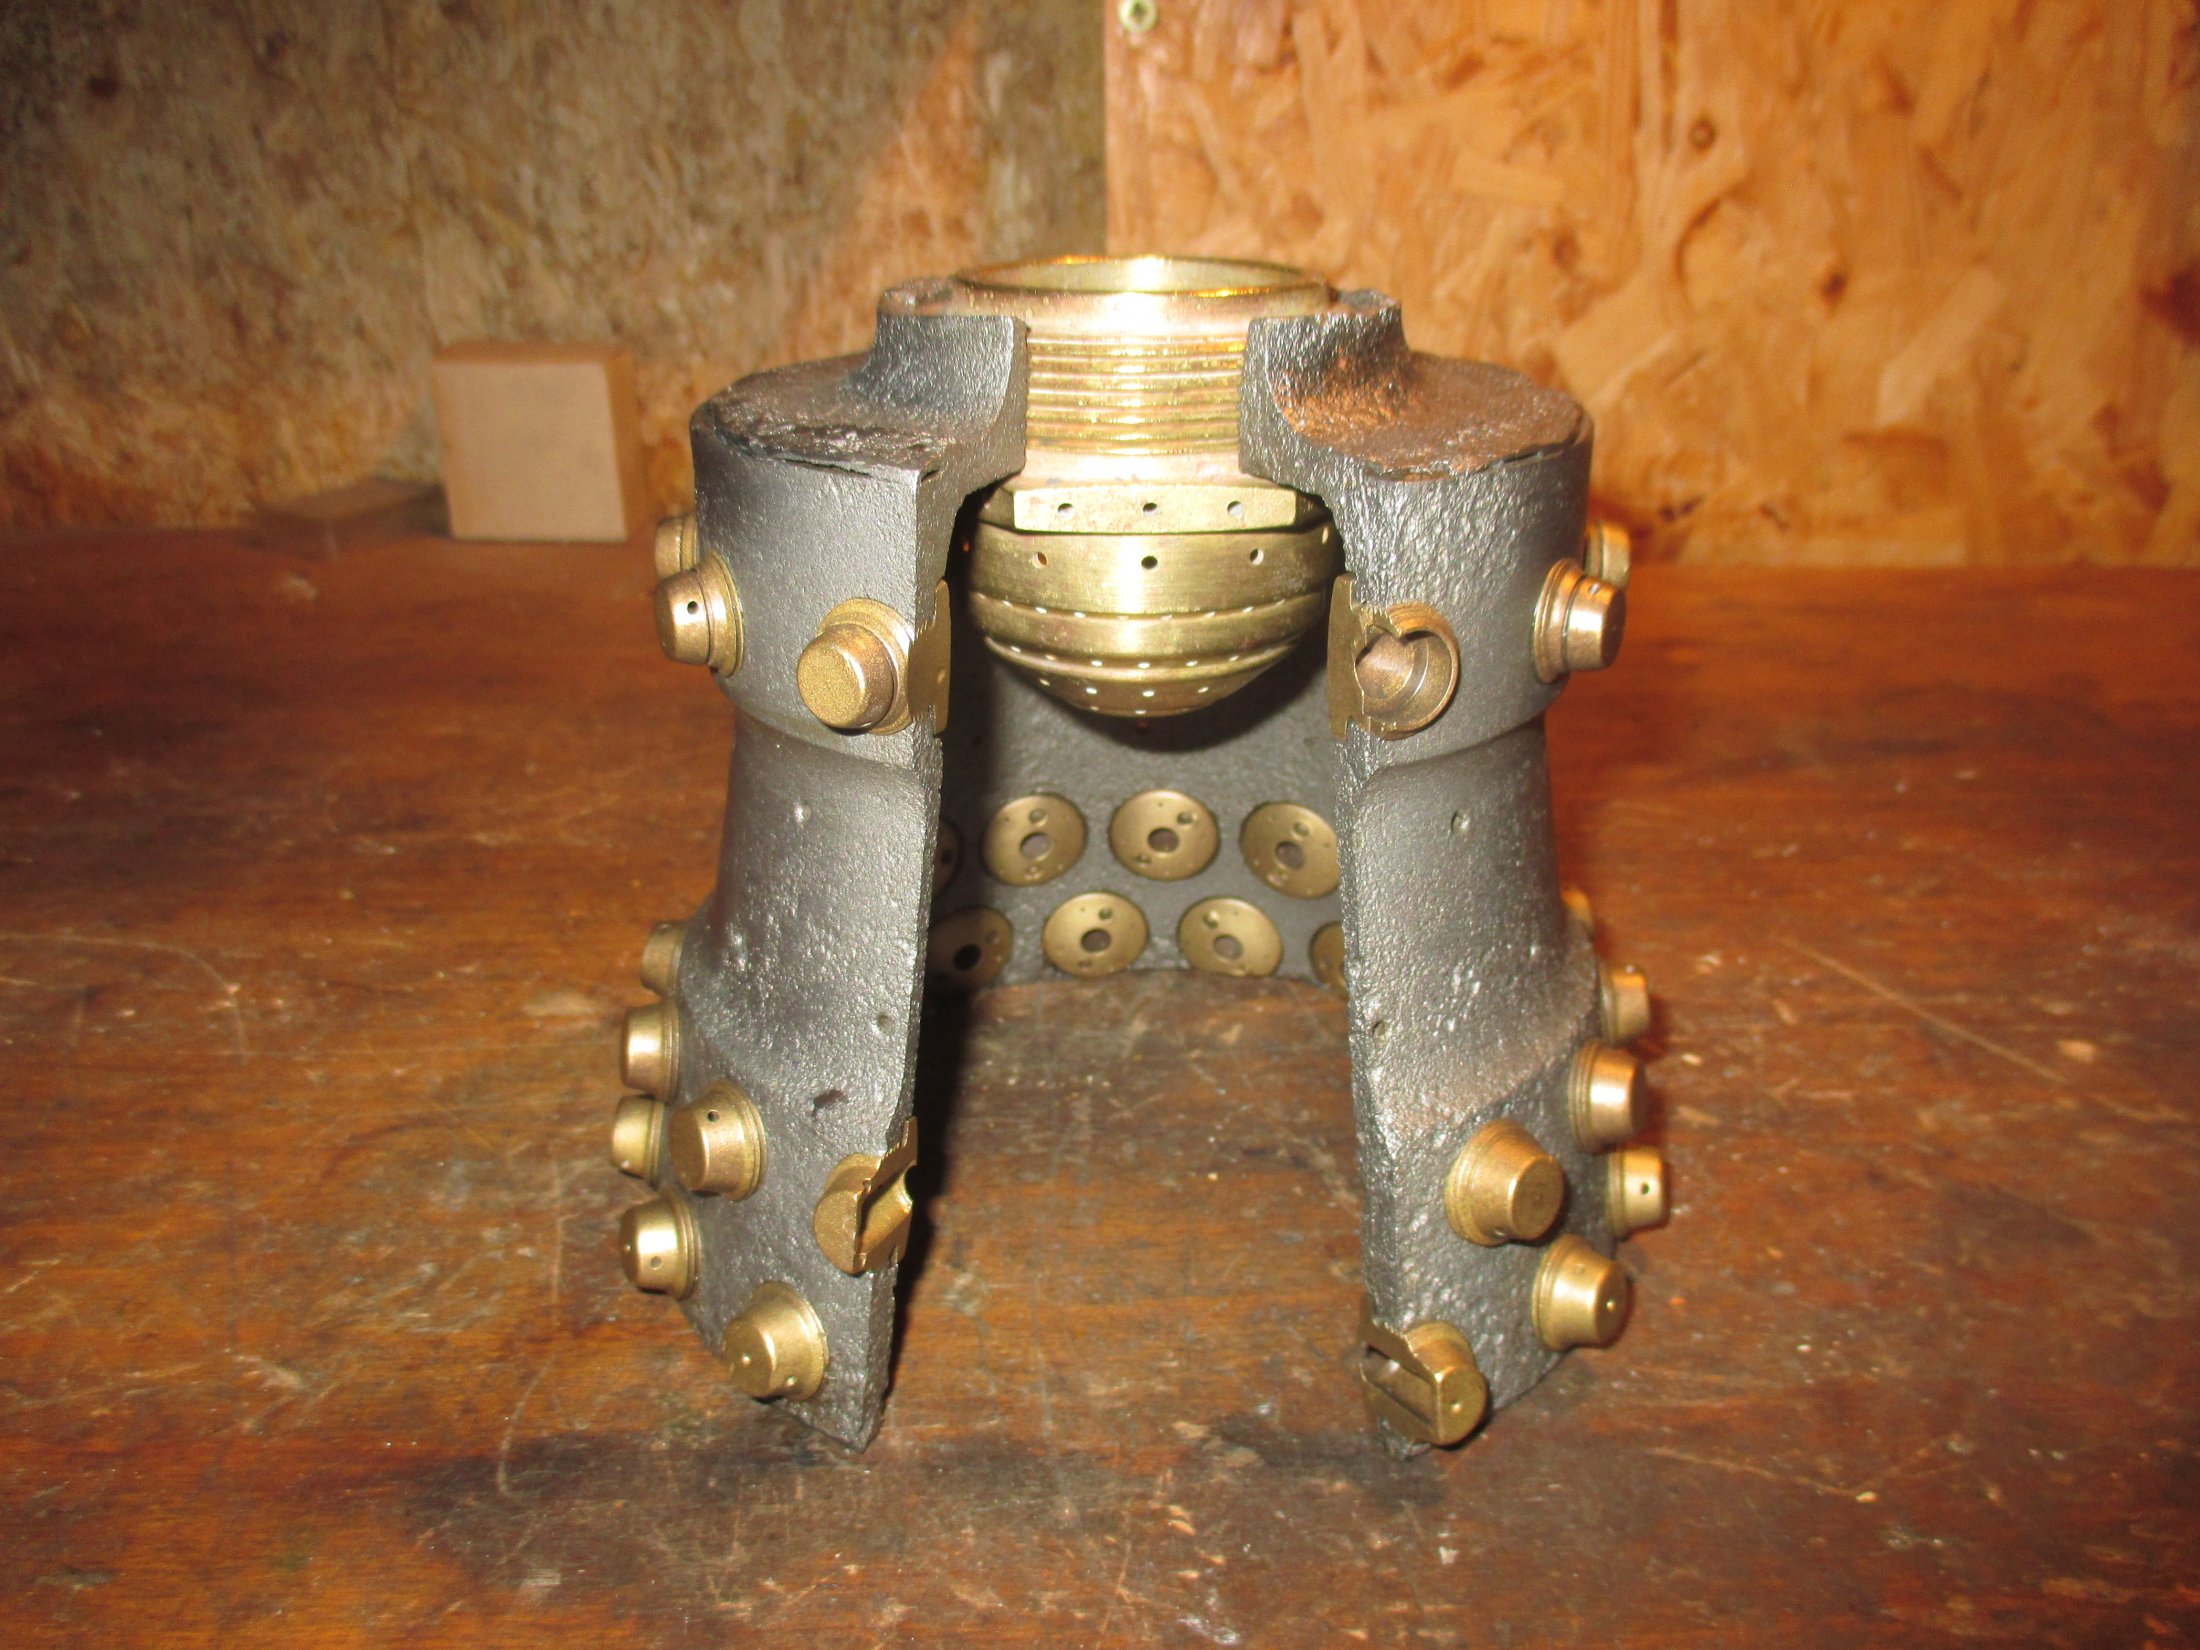
Cutaway section of fuel and liquid oxygen (LOX) injector pot. The exhibit shows the bell shaped thick inner wall of the burner with three tiers of fuel injector inserts (A,D, and E). The central copper alloy LOX spray injector is also well displayed in this image. The thin steel outer shell of the burner cup is shown and affords a good view of the head cavity that supplies fuel to the injector inserts – one A type injector is shown party cut through on the right, its rear portion showing inside the fuel cavity. V2RH image
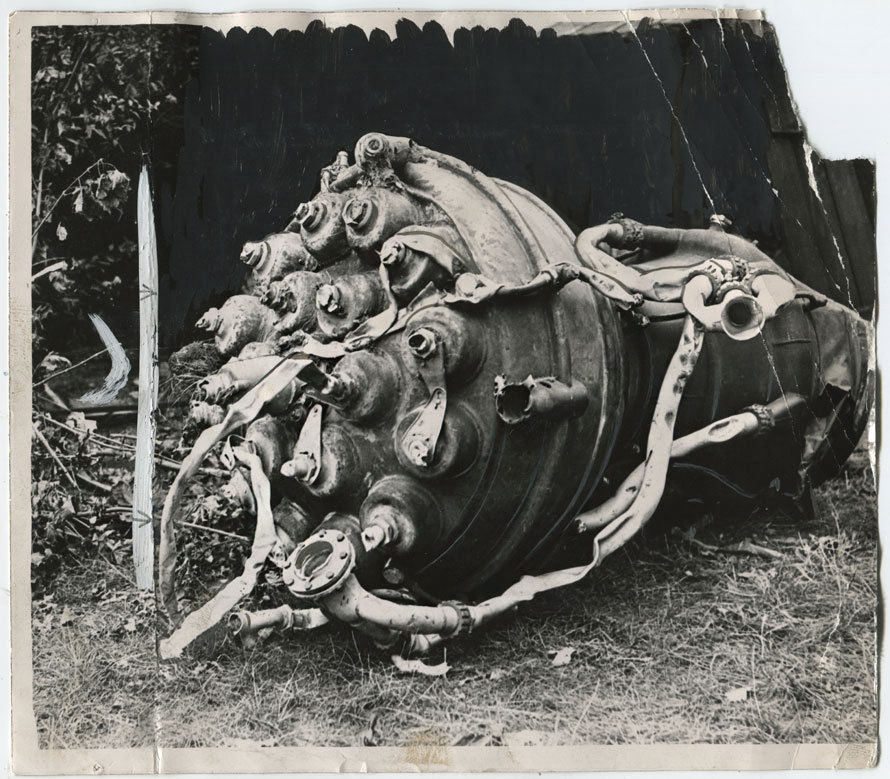
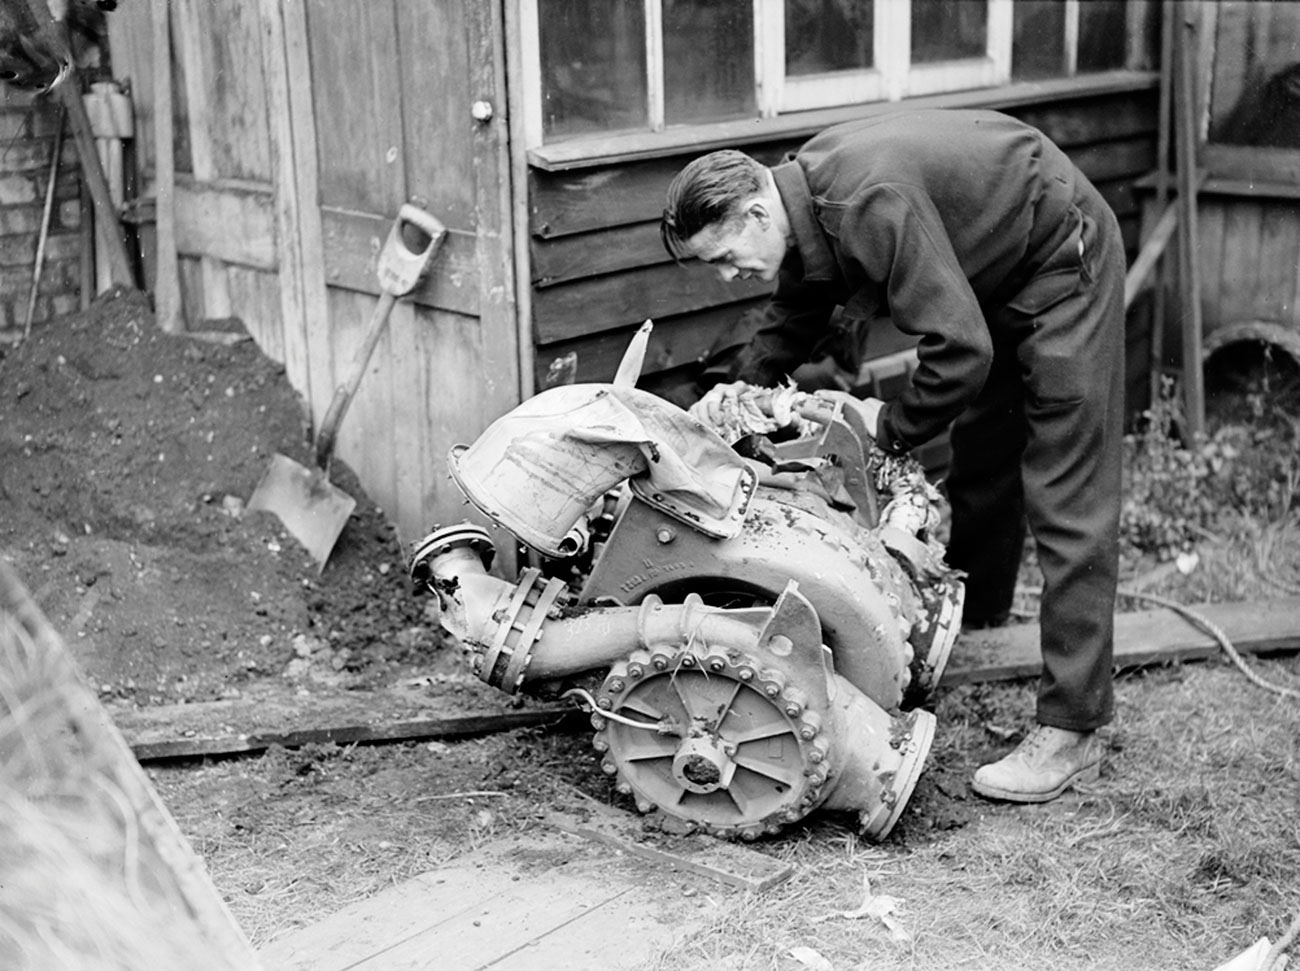
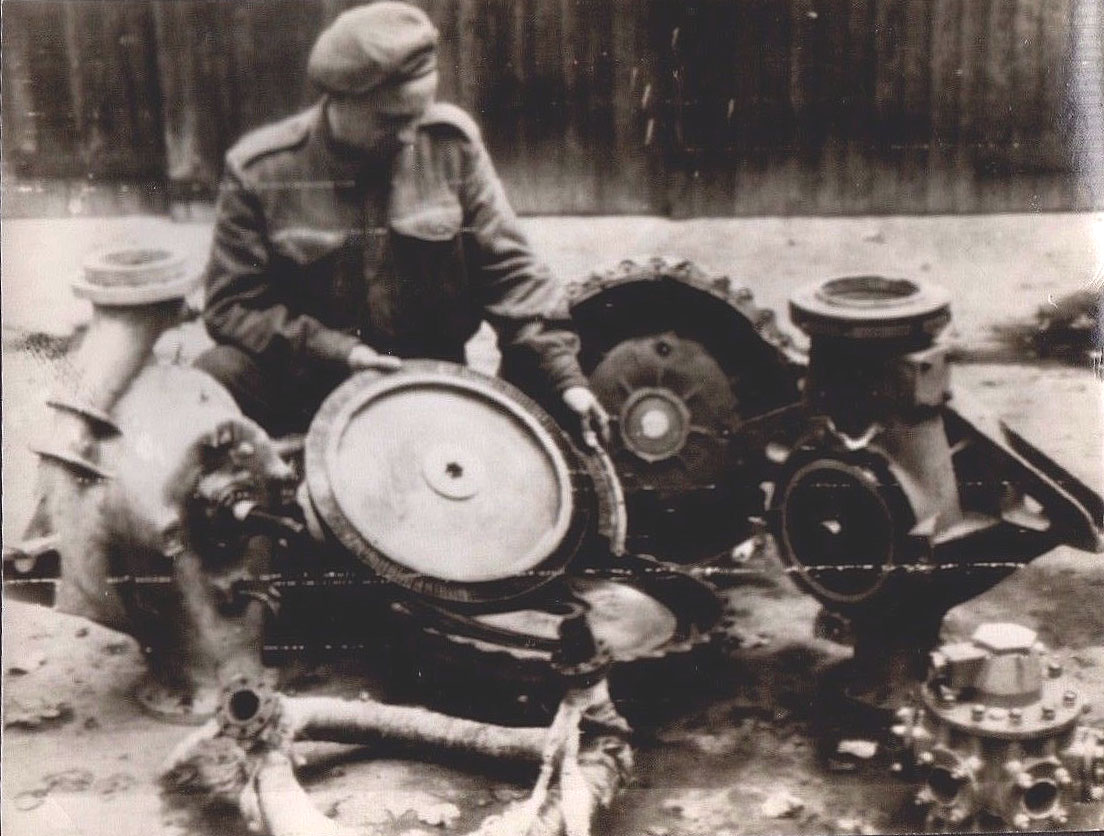
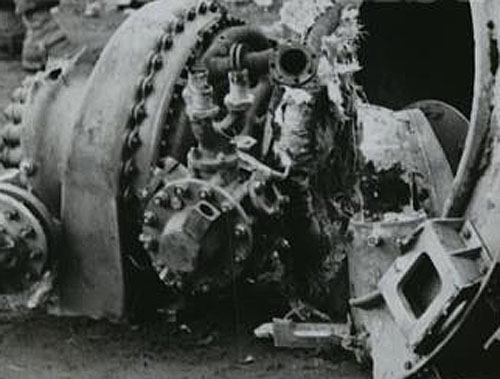
Wreckage of V2 combustion chamber with a tangle of connection pipes laying in a garden in Southern England – winter 1944. The censor has obscured the background to avoid providing the enemy with useful information. The injection head shows two connected lock ‘spanners’ securing the nuts of oxygen inlet pipes. Prior to impact all 18 of the LOX pipe input nuts would have been secured by these lightweight pressed steel ‘spanners’.
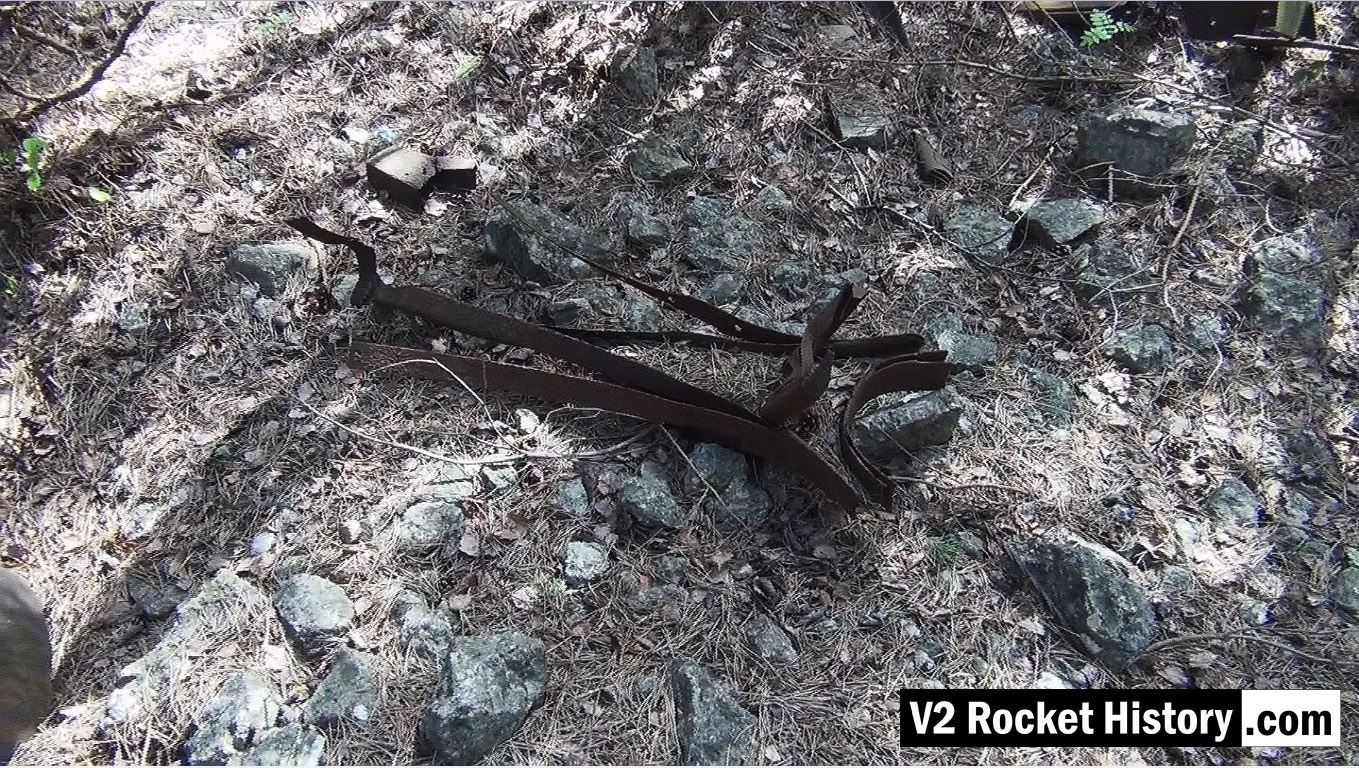
Picture shows parts of V2 missile fin structure laying on open ground near area between admin offices and F1 (near Admin. block railway platform, see map).
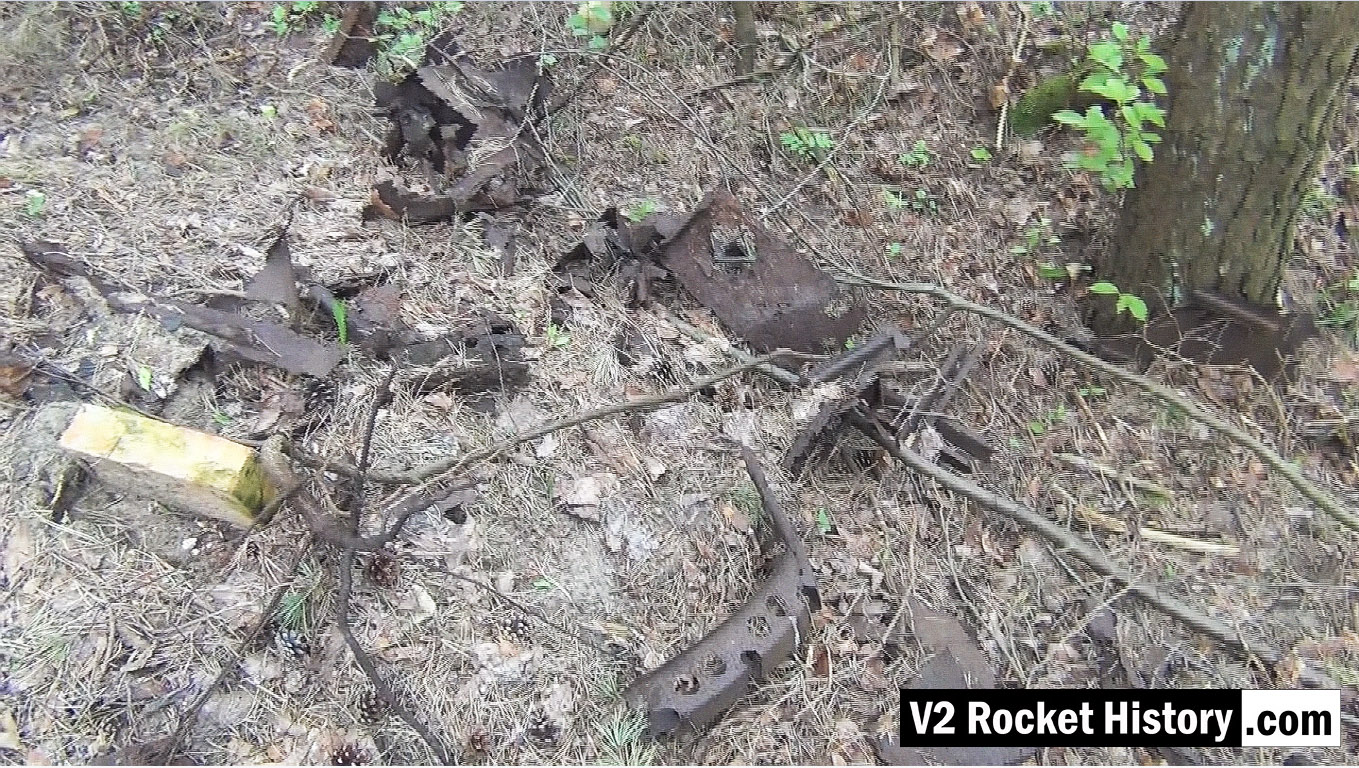
This picture shows a small debris field of steel fragments from the V2 missile 130m South-East of F1, and just 20m to the North East of the foundations of a small heat distribution building. Various body and frame parts can be seen and in the middle foreground a 350mm segment of curved missile body ring is visible. These parts have almost certainly been dug up and exposed by the action of metal detectorists. The metal fragments have been abandoned by their finders as they are perceived to have no financial value and hence are not worth removing from the site.
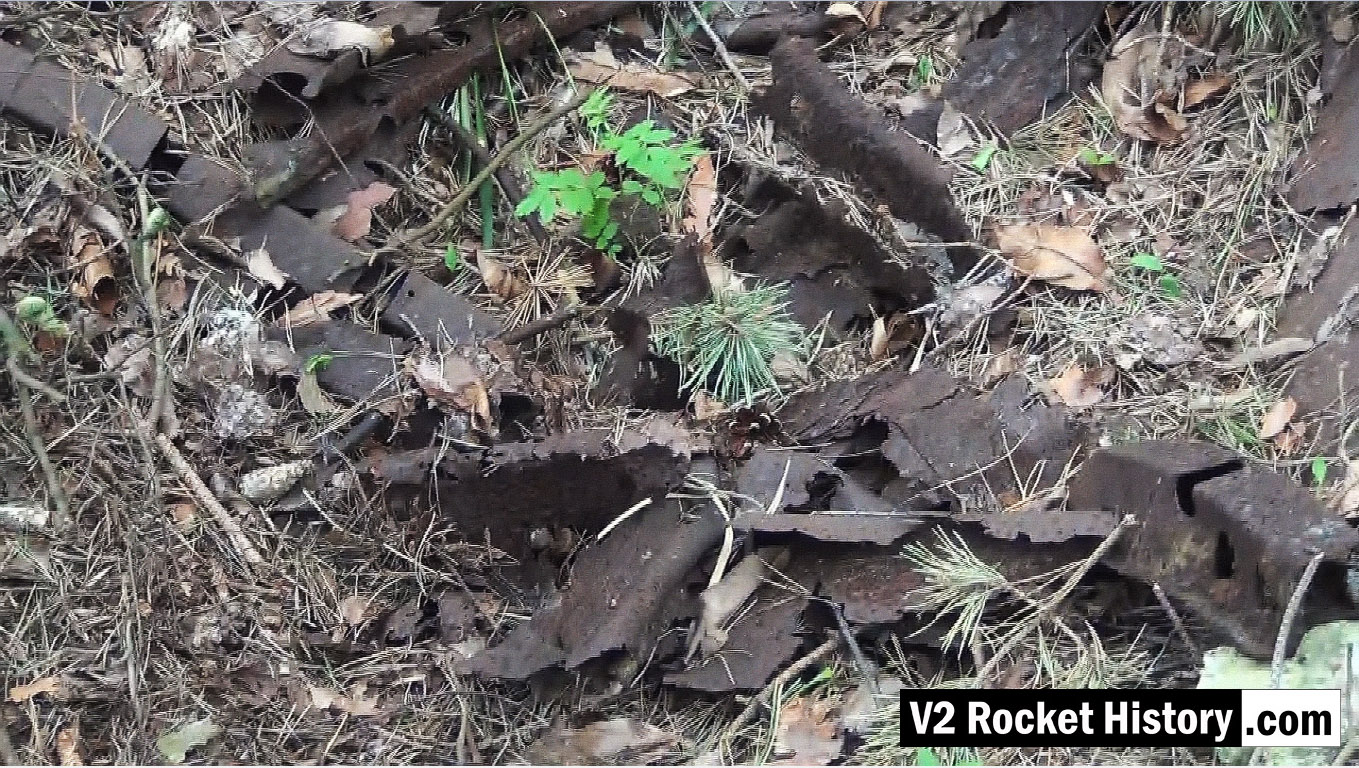
This picture shows a close up detail of parts in a small debris field of steel fragments from the V2 missile 130m South-East of F1, and just 20m to the North East of the foundations of a small heat distribution building. Various body and frame parts can be seen and in the upper left and two segments of curved missile body ring are visible. See previous.
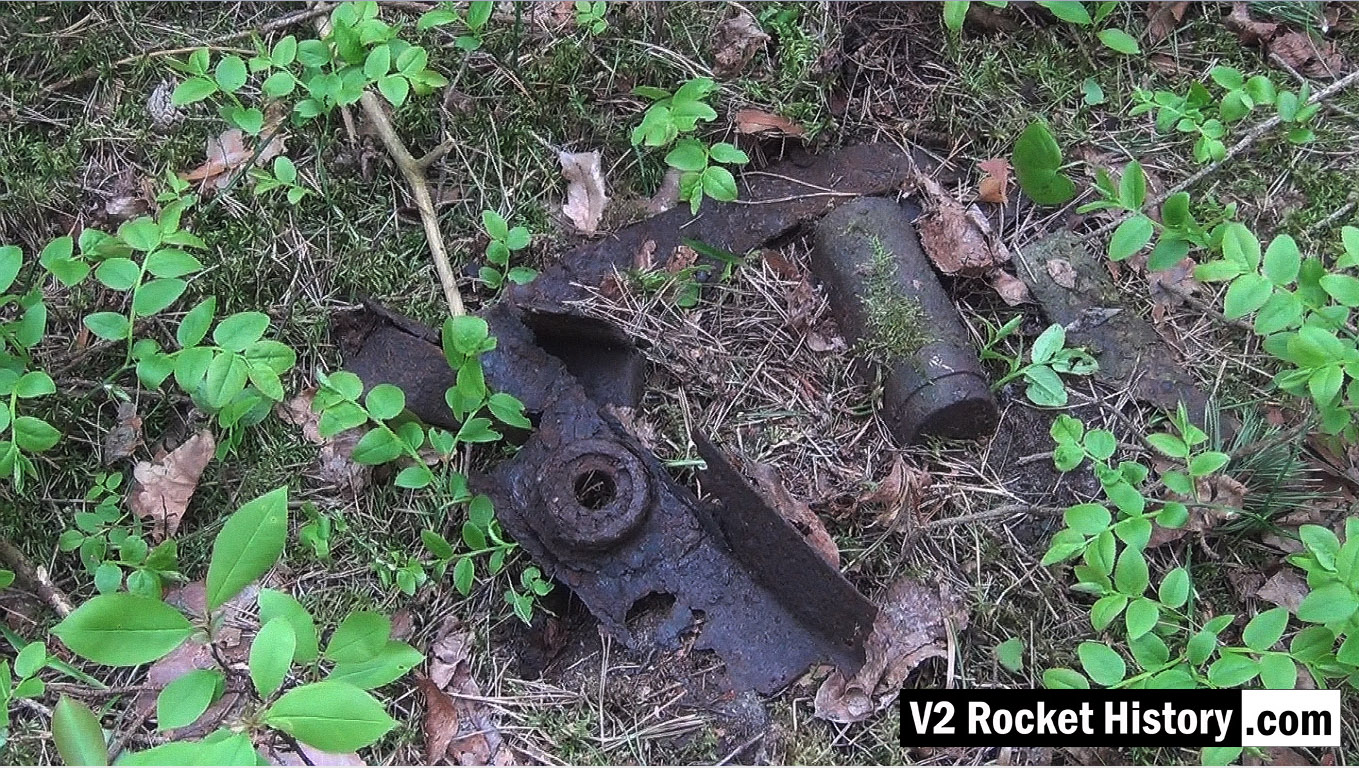
V2 missile parts in F1 prisoner turn-out or ‘free movement’ area. The location referred to is a large triangular shaped area situated on the South-East side of the pre-propuction hall Fertigungshalle Eins (F1). The area was fenced off with a high barbed wire fence (a portion of which was electrified) with guard towers every 60 metres.
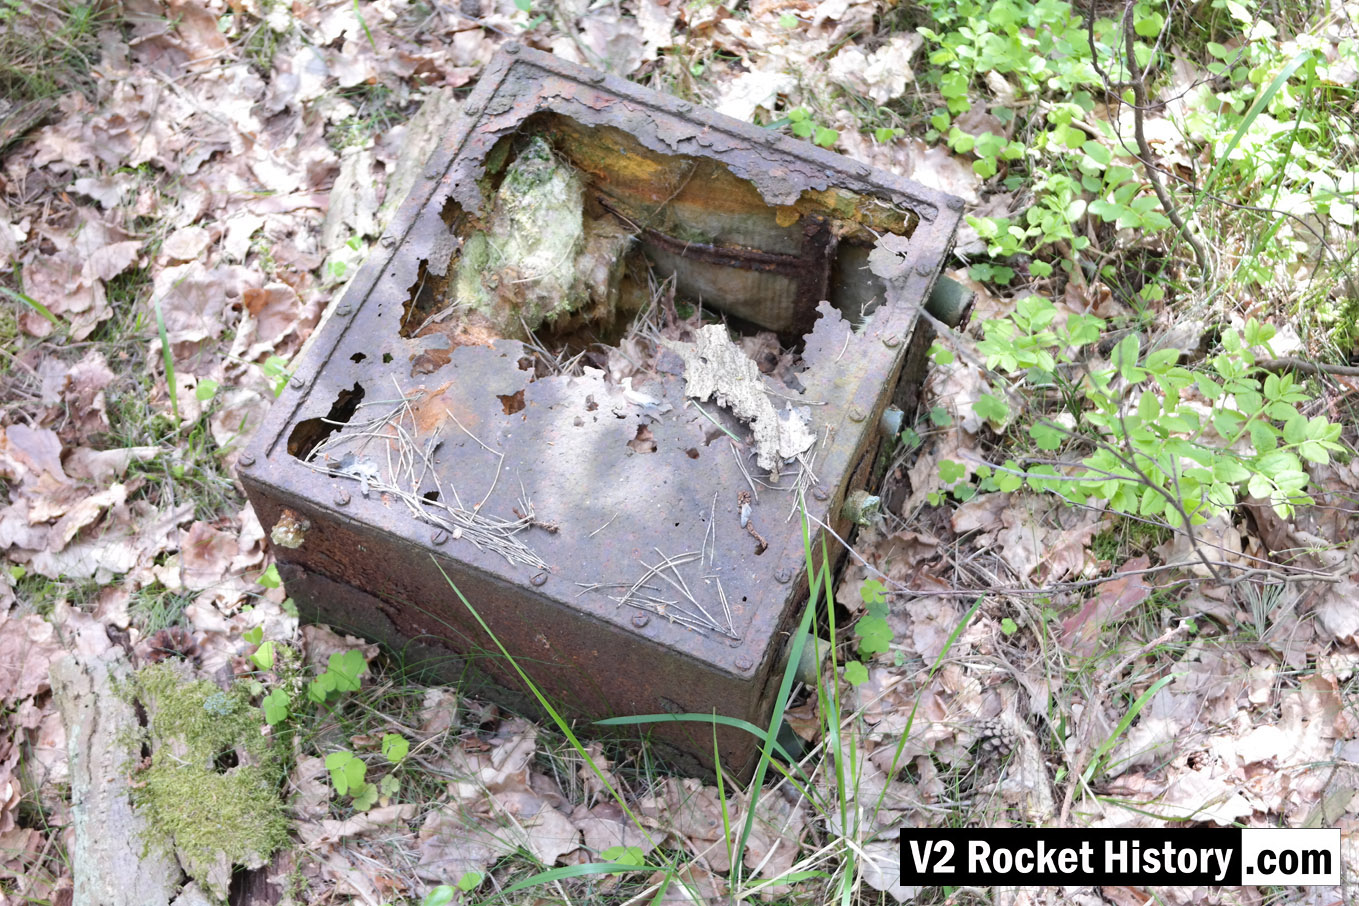
The photo shows a Lichtstrahl empfänger (In English: Light-beam receiver) environmental protection case, originally one of a group of 40 or so we first found in 2010 abandon in an area adjacent to the train platform for the administration block. On subsequent visits this number has declined to just ten or so, mostly very decayed examples. The environmental casing was vital to the Lorentz Light-Beam equipment on-board the V2 missile as the critical radio frequency would otherwise drift with the large change in temperature as the missile climbed into the stratosphere. The case was thickly insulated with rock wool or fibre-glass strands and designed to help maintain a stable temperature – indeed, the same temperature as the radio equipment was when at ground level when calibration and adjustment was completed before launch. The F1 pre-production hall is located about 200m North-West of the point where this photo was taken. Scroll down to see map below (click map and switch to ‘satellite view’ for clearer indication of location).
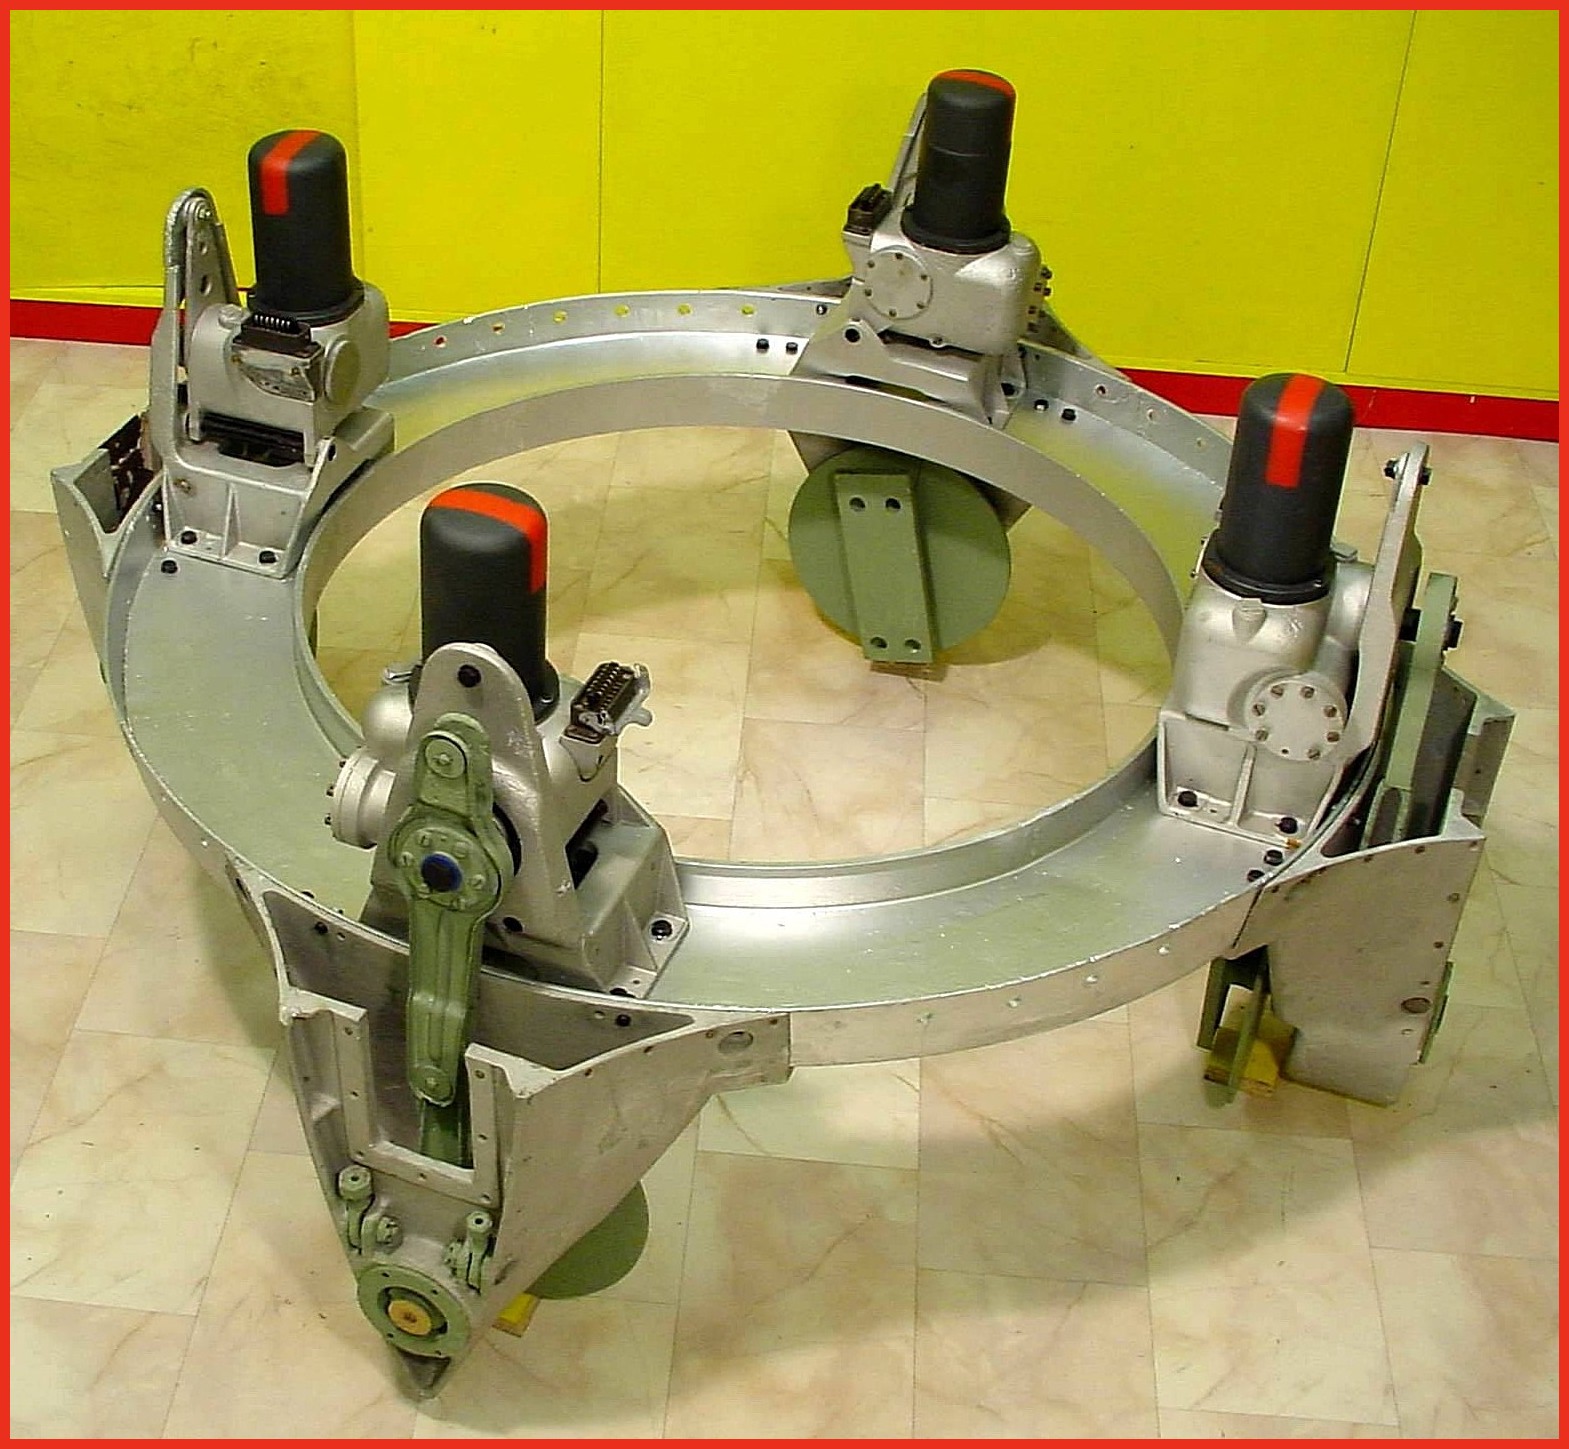
Photo shows cast aluminium thrust ring with electro-hydraulic servos in position. Note different crank lever shapes (pale green arm on servo) for fins 1/3 and 2/4 This excellent restoration is the work of Horst Beck. Photo copyright: The Horst Beck Collection
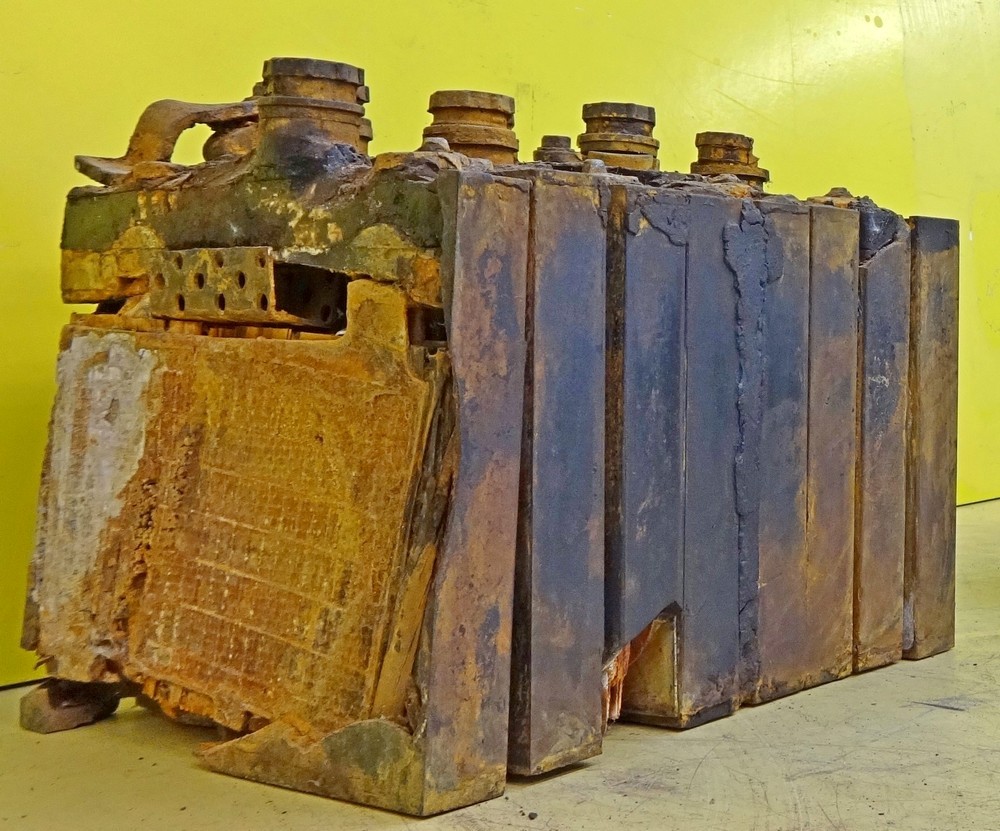
Photo shows rare surviving complete set of 8 lead acid battery cells from one of the V2 rocket’s 32 volt (100 amp) lead acid batteries. Two sets of batteries like this were used to provide the direct current (DC) voltage used aboard the V2 missile to power the DC to 3-phase alternating current (AC) generators, that in turn, powered the gyroscopes, electro-hydraulic servos, trim motors and other vital guidance and control devices. Photo copyright: The Horst Beck Collection
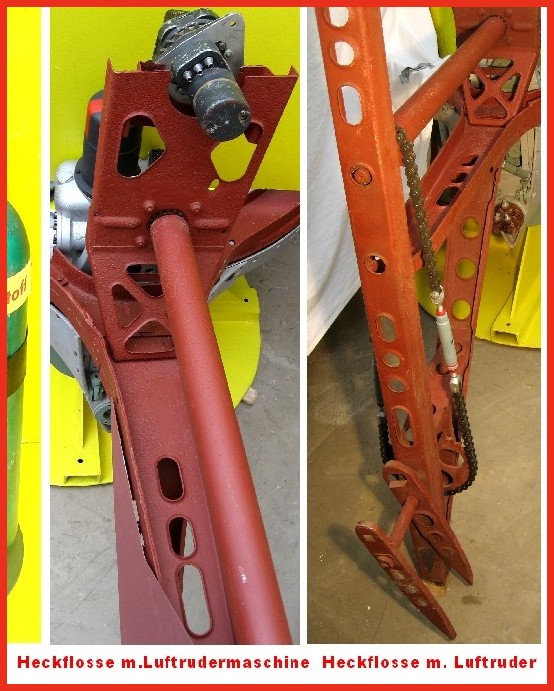
Photo shows partially restored air-rudder and fin detail. The image on the left shows the relationship of the trim motor to the air rudder drive shaft on fins 2 and 4. A chain similar in gauge to the type used on a push-bike and yet, at the other end of the shaft, the chain transmitting the torque of the trim motor to the air-rudder drive sprocket has a heavy gauge chain similar to that found on a 1000CC motor-cycle! This excellent restoration is the work of Horst Beck. Photo copyright: The Horst Beck Collection
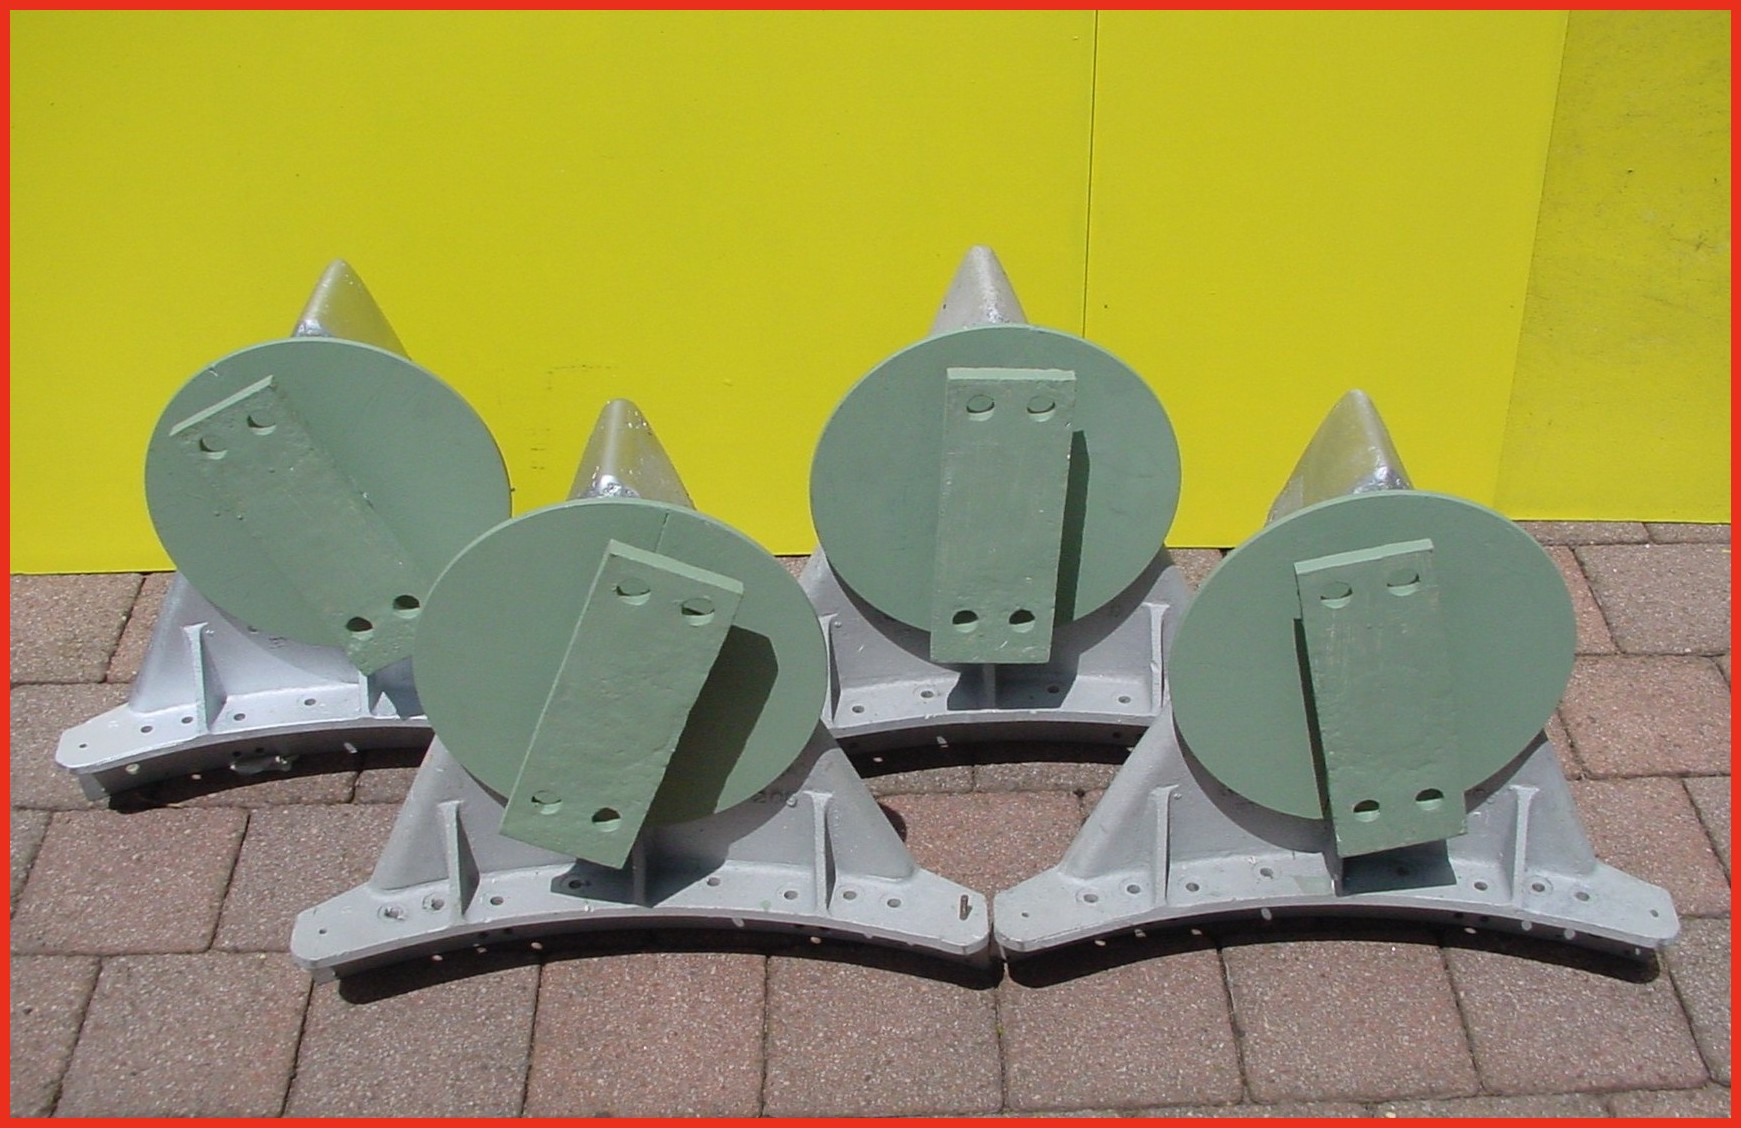
Photo shows four restored graphite jet vane support blocks and bearing housings. The round plates we can see here act as heat sinks and allow heat to radiate away from the support block and bearing to help prevent expansion due to relatively rapid and uneven temperature distribution accumulation. The graphite vanes were quite brittle and cracking caused by rapid and uneven expansion could cause the vane to disintegrate. The area around the graphite vanes was exposed to the accumulation of heat not merely as a result of duration of the motor burn time but temperature was also increased at higher rates as the jet plume expanded with the decreasing atmospheric pressure as the missile gained altitude. This excellent restoration is the work of Horst Beck. Photo copyright: The Horst Beck Collection
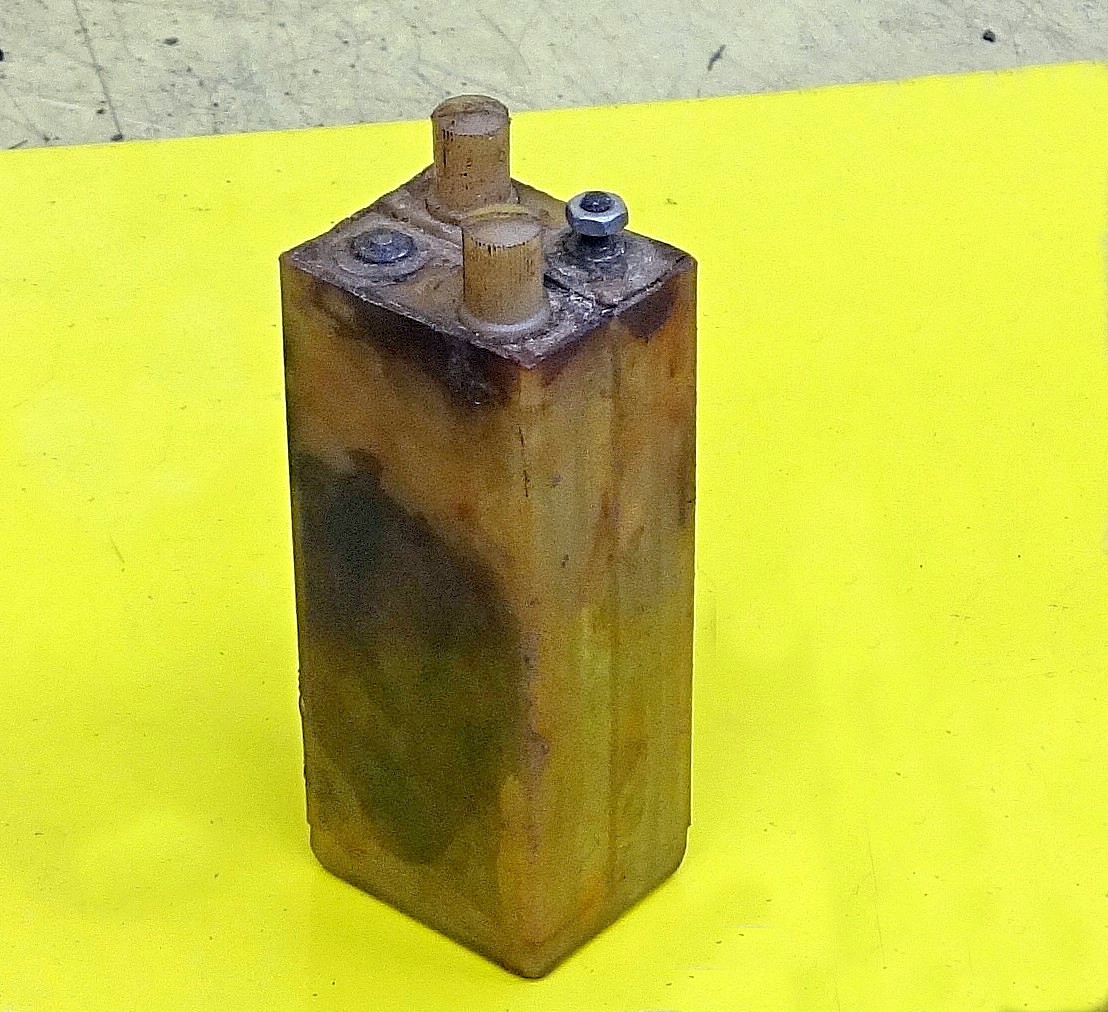
Photo shows rare surviving 1.2 volt cell from the V2 missile’s 50 volt command or signalling battery used in its gyro guidance system (note, the terminal connection on the left is missing from this exhibit, it would be identical to the one on the right). This wet nickel-cadmium battery cell was combined in pairs to a total set of 21 providing a 50.4 voltage at 300mA. The cells were contained in a wooden box that was held on a rack in equipment bay III. Its function was to provide the direct current (DC) signalling voltage that communicated the moment to moment resistance of the gyroscope’s potentiometers to the analog guidance computer (Mischgerät = Mixer-device or control amplifier) aboard the V2 missile. It was critical that the signalling voltage was maintained between 48 and 50.4 volts. Photo copyright: The Horst Beck Collection
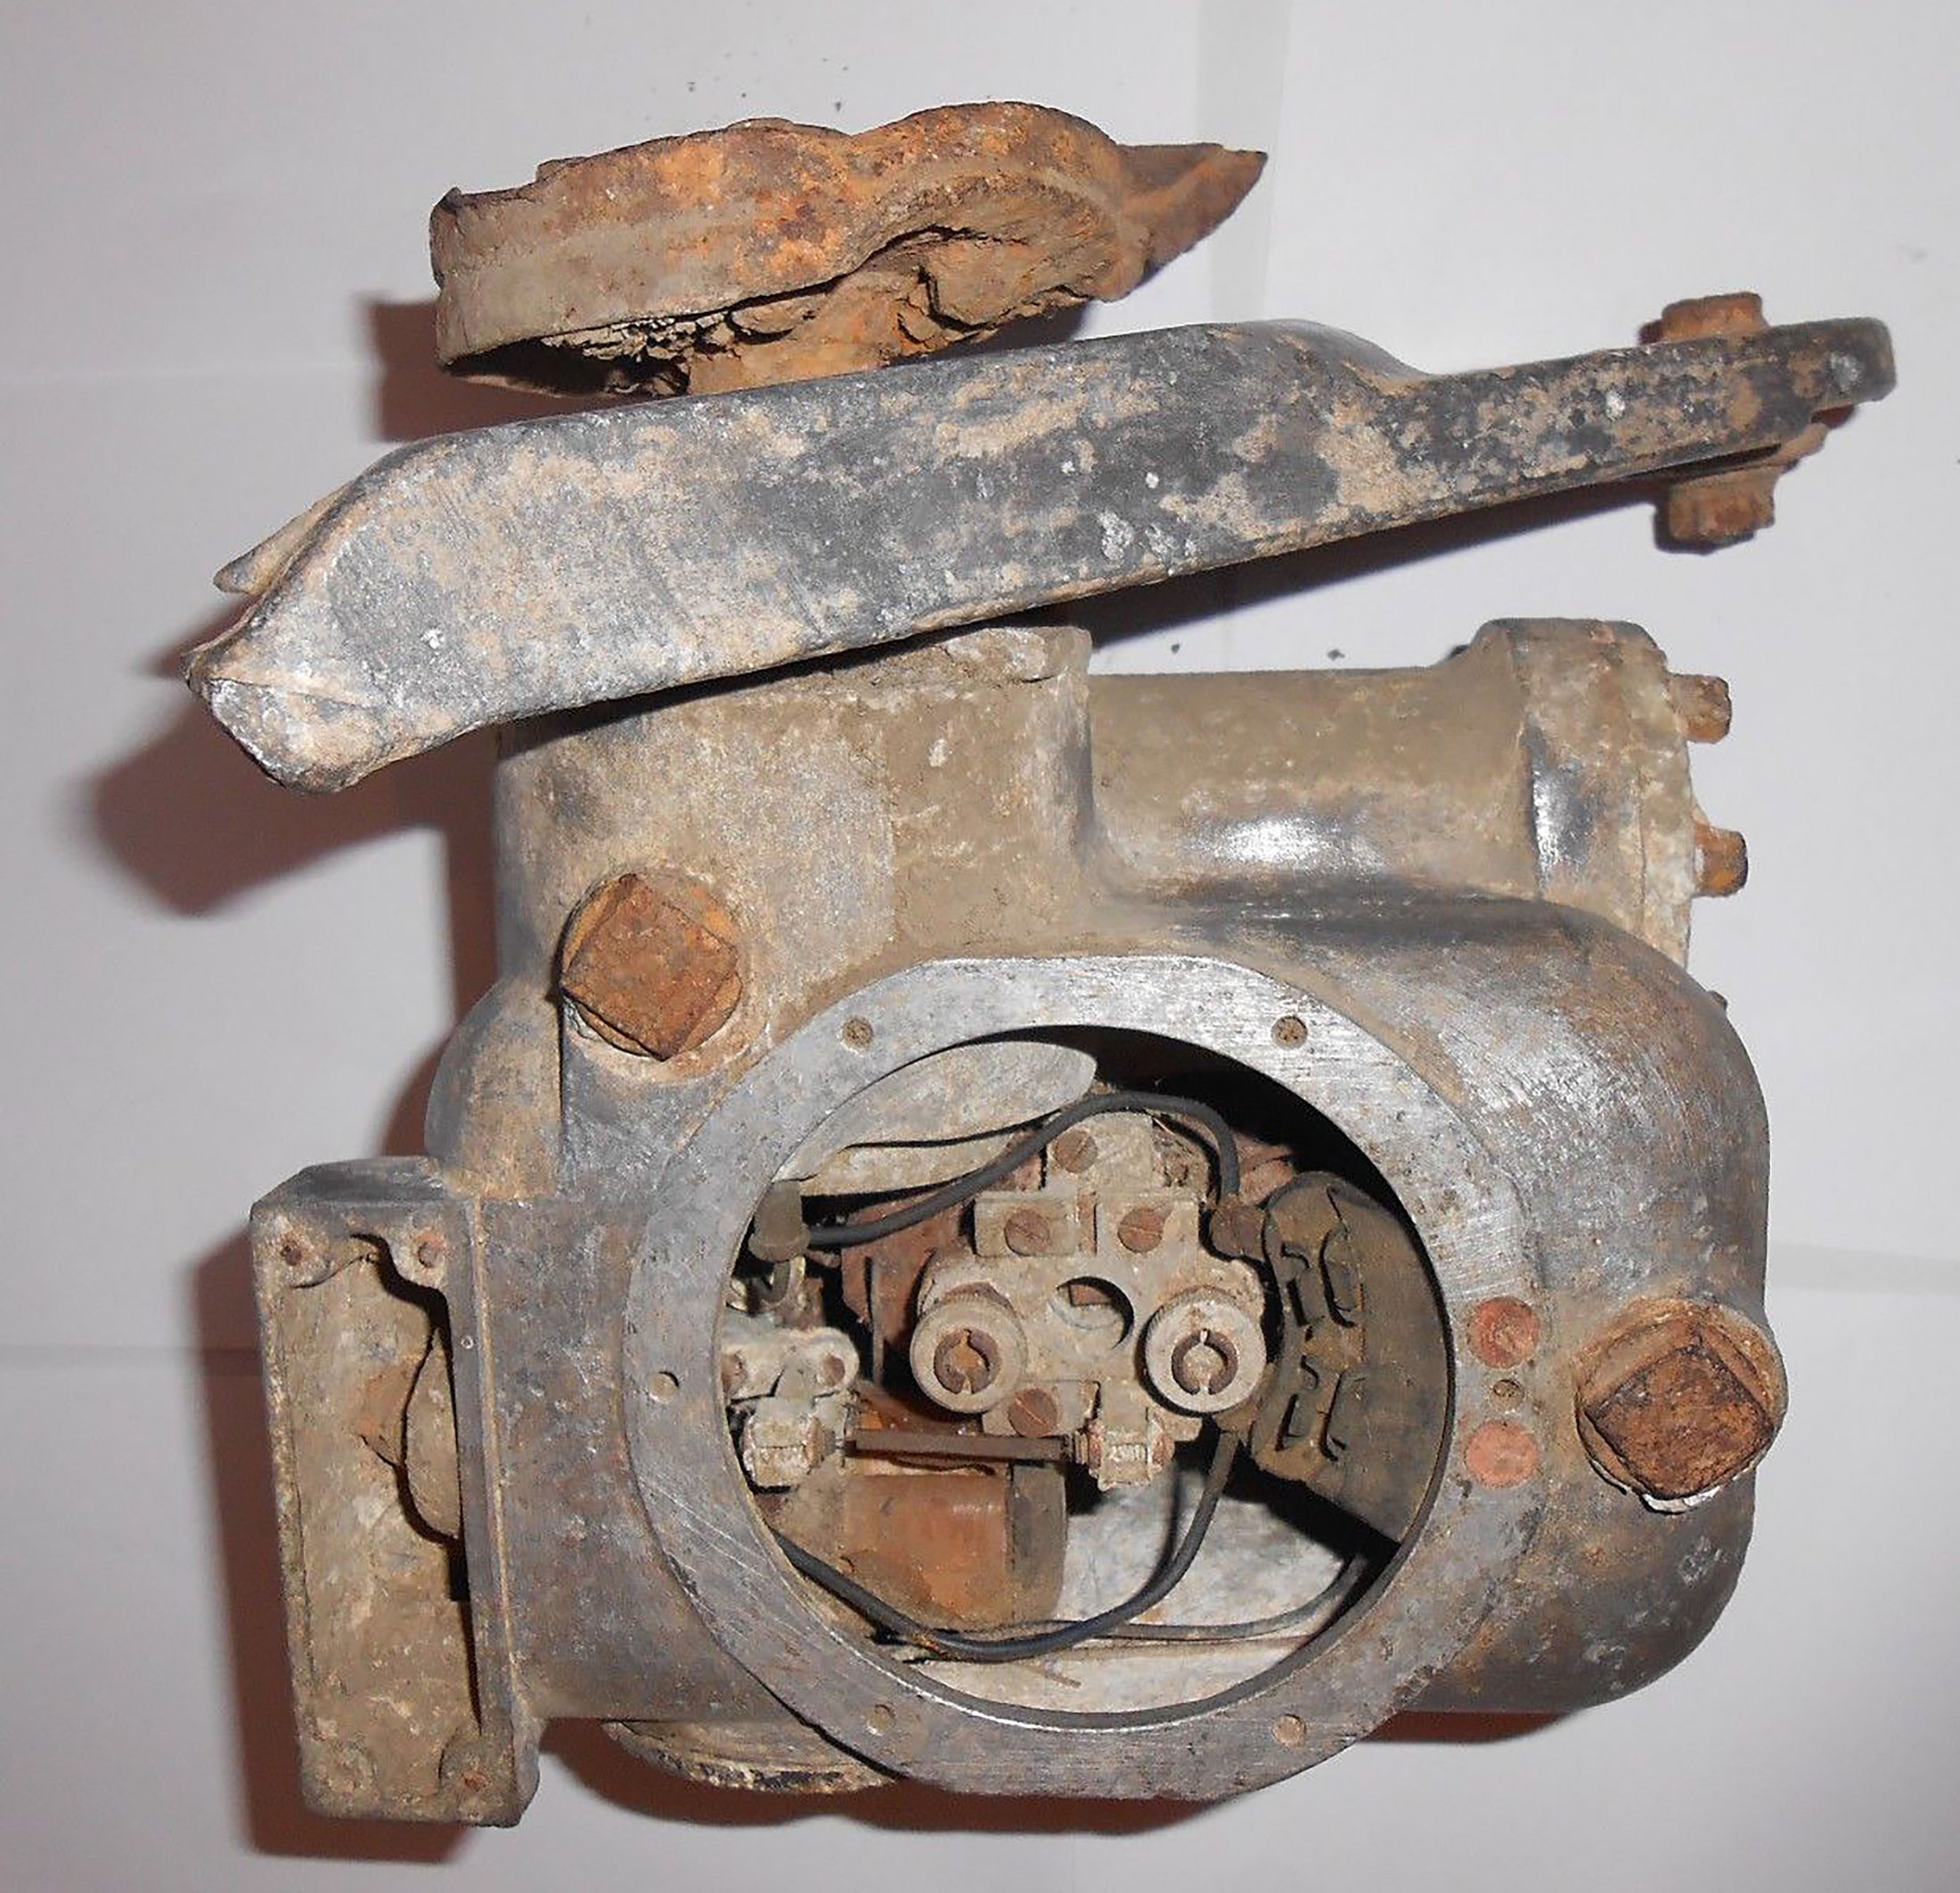
Wreckage of hydraulic servo from fin 2 or 4 of V2 missile that fell on a farm in Essex in March 1945. The motor has been removed and we can see details of the oil gear pump and valve control gear. The 3 position electromagnetic relay switch is visible at the 7 to 8 o’clock position within the open aperture. The push rod that connects the relay to the gear pump valves is also visible as a short brown coloured rod with a fine wire connector at each end, running in towards the gear-valves from the 9 o’clock position. The point that provides electrical current for the motor (which runs all the time and in one direction only) can be seen at the three o’clock position. The black housing has two sets of brass tongues that receive the matching brass spades mounted on the base of the motor for power input. The motor drive shaft has a female square socket coupling to connect the motor to the middle drive gear of the gear pump. A small portion of the square drive shaft of the central gear can just be seen in the photo – in the centre of the valve control block.
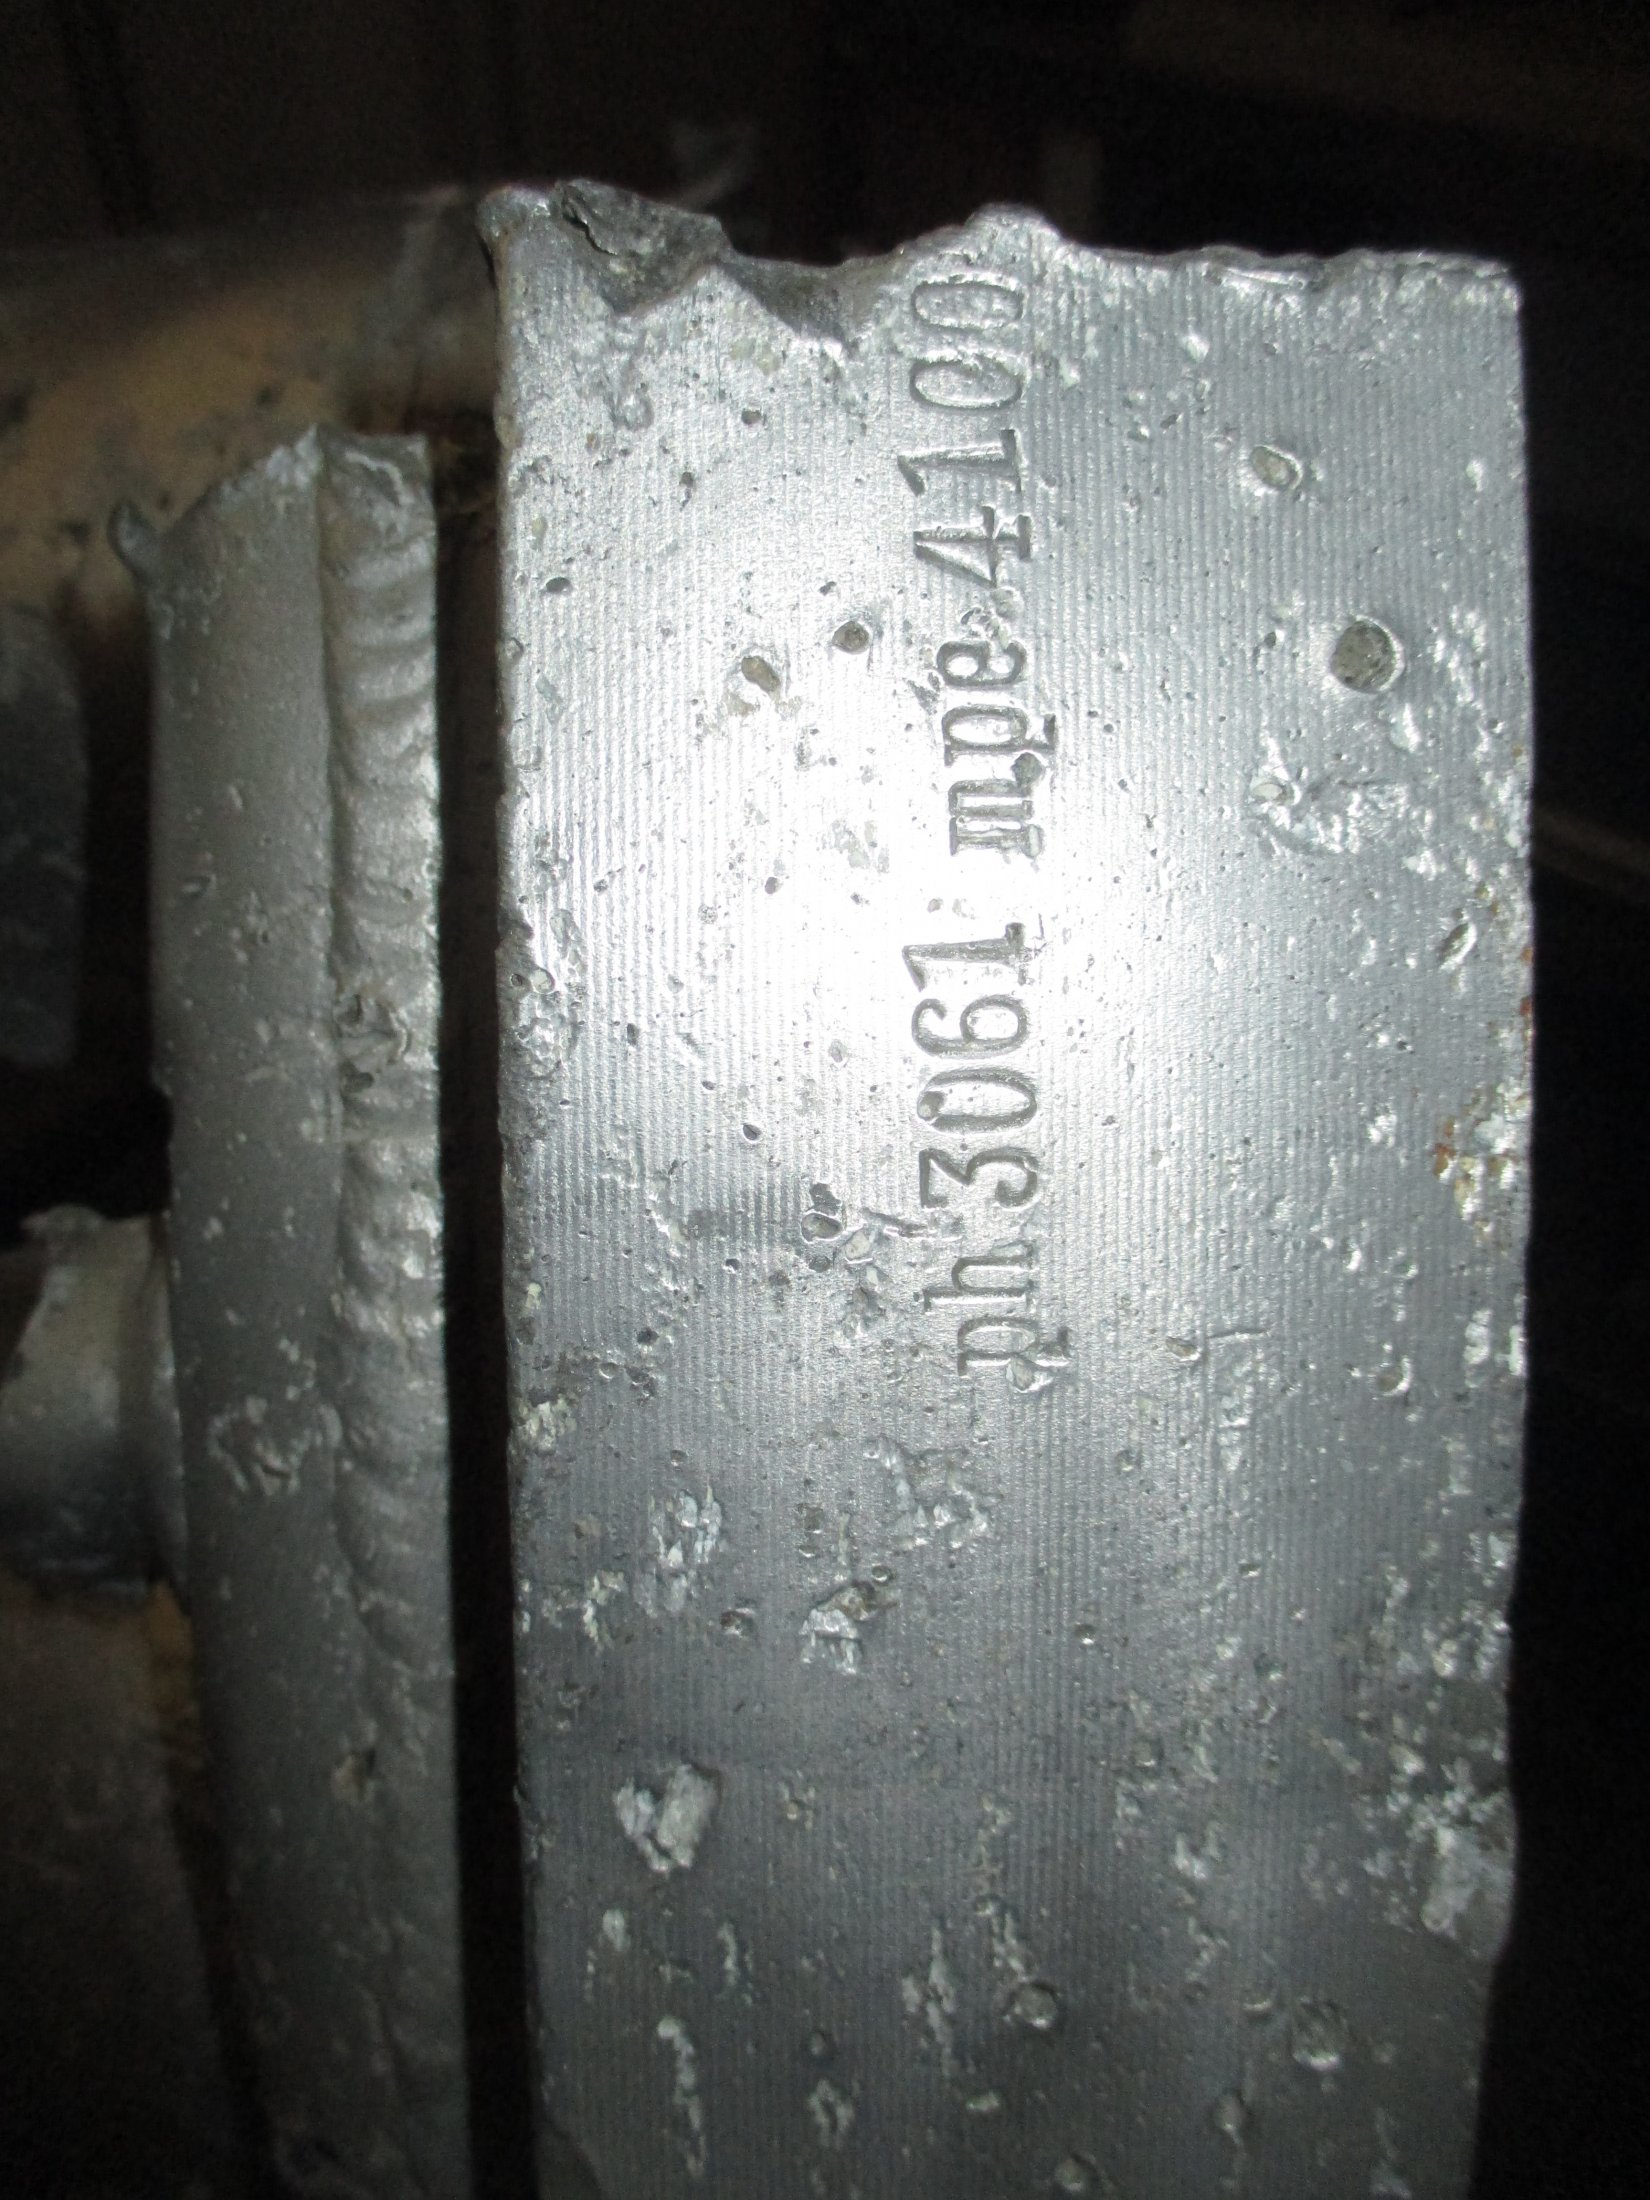
25-Ton aluminium injector head showing mpe armament code for the Heimat-Artillerie-Park 11 (HAP11) Karlshagen Werk Nord.
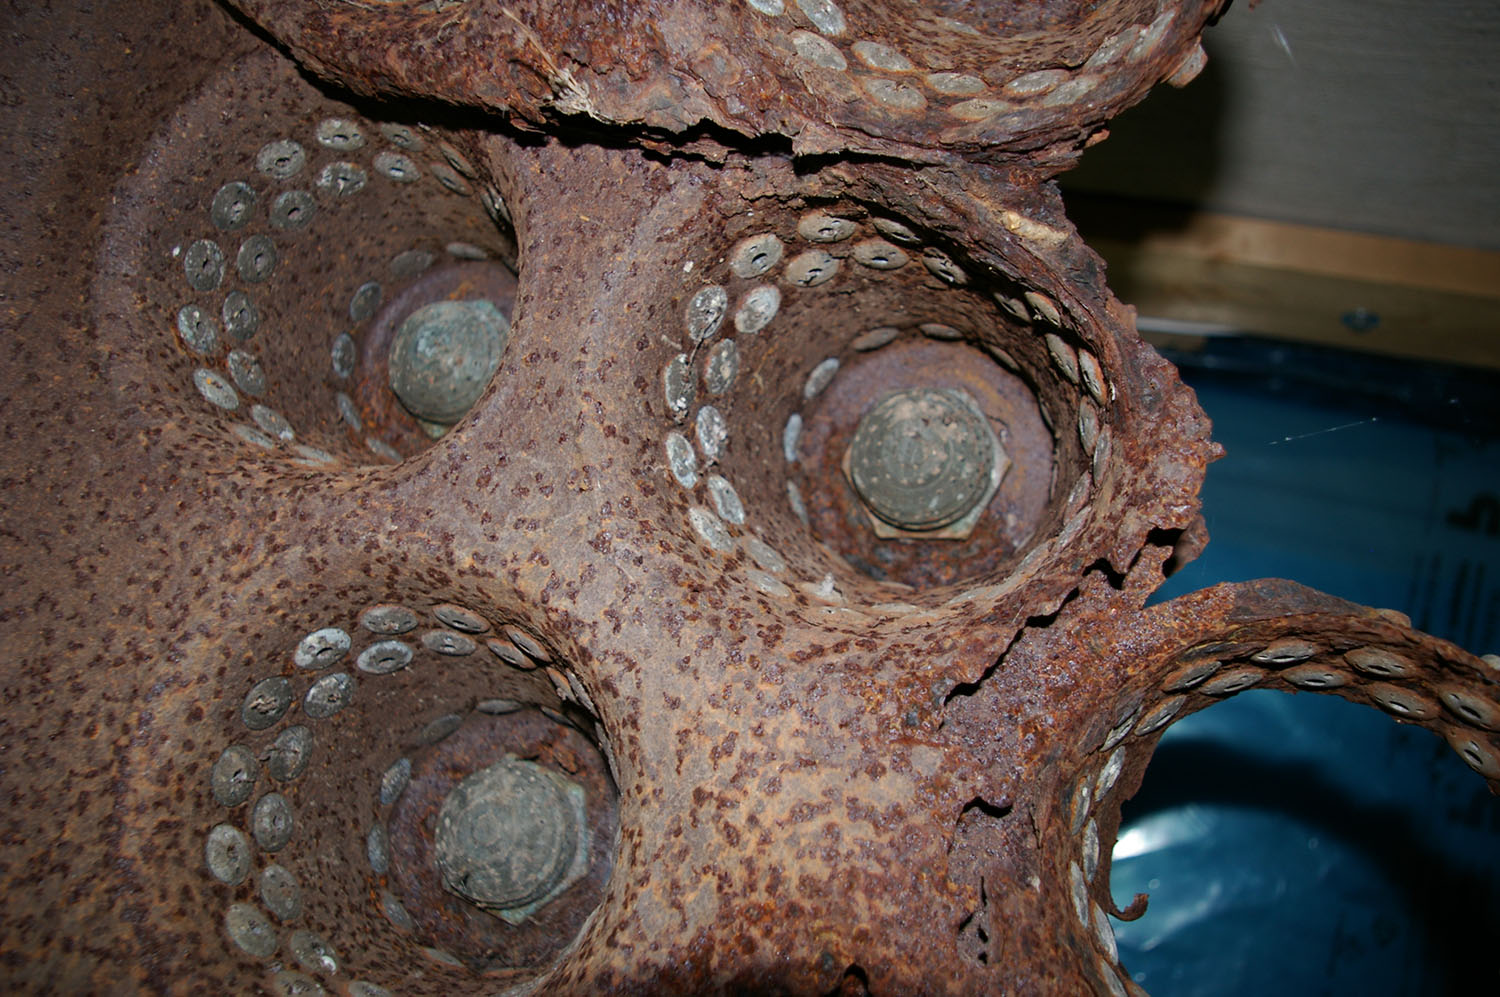
Relics of the A4 25-ton 1941 aluminium injector head. See other photos in this series for more detail. Photo courtesy Horst Beck Collection
Part of the ‘Standard’ series A aluminium head from 1941 to early 1942. Showing the position of standard type LOX injector. The brass fuel injector inserts type and position pattern on the relic seem to be of the standard type with the row of 3 inlet aperture type inserts positioned furthest from the LOX injector. Photo courtesy Horst Beck Collection
Injector head relic from February 1945 showing injector insert type and pattern. Photo www.v2rockethistory.com
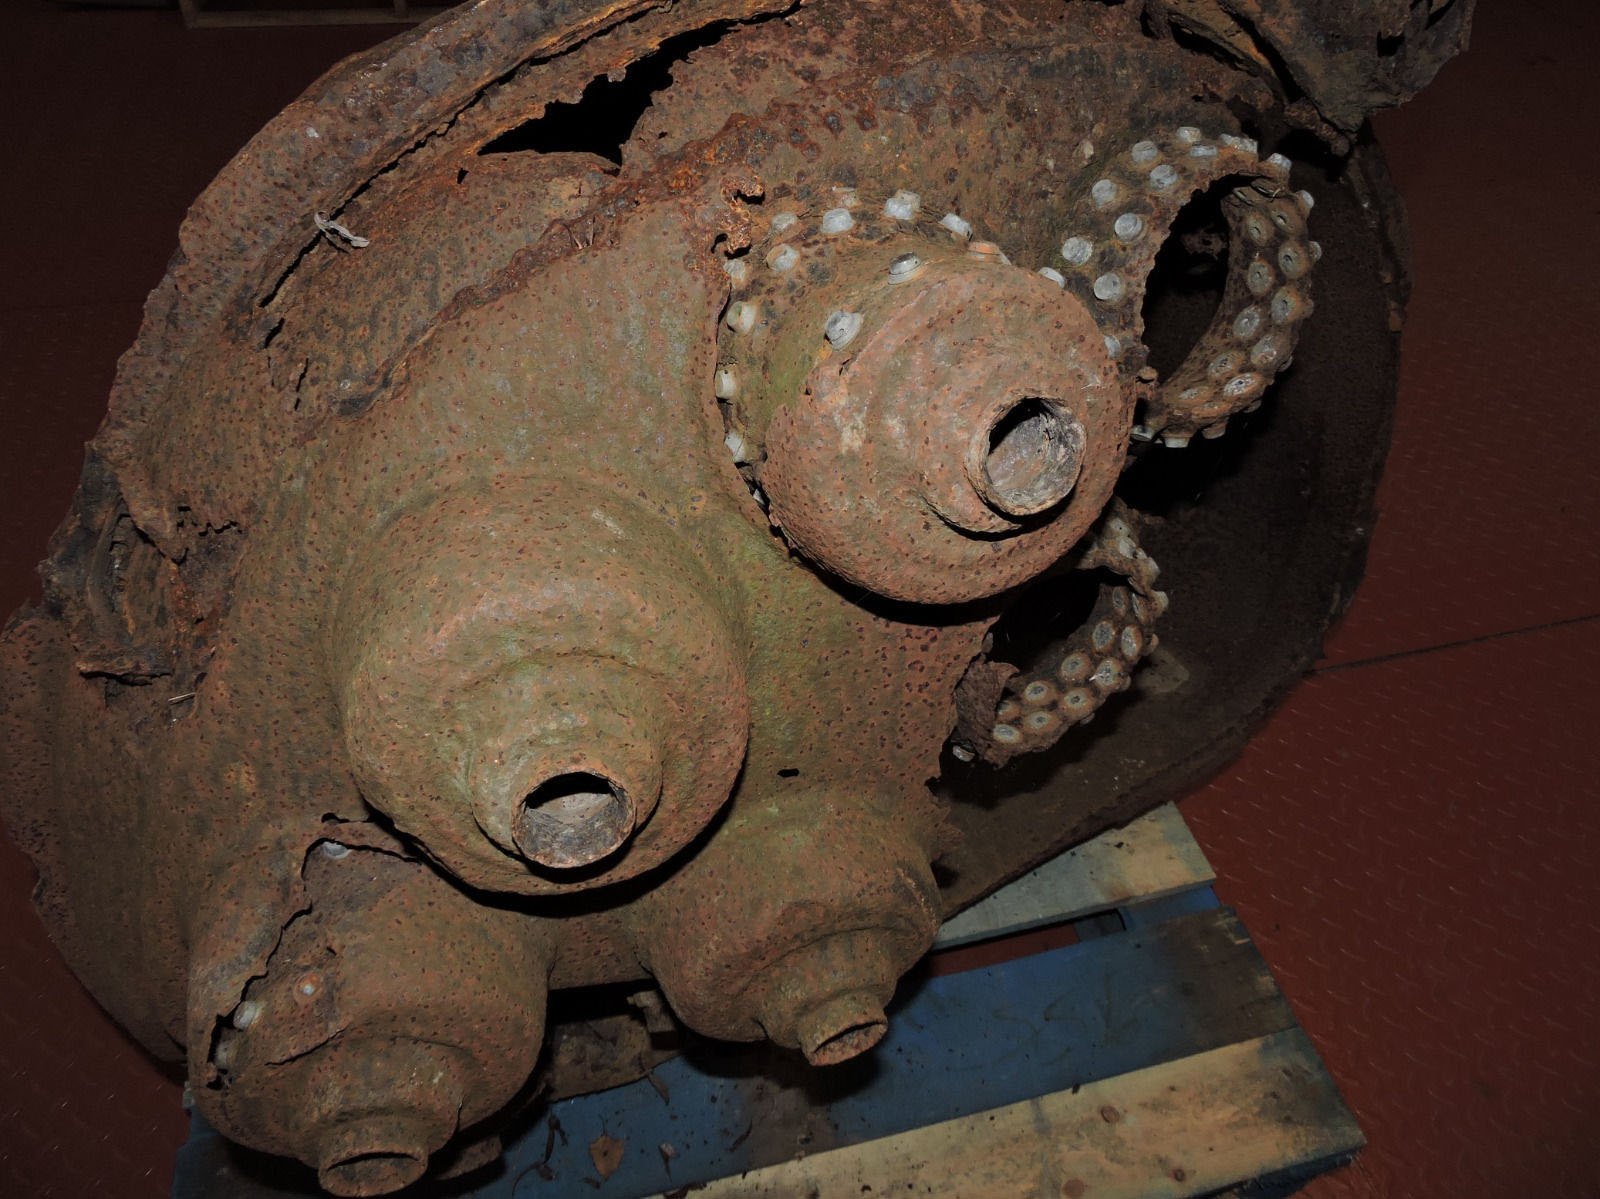
Flown V2 thrust chamber relic from February 1945. Badly damaged from impact, this head shows 4 intact LOX input pipe connections as well as exposed fuel injector inserts positioned in the inner wall of the injector pots. The inner and outer walls of the head are also conveniently exposed on this exhibit. Photo www.v2rockethistory.com
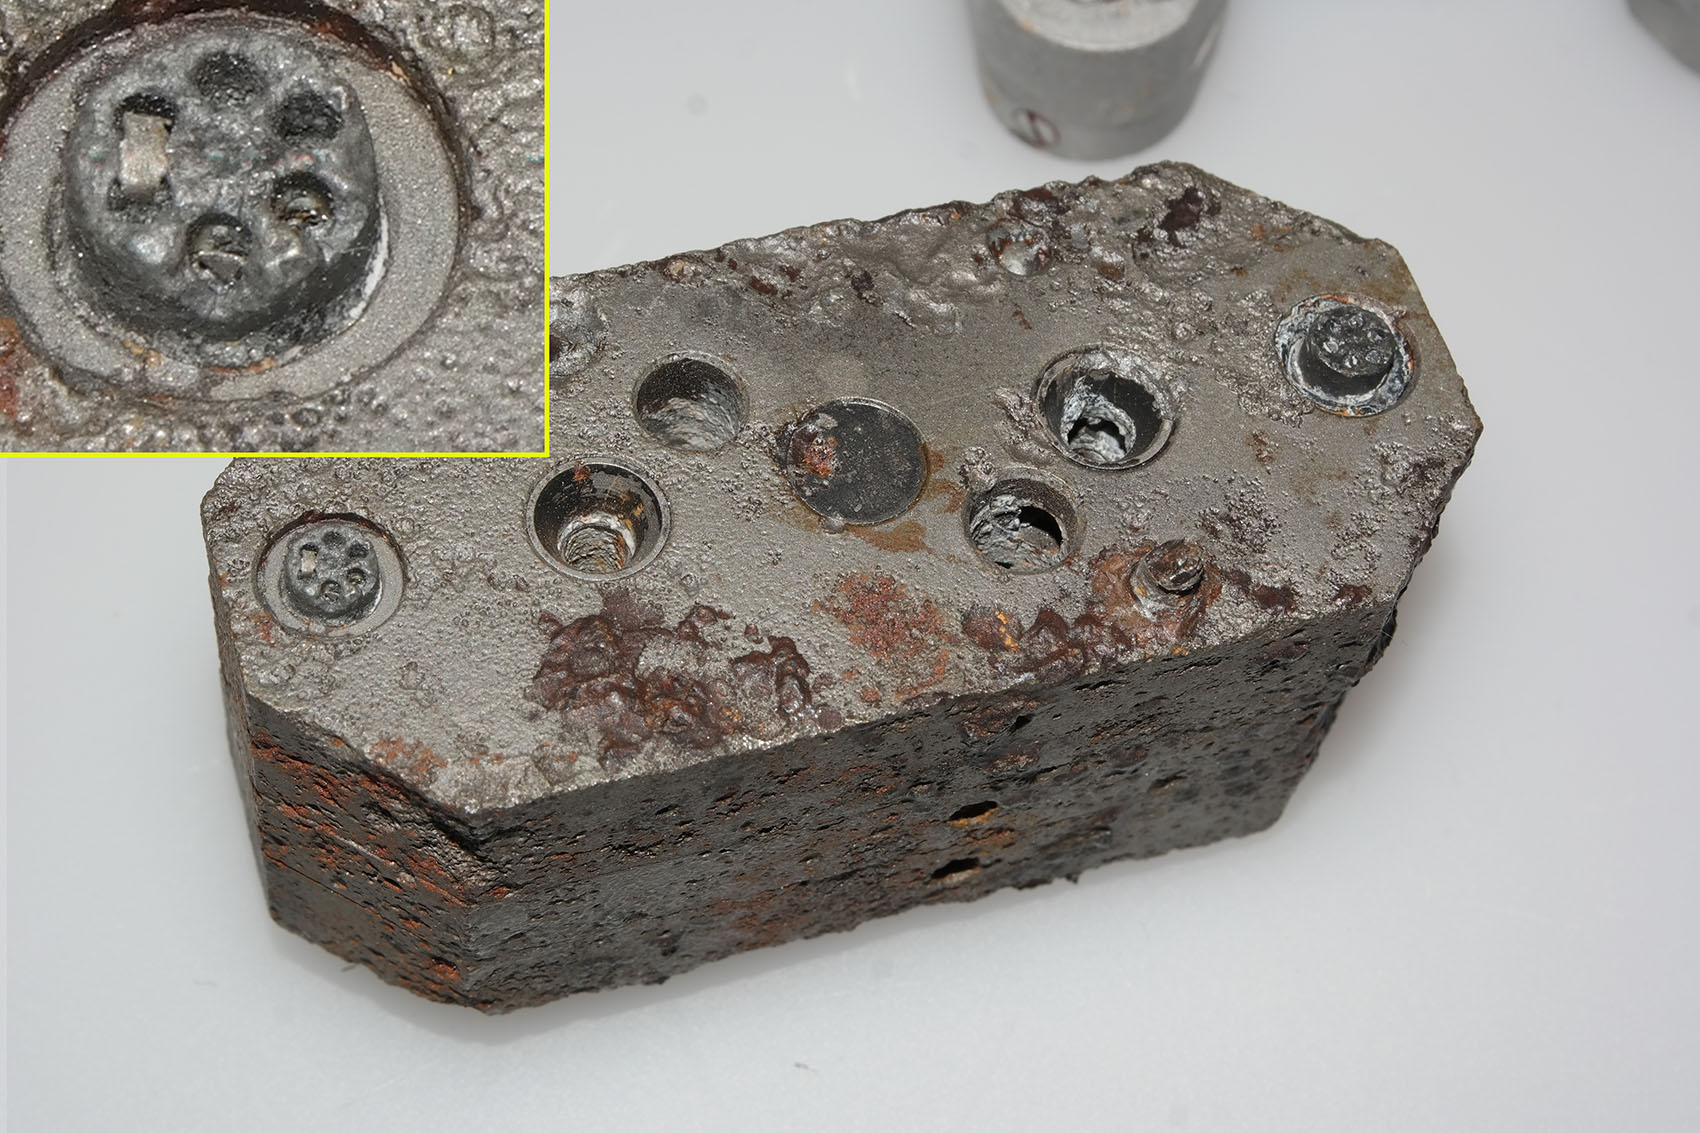
Hydraulic gear pump with close up detail showing ceramic heater element insulators with flat, possibly nichome, metal strip element threaded through them. This oil heating system was designed to maintain a specific viscosity of the oil regardless of environmental temperature, to better maintain oil flow rates and thus pump efficiency. The heating system is found only rarely on surviving relics.
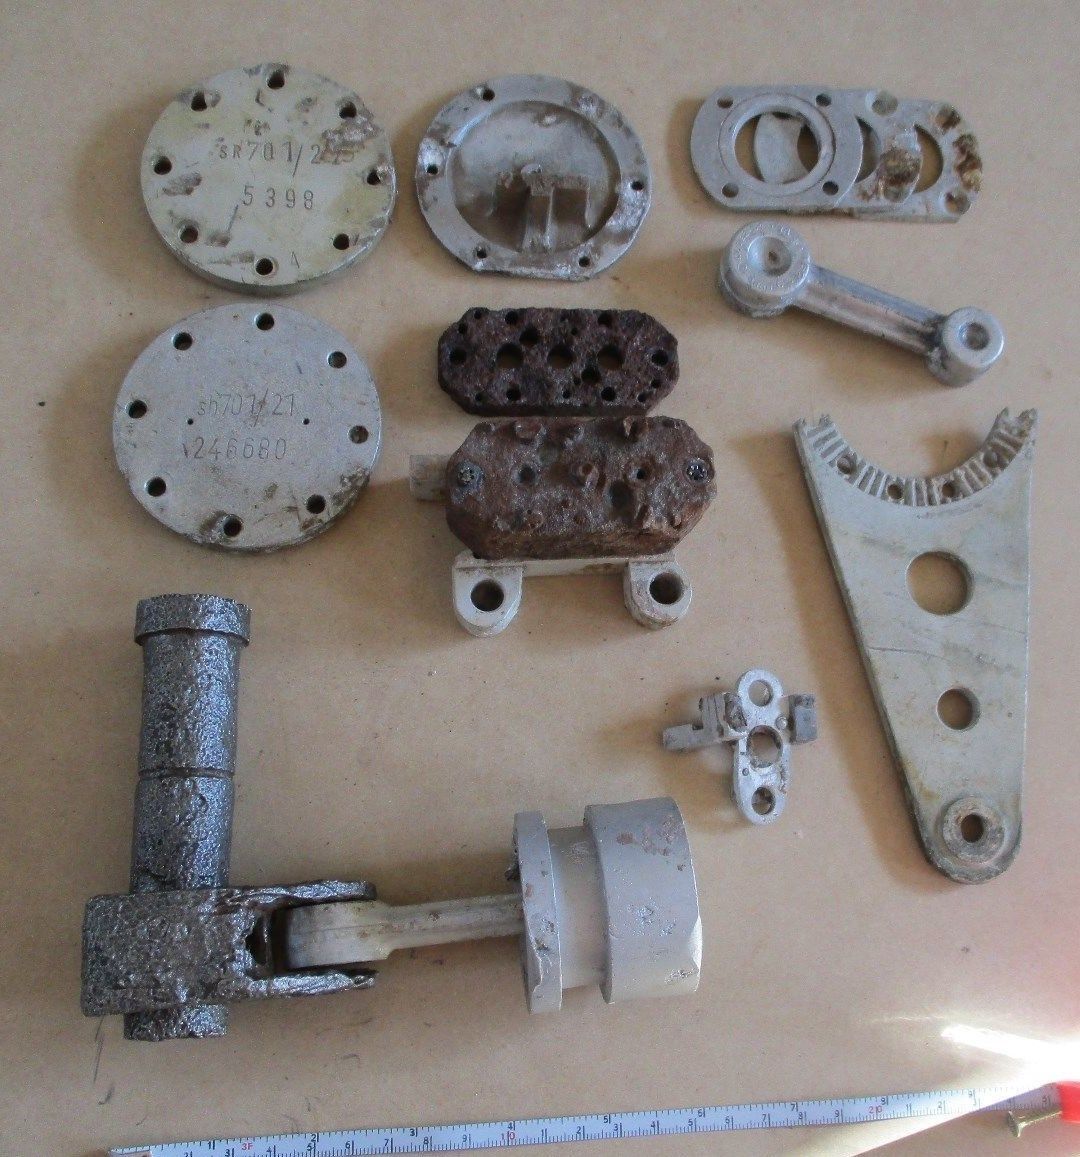
This collection of parts were all found in vicinity of the Nordhausen manufacturing facility. parts include servo crankcase caps -top left, electro-magnetic switch installation plate – middle top, crank bearing covers – top right, gear pump blocks with base – centre, and crank-shaft, piston rod, and hydraulic piston – btm left. The deep recess on the piston circumference is for a rubber seal and is an interesting variation in ring seal design (at least 4 variations of piston design were employed, with three designs flown on combat missiles). A valve tilt seat is visible a little to the right of the piston. A broken servo mount stabiliser is shown – middle right. The cast piston rod, top right, has not been drilled and milled – the part is ‘raw’ as supplied by the manufacturer before machining has been completed. Normally the manufacturer’s details are machined off the metalwork – but not in this rare case. The three letter code gfa is clearly visible on the part and stands for the firm of Otto Fuchs Metallwerke.
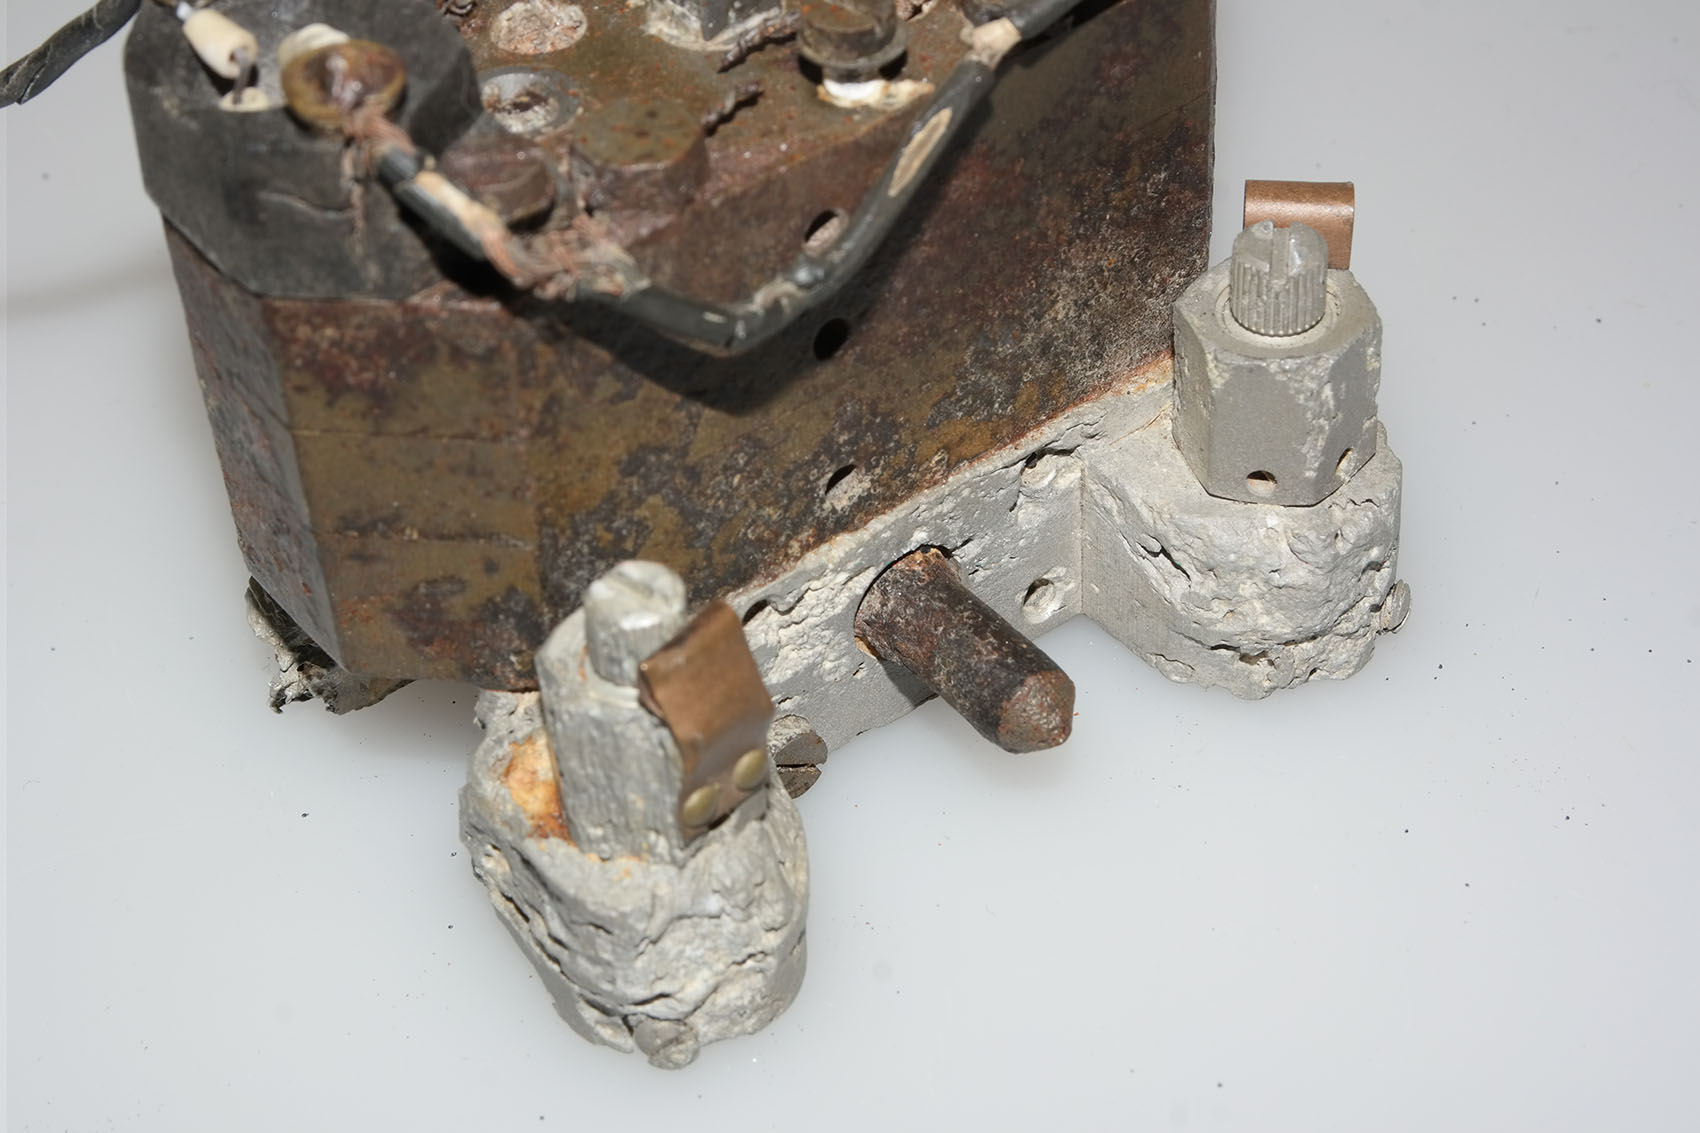
Close-up of Askania gear pump relic with oil heaters. This picture shows an unusual feature on the otherwise normal cast aluminium base of this gear pump. The knurled knob positioned between the oil flow balance adjusters has a purpose that is unknown to us. The two oil-flow balance adjuster valves visible in the picture have slot head adjuster screws and you can also see the knurled circumference on each screw. This parallel knurling is engaged by a crease formed in the facing surface of the copper spring strips. The function of these strips is to create tactile feedback that the technician making the adjustment can feel in the handle of the screwdriver. This was done because the gear pump needed to be adjusted in a dark and narrowly confined space.
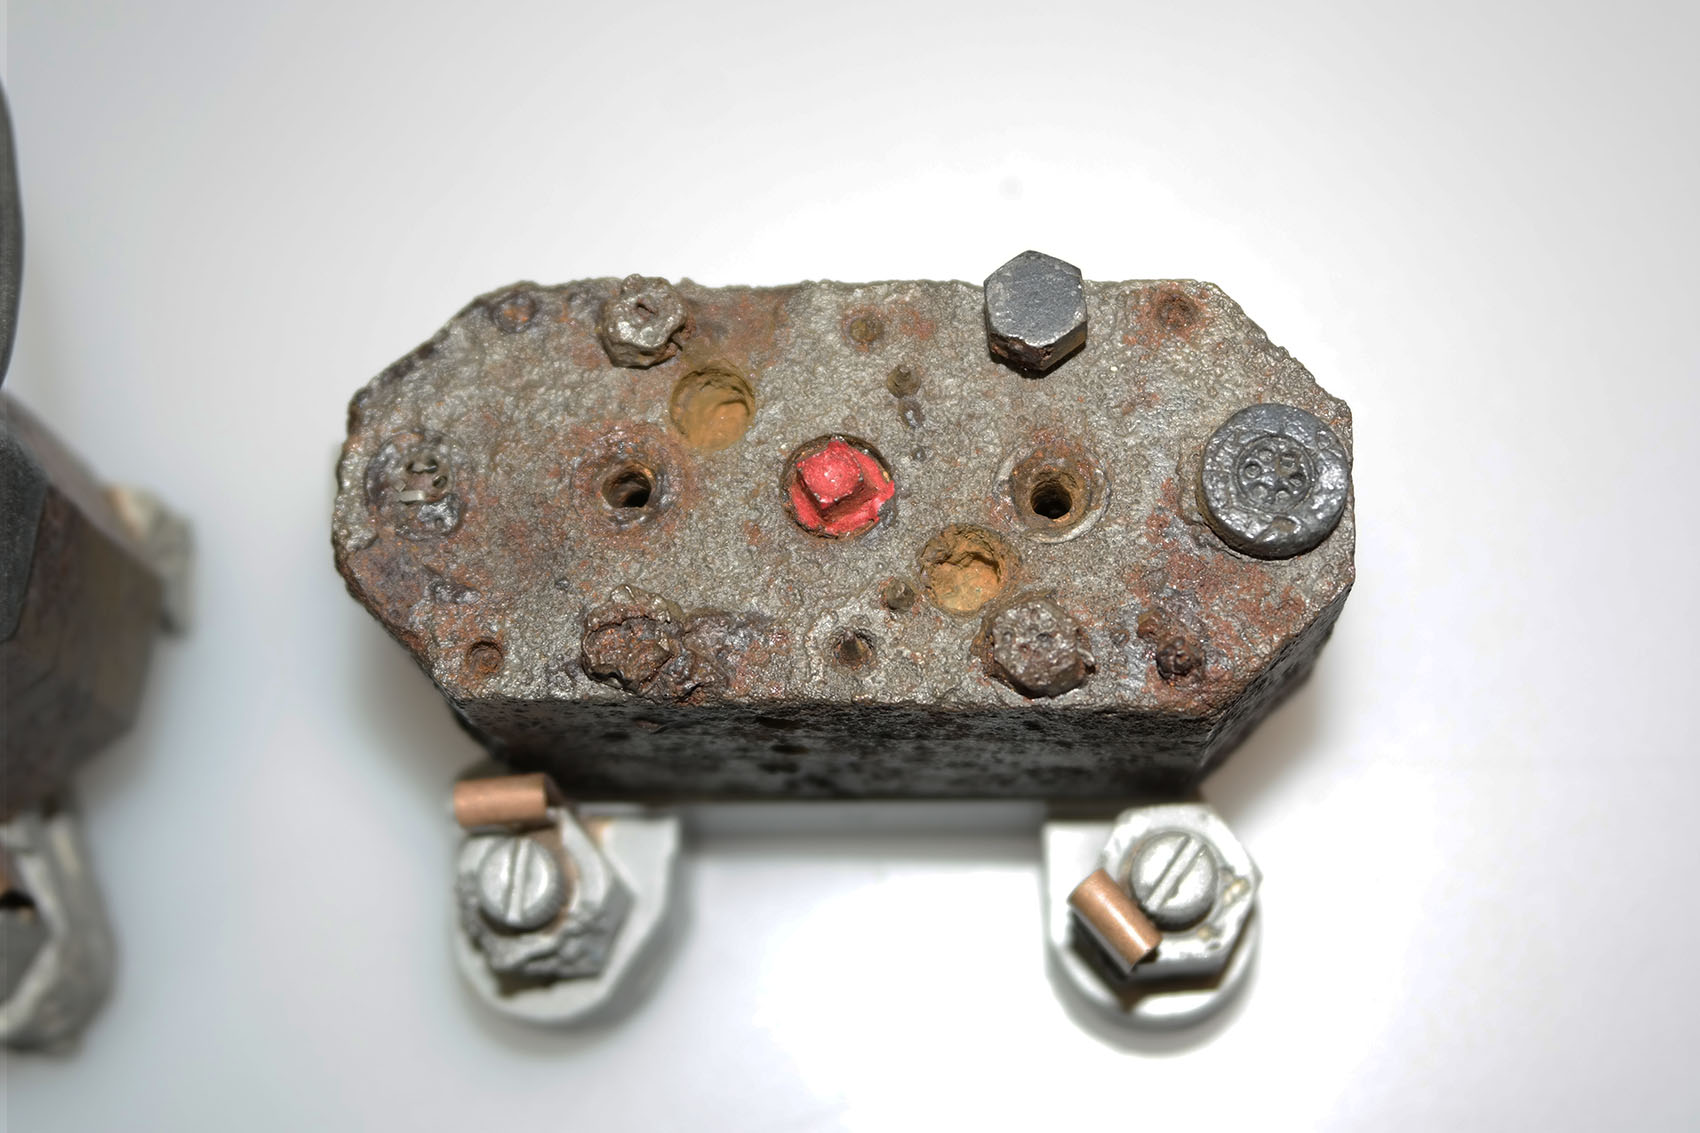
Gear pump showing flow adjusters (two slot head screws nearest bottom of picture) and ceramic heater elements situated at each end of the block. The square drive shaft coupler (corroded but still identifiable) has been highlighted in red paint. The open holes either side are the main control valve guides. The copper spring strips visible on each oil flow adjuster provide locking and tactile feed-back for the adjusting process. This relic was recovered from Usedom island.
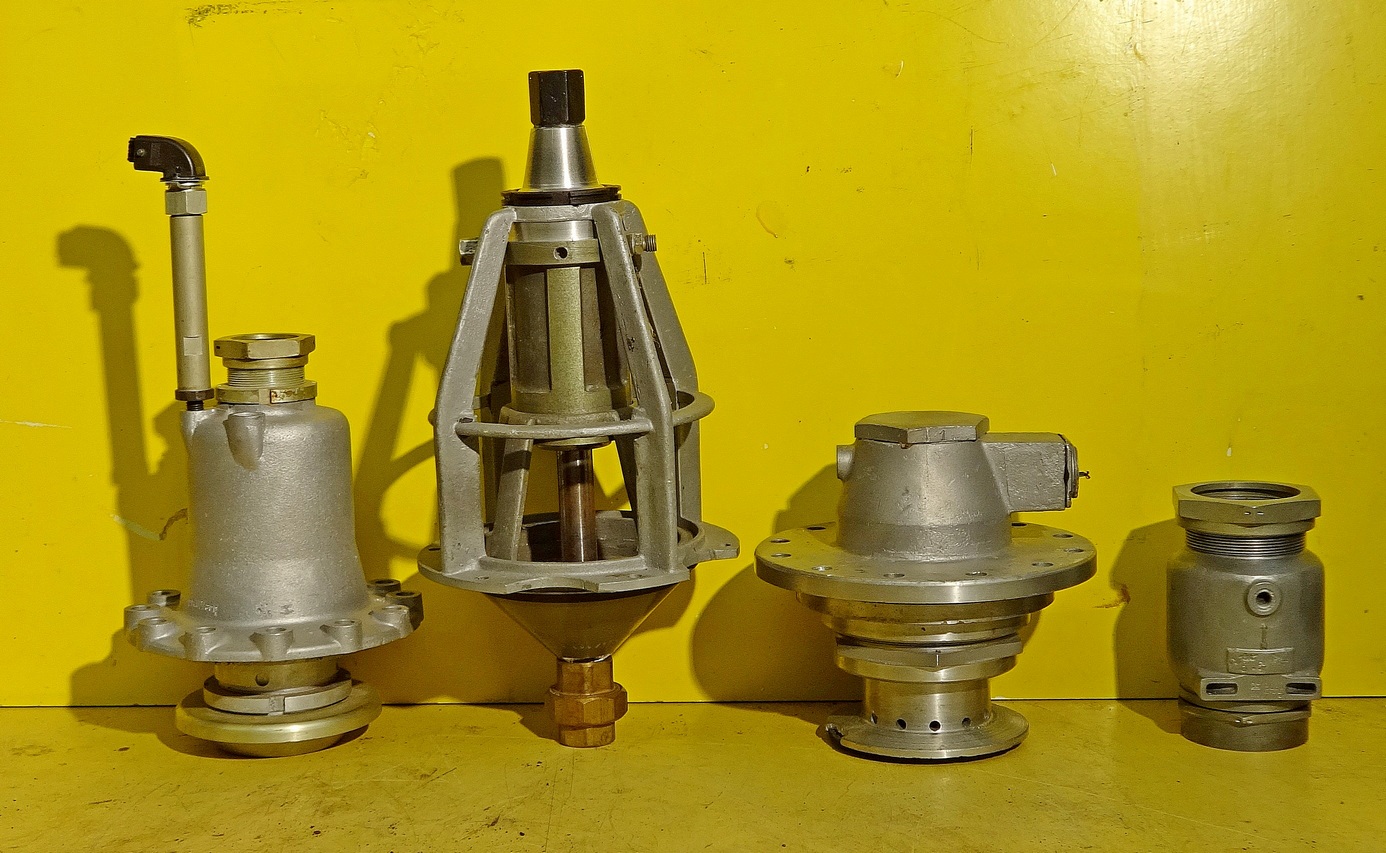
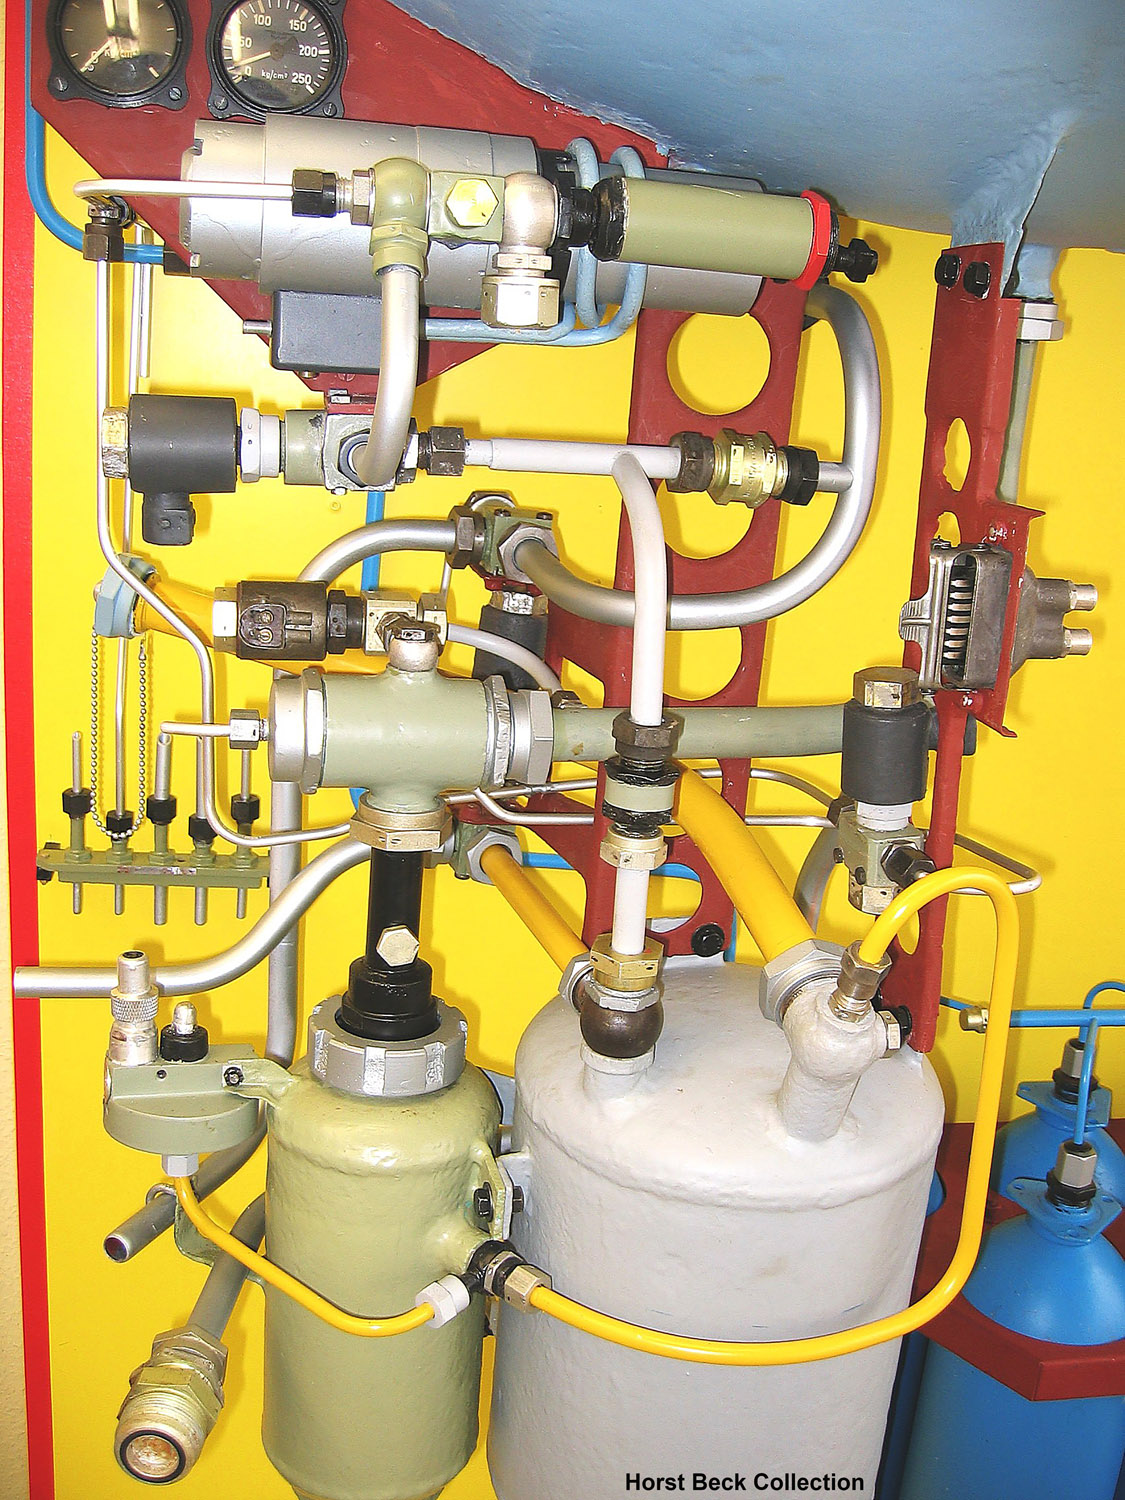
Photo shows main valves. Photo copyright: The Horst Beck Collection
| Album | Valves |
| Category | V2 Missile relics |
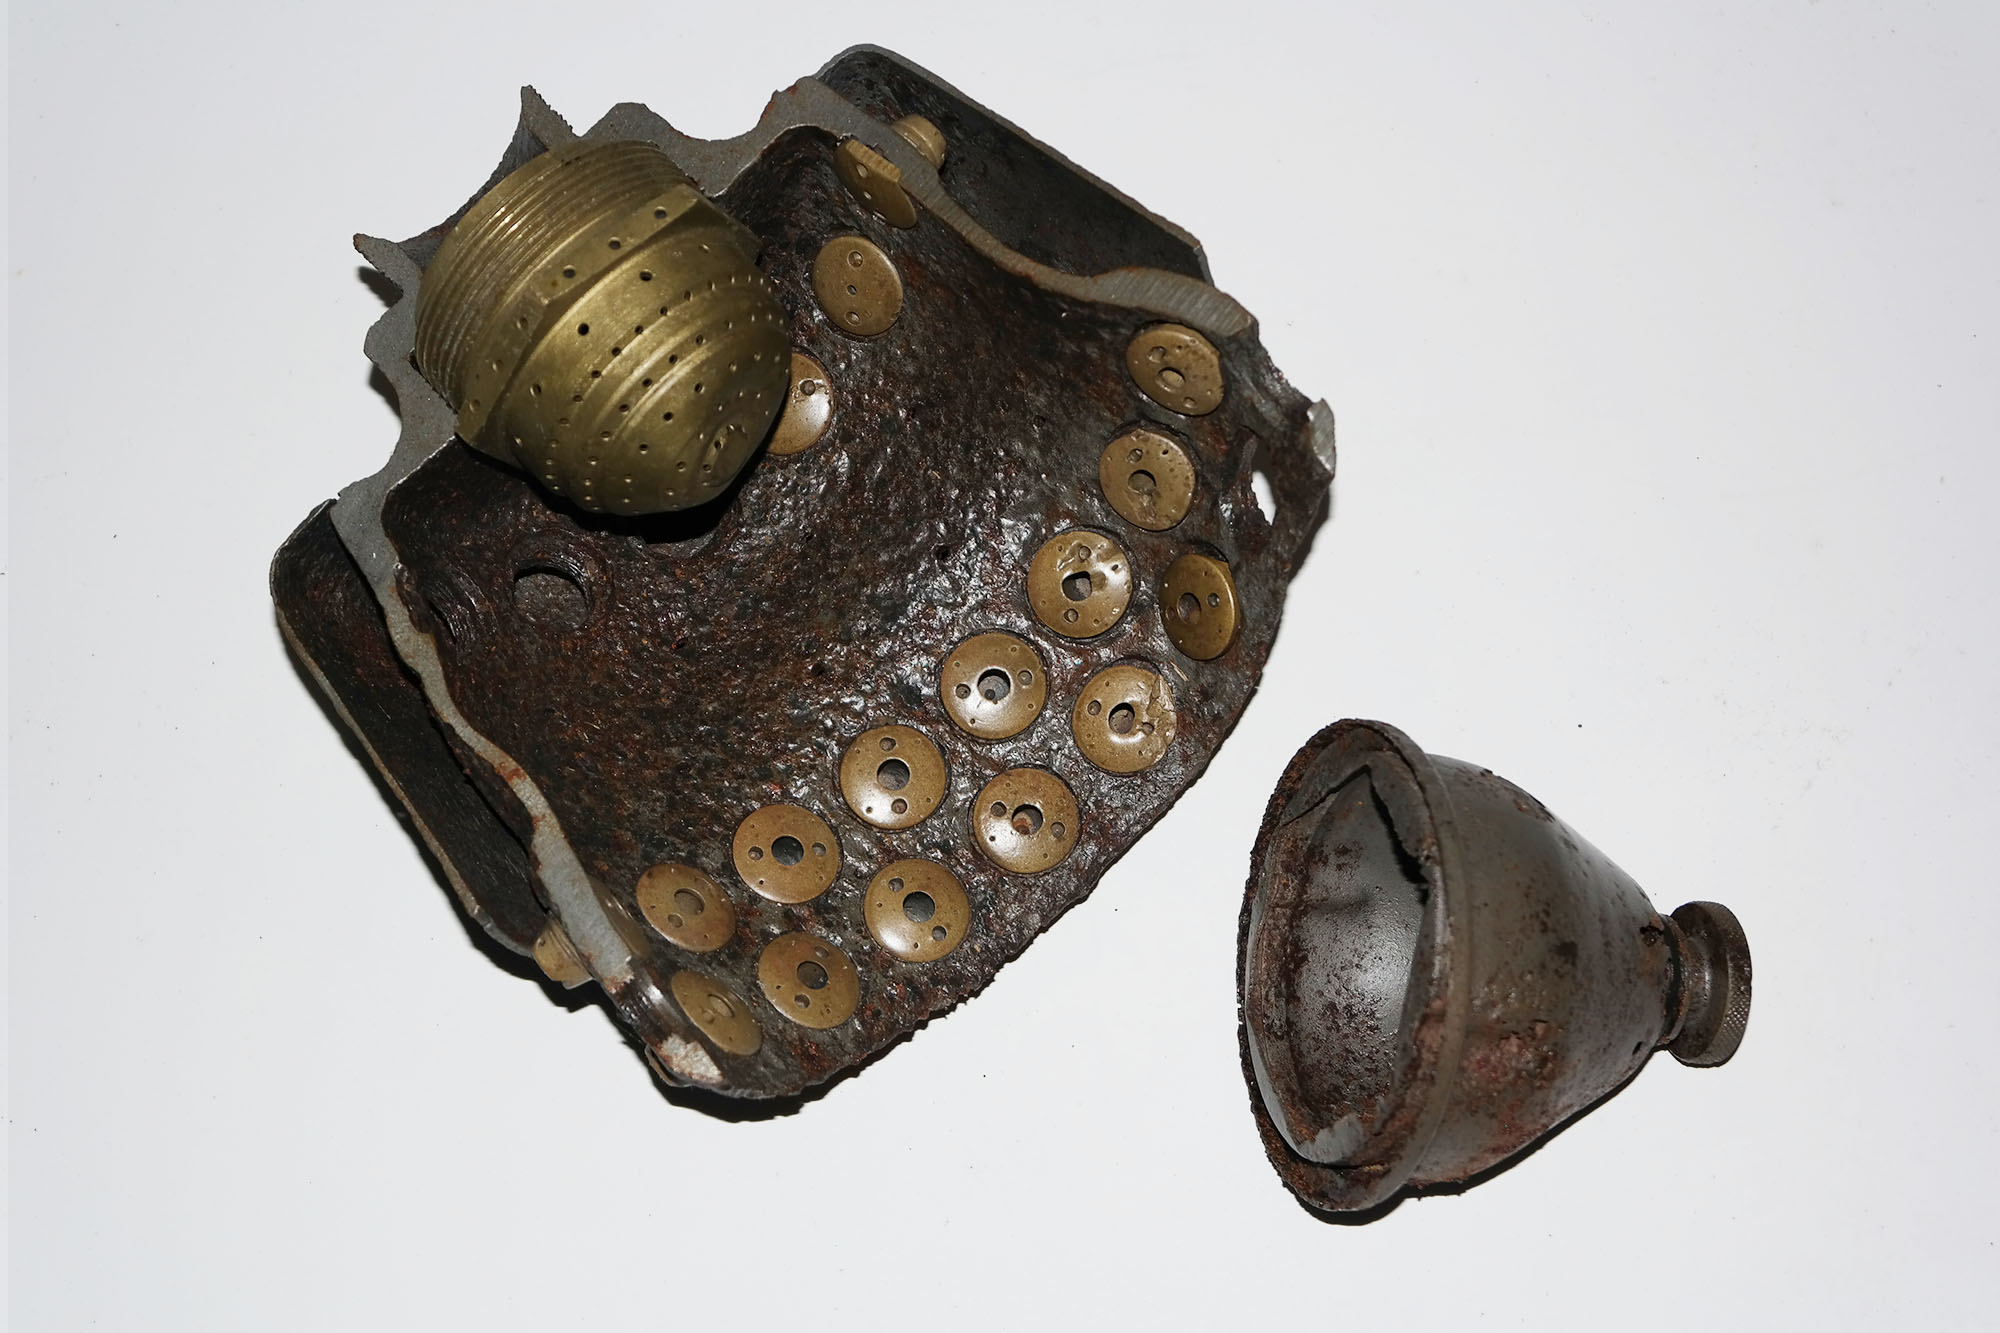
V2 Rocket History Museum Relic: This cutaway presentation shows one of the V2’s 18 combined fuel and liquid oxygen (LOX) injector ‘pots’. The LOX injector transit cap is also shown. The pot shown here is sometimes incorrectly referred to as a pre-burner or pre chamber – a mixer or diffuser pot probably describes its role more accurately.
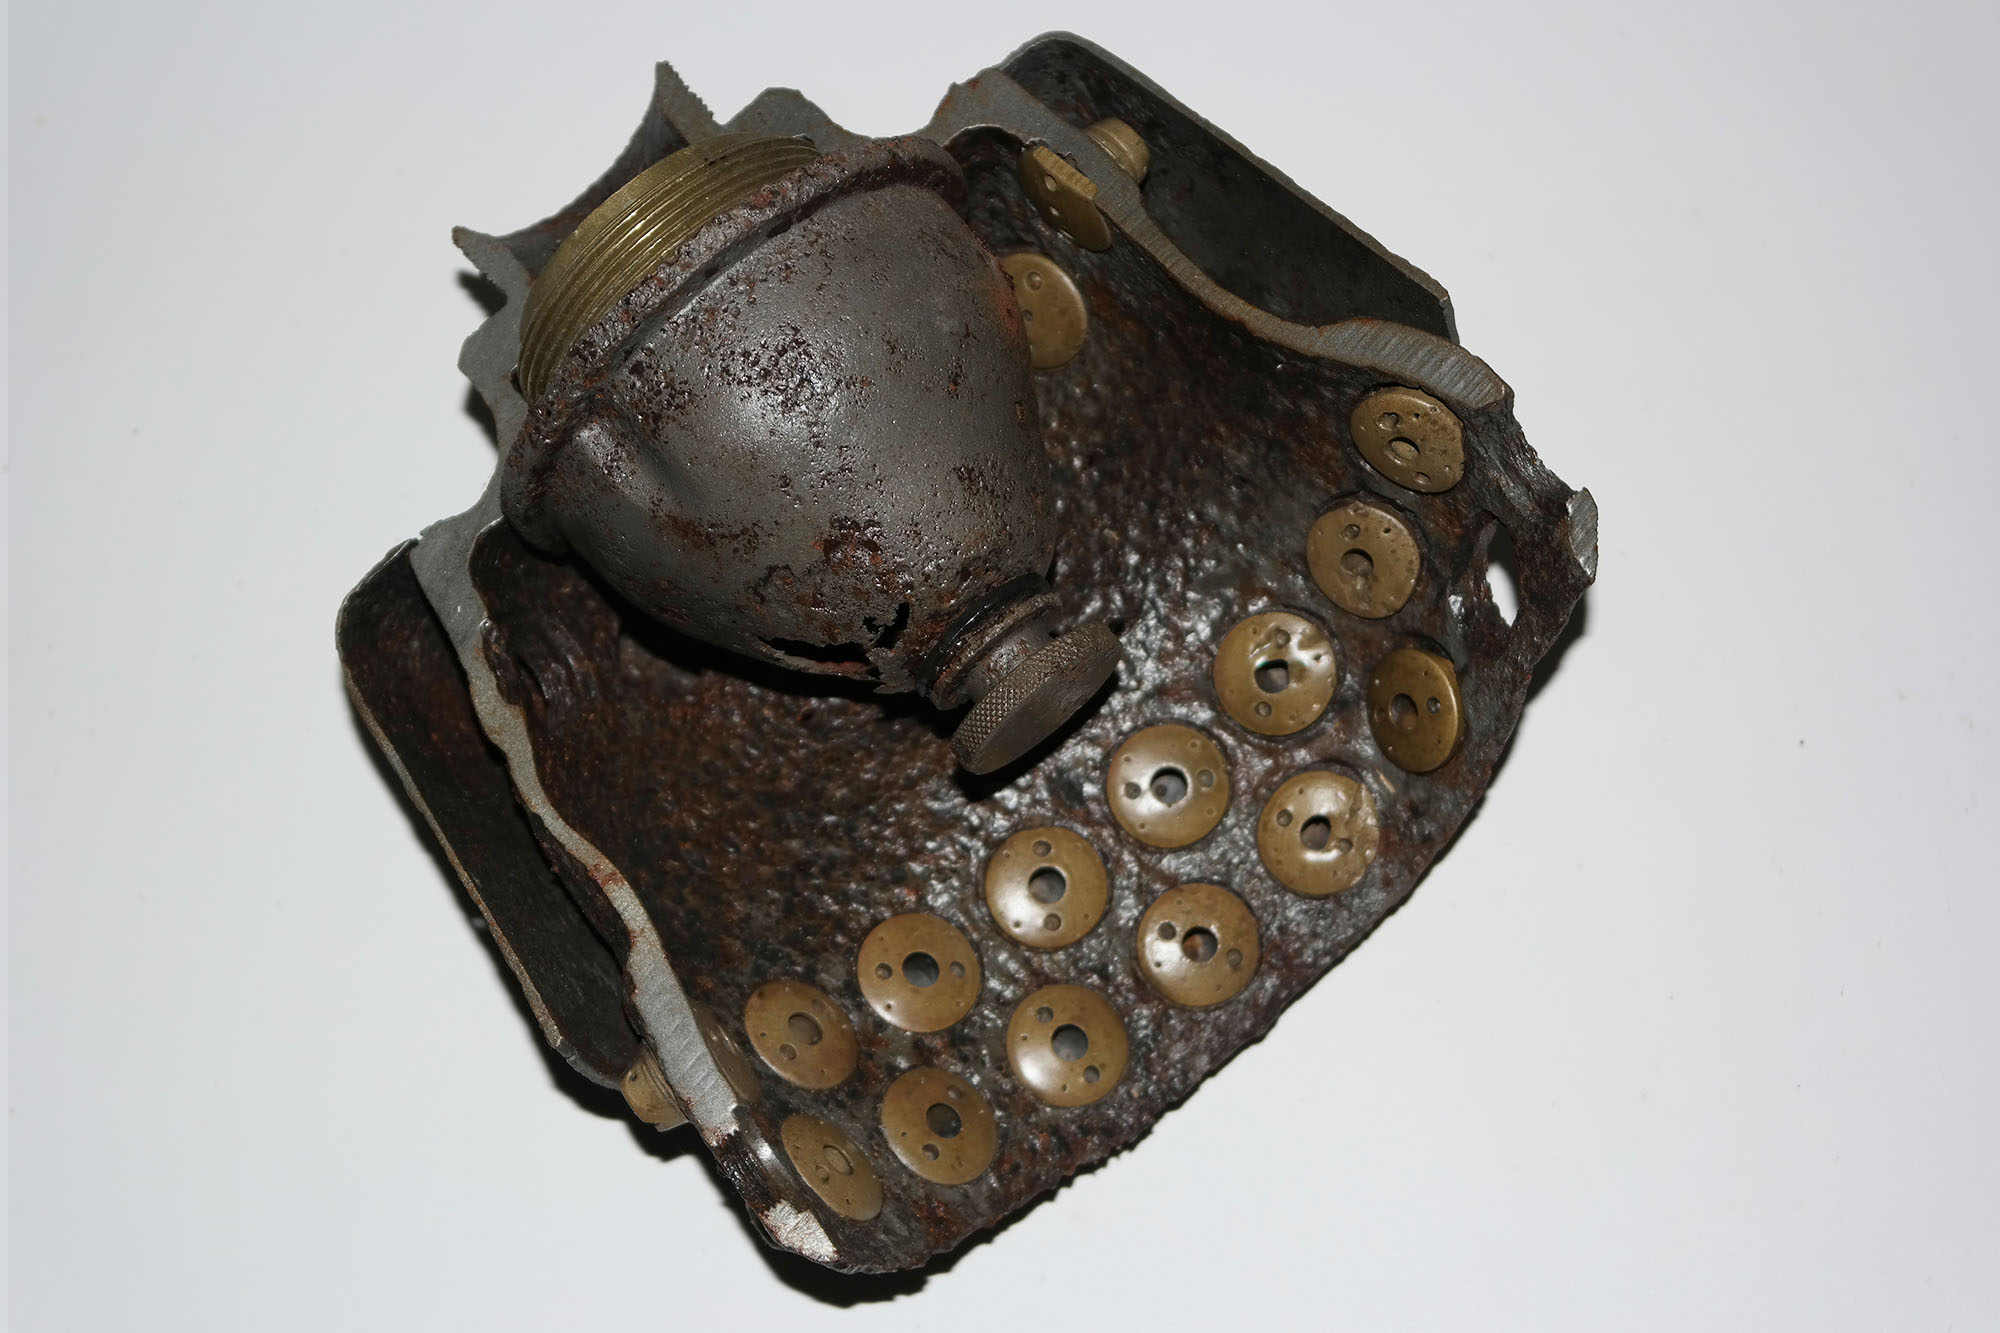
This relic from the V2 Rocket History collection shows a cutaway presentation of one of the V2’s 18 combined fuel and liquid oxygen (LOX) injector ‘pots’. The LOX injector transit cap is also shown fitted over the LOX injector.
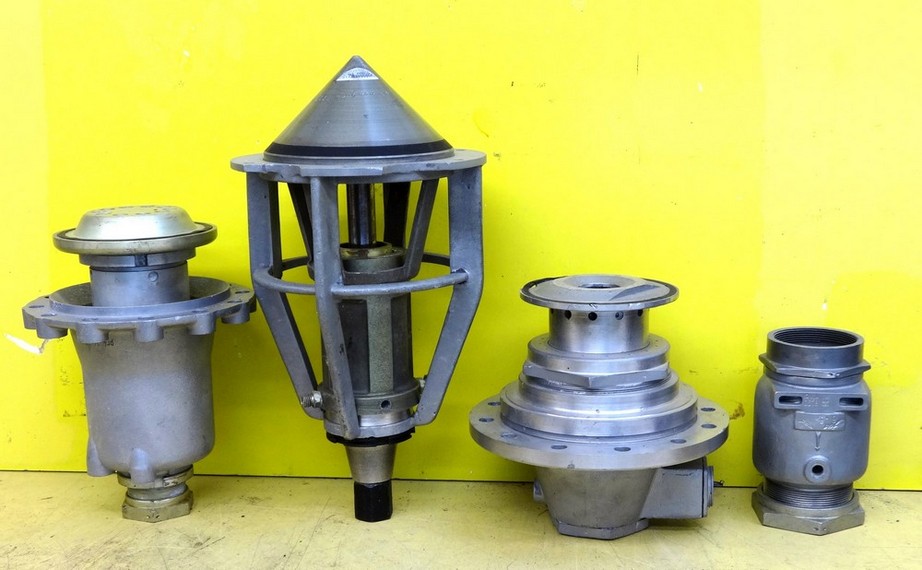
Photo shows main valves. Photo copyright: The Horst Beck Collection
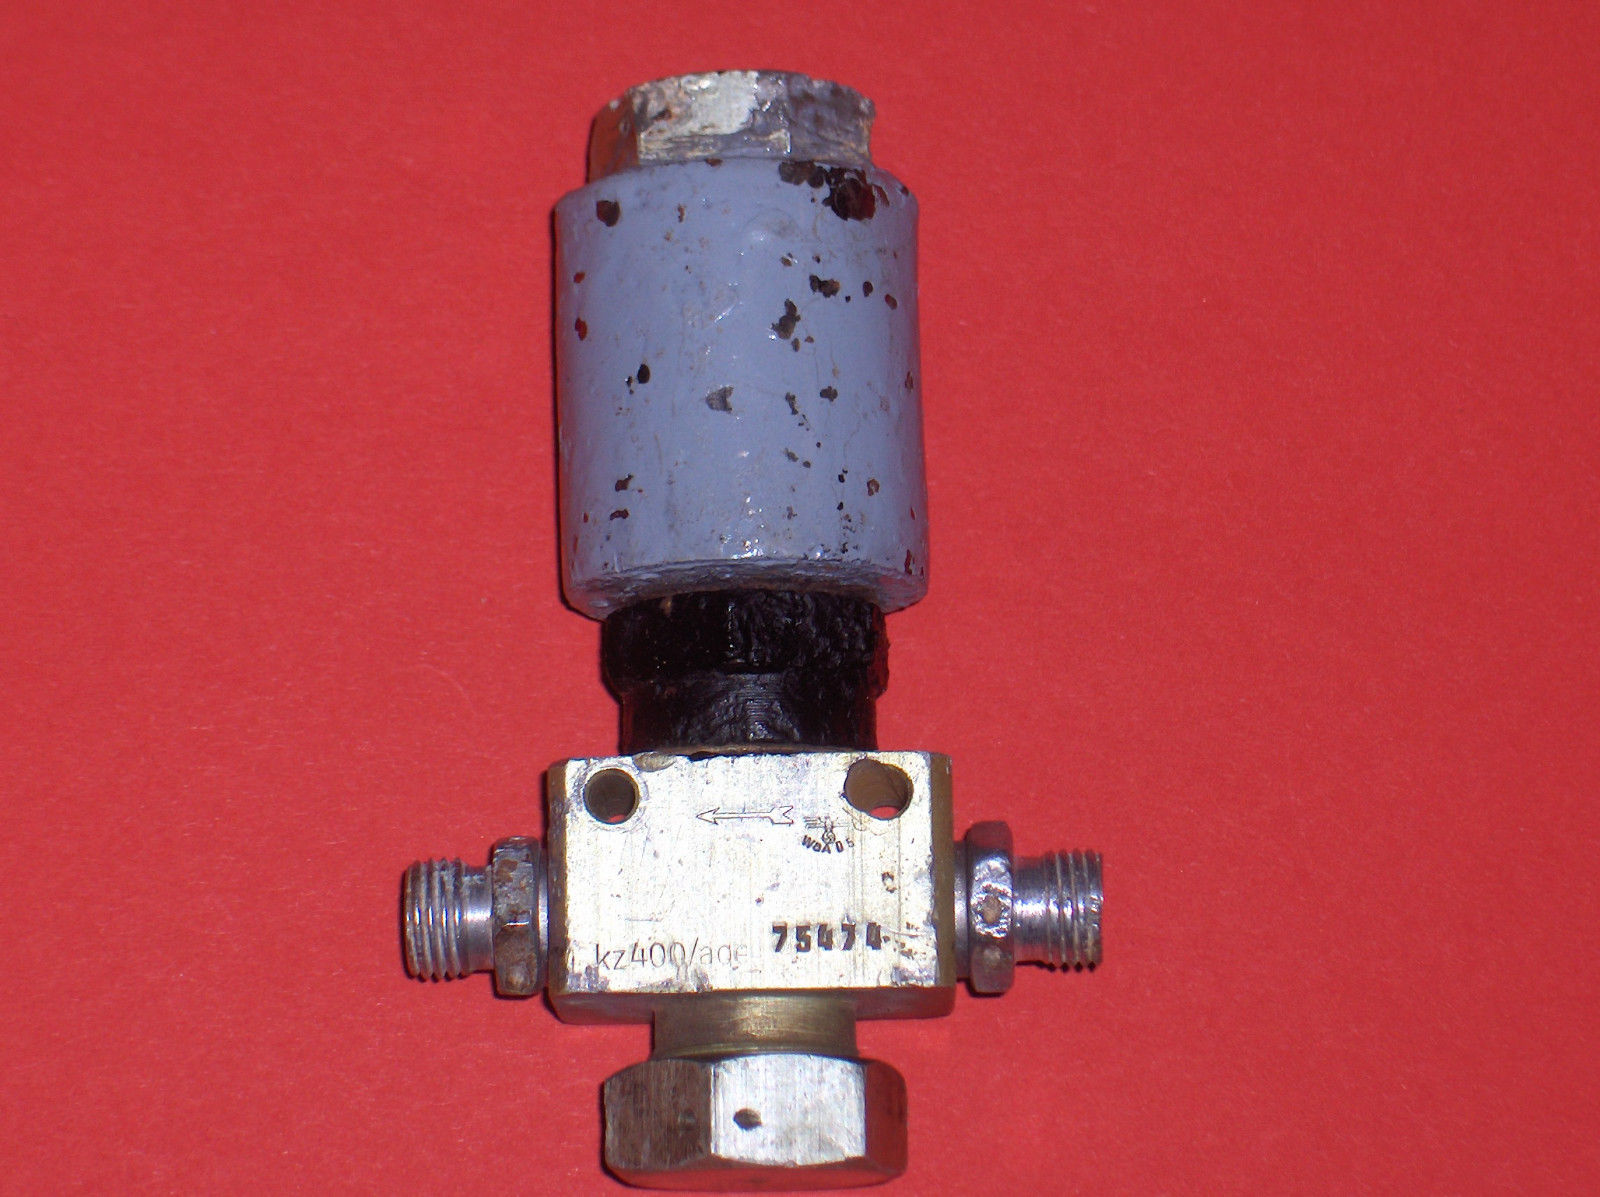
Solenoid electro-magnetic air valve. The This valve type is used numerous times to control equipment in the V2 missile. Variations of this electrically activated valve can be used to control high pressure air or fluids.
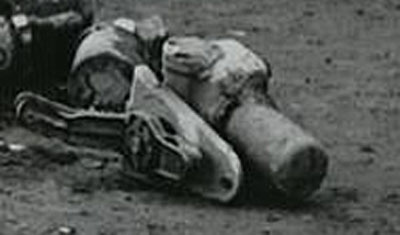
Hydraulic servo from fin 1 or 3 of the V2 missile, collected with other debris following a combat impact.
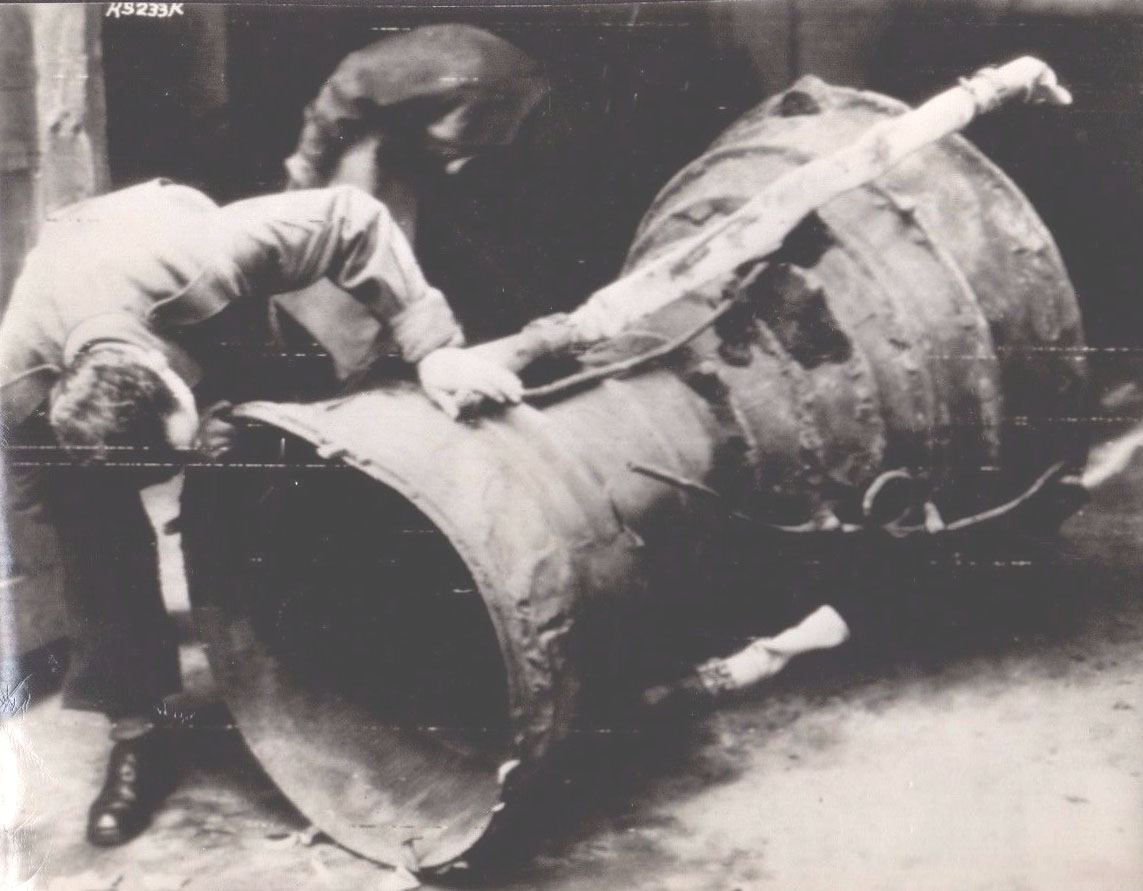
Examination of V2 missile thrust chamber. Sections of two of the large bore aluminium alcohol inlet manifold feed pipes and two thin steel veil colling supply pipes are still attached. The distinctive heat expansion relief loop can be seen on one of the pipes.
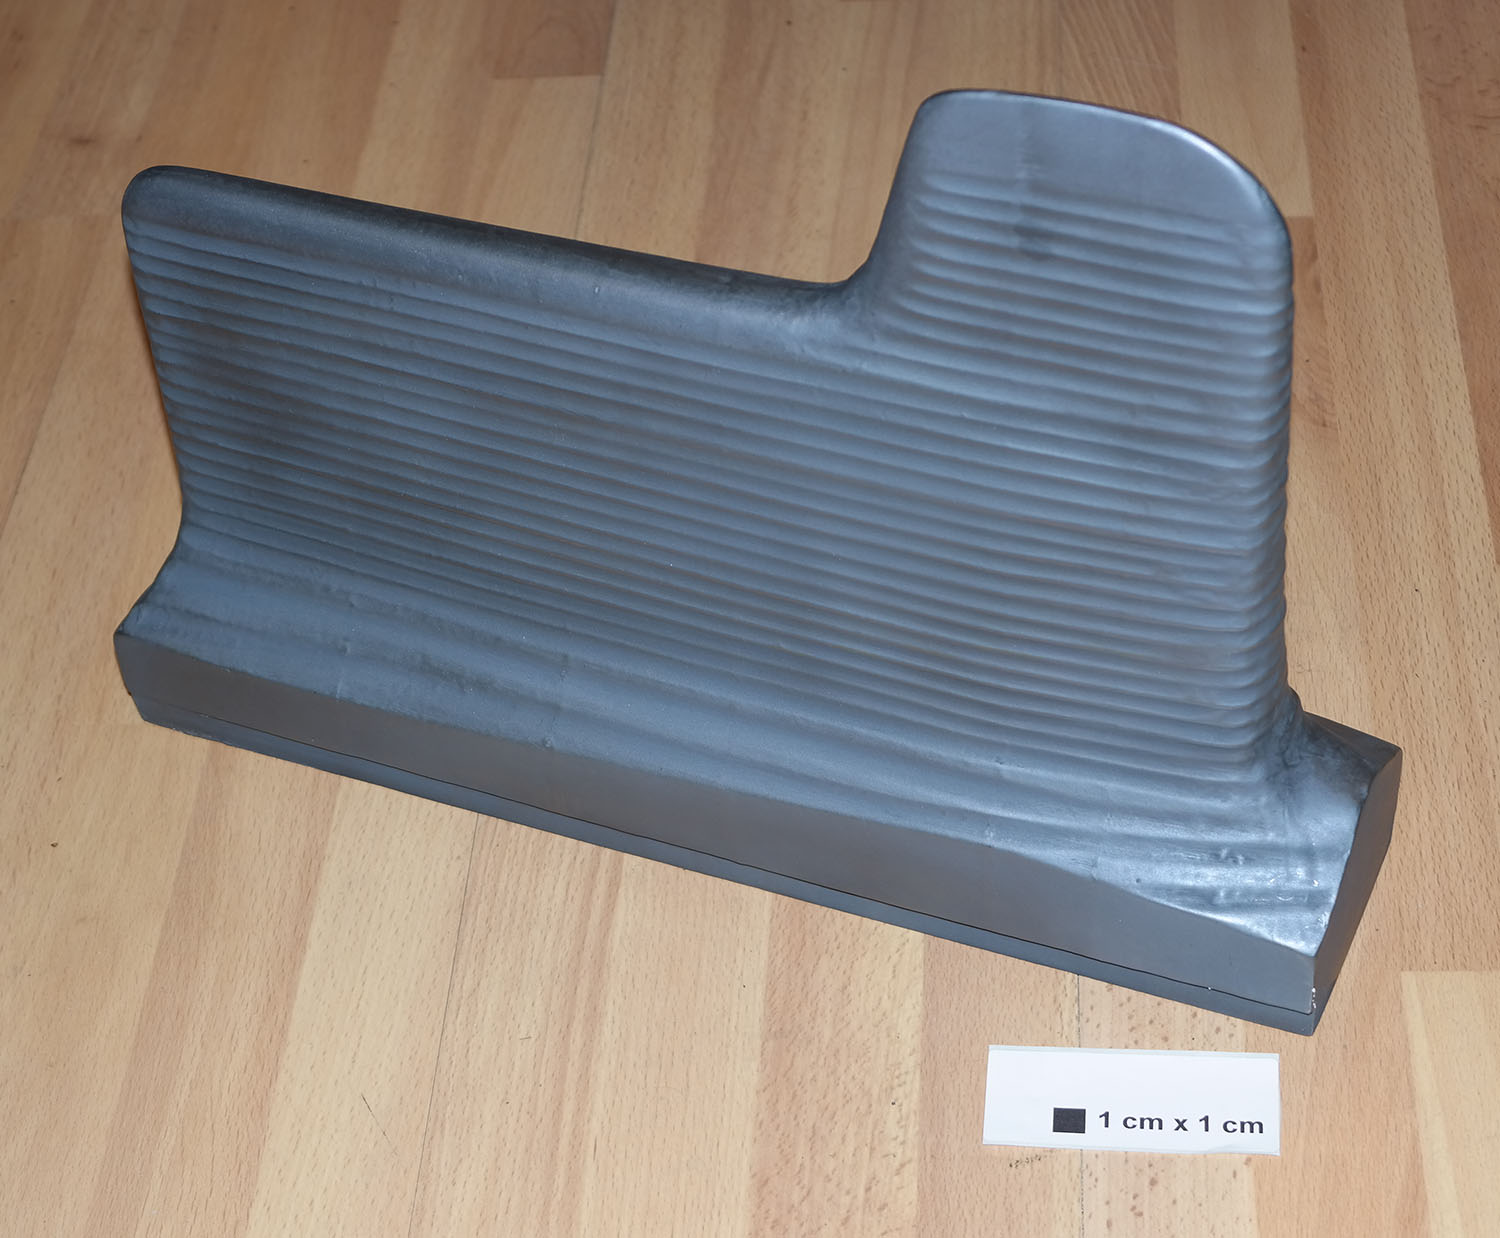
This image shows a full size replica of the A4 missile graphite jet vane held at our ‘Wernher von Braun rocket academy’ museum.
| Category | V2 Missile relics |
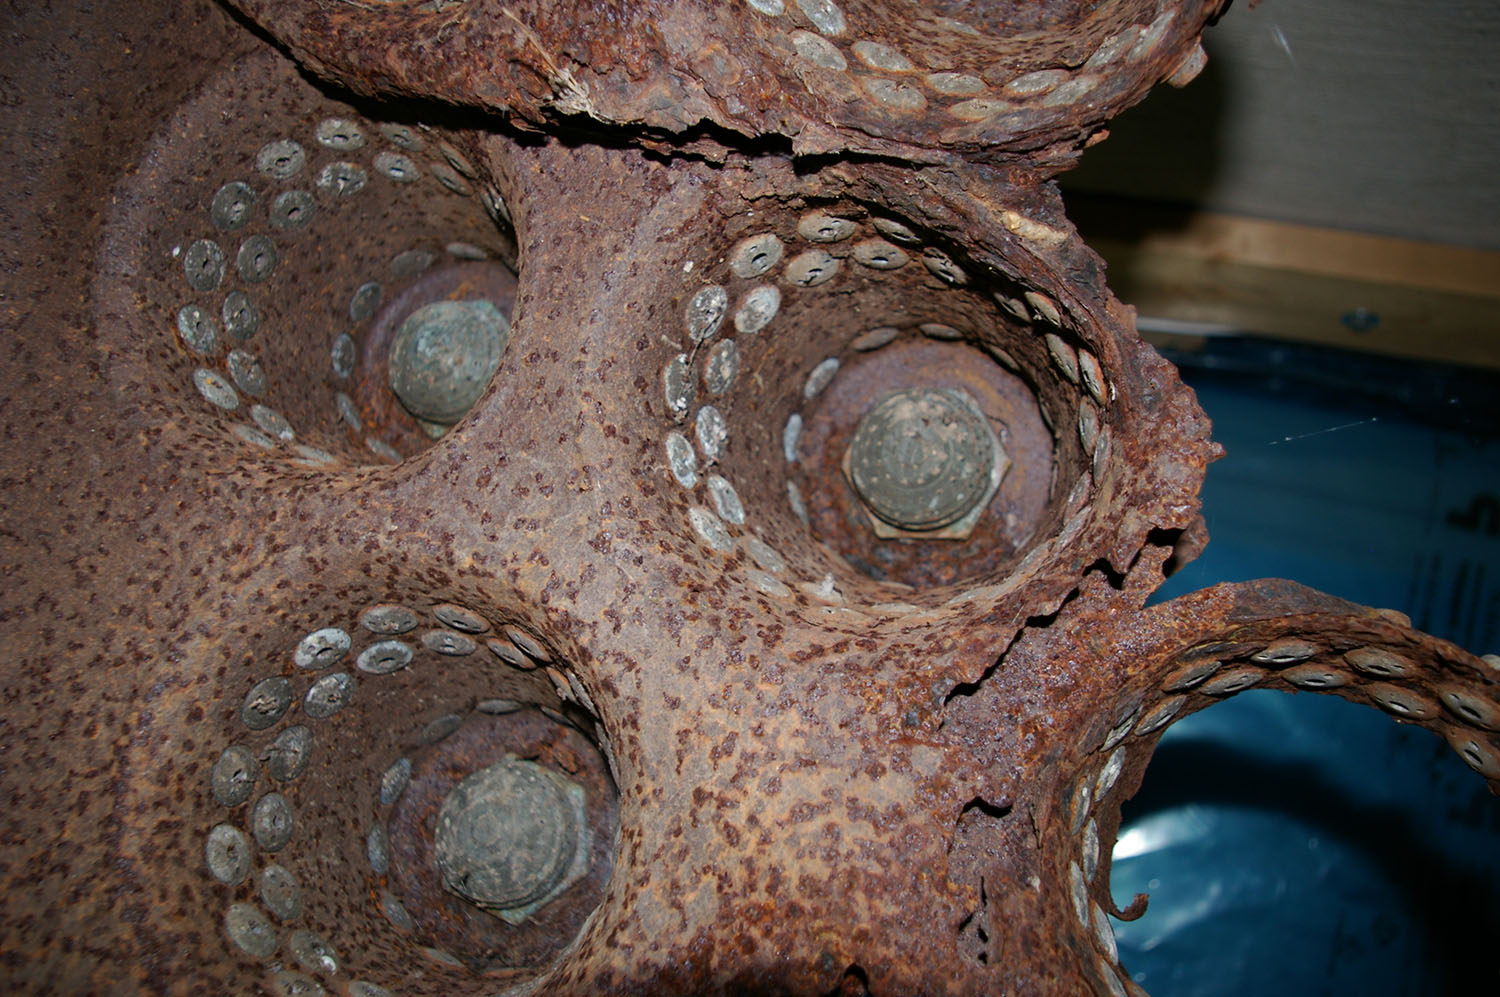
Image shows interior of production series (combat relic) V2 missile propellent injector pre-mixer pots. Three post in the picture are intact, others seem in the picture have been destroyed in the impact. This engine part was recovered from a combat impact East of London. Impact date: February 1945
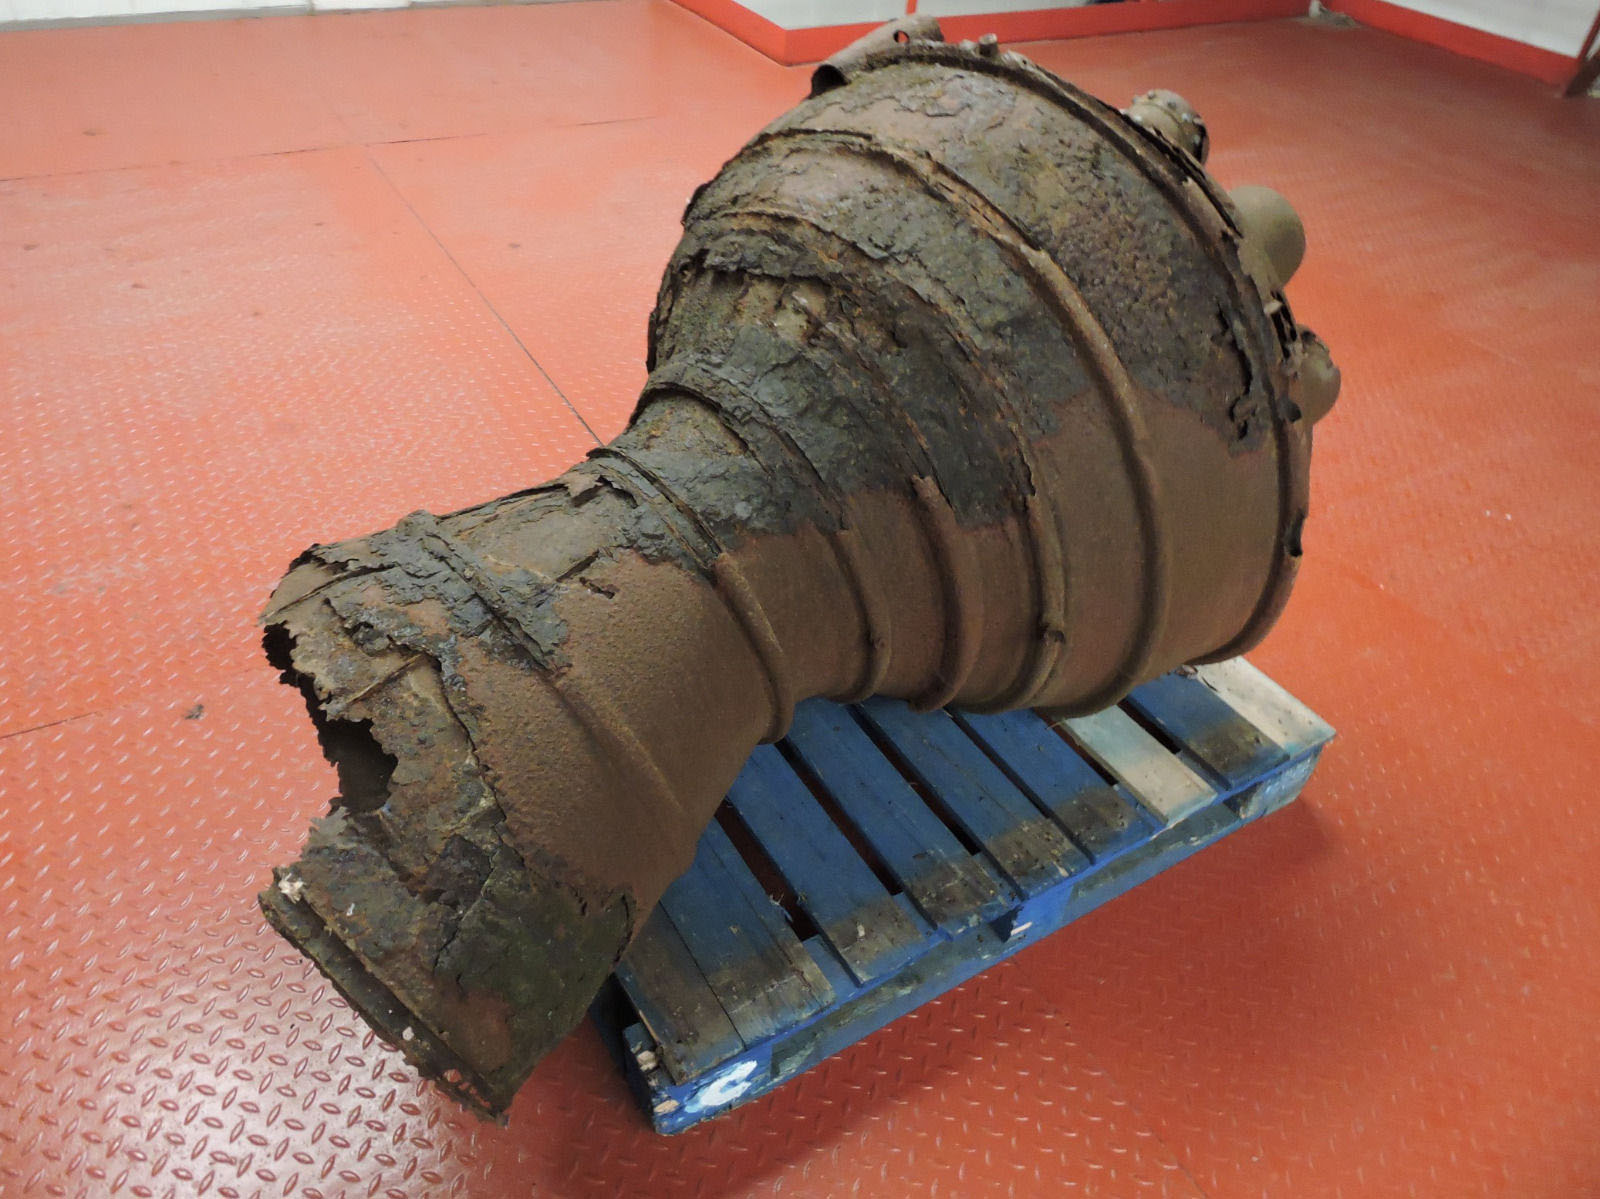
Recovered from Great Warley impact: February 1945. This chamber has a production use order number of 33 painted crudely on topmost segment. This number, to indicate rank in batch, was added shortly after manufacture to ensure the chamber was selected by the missile assembly crews in the correct order; that is on a newest-last basis to make sure that the oldest chambers were employed in missile construction operations first.
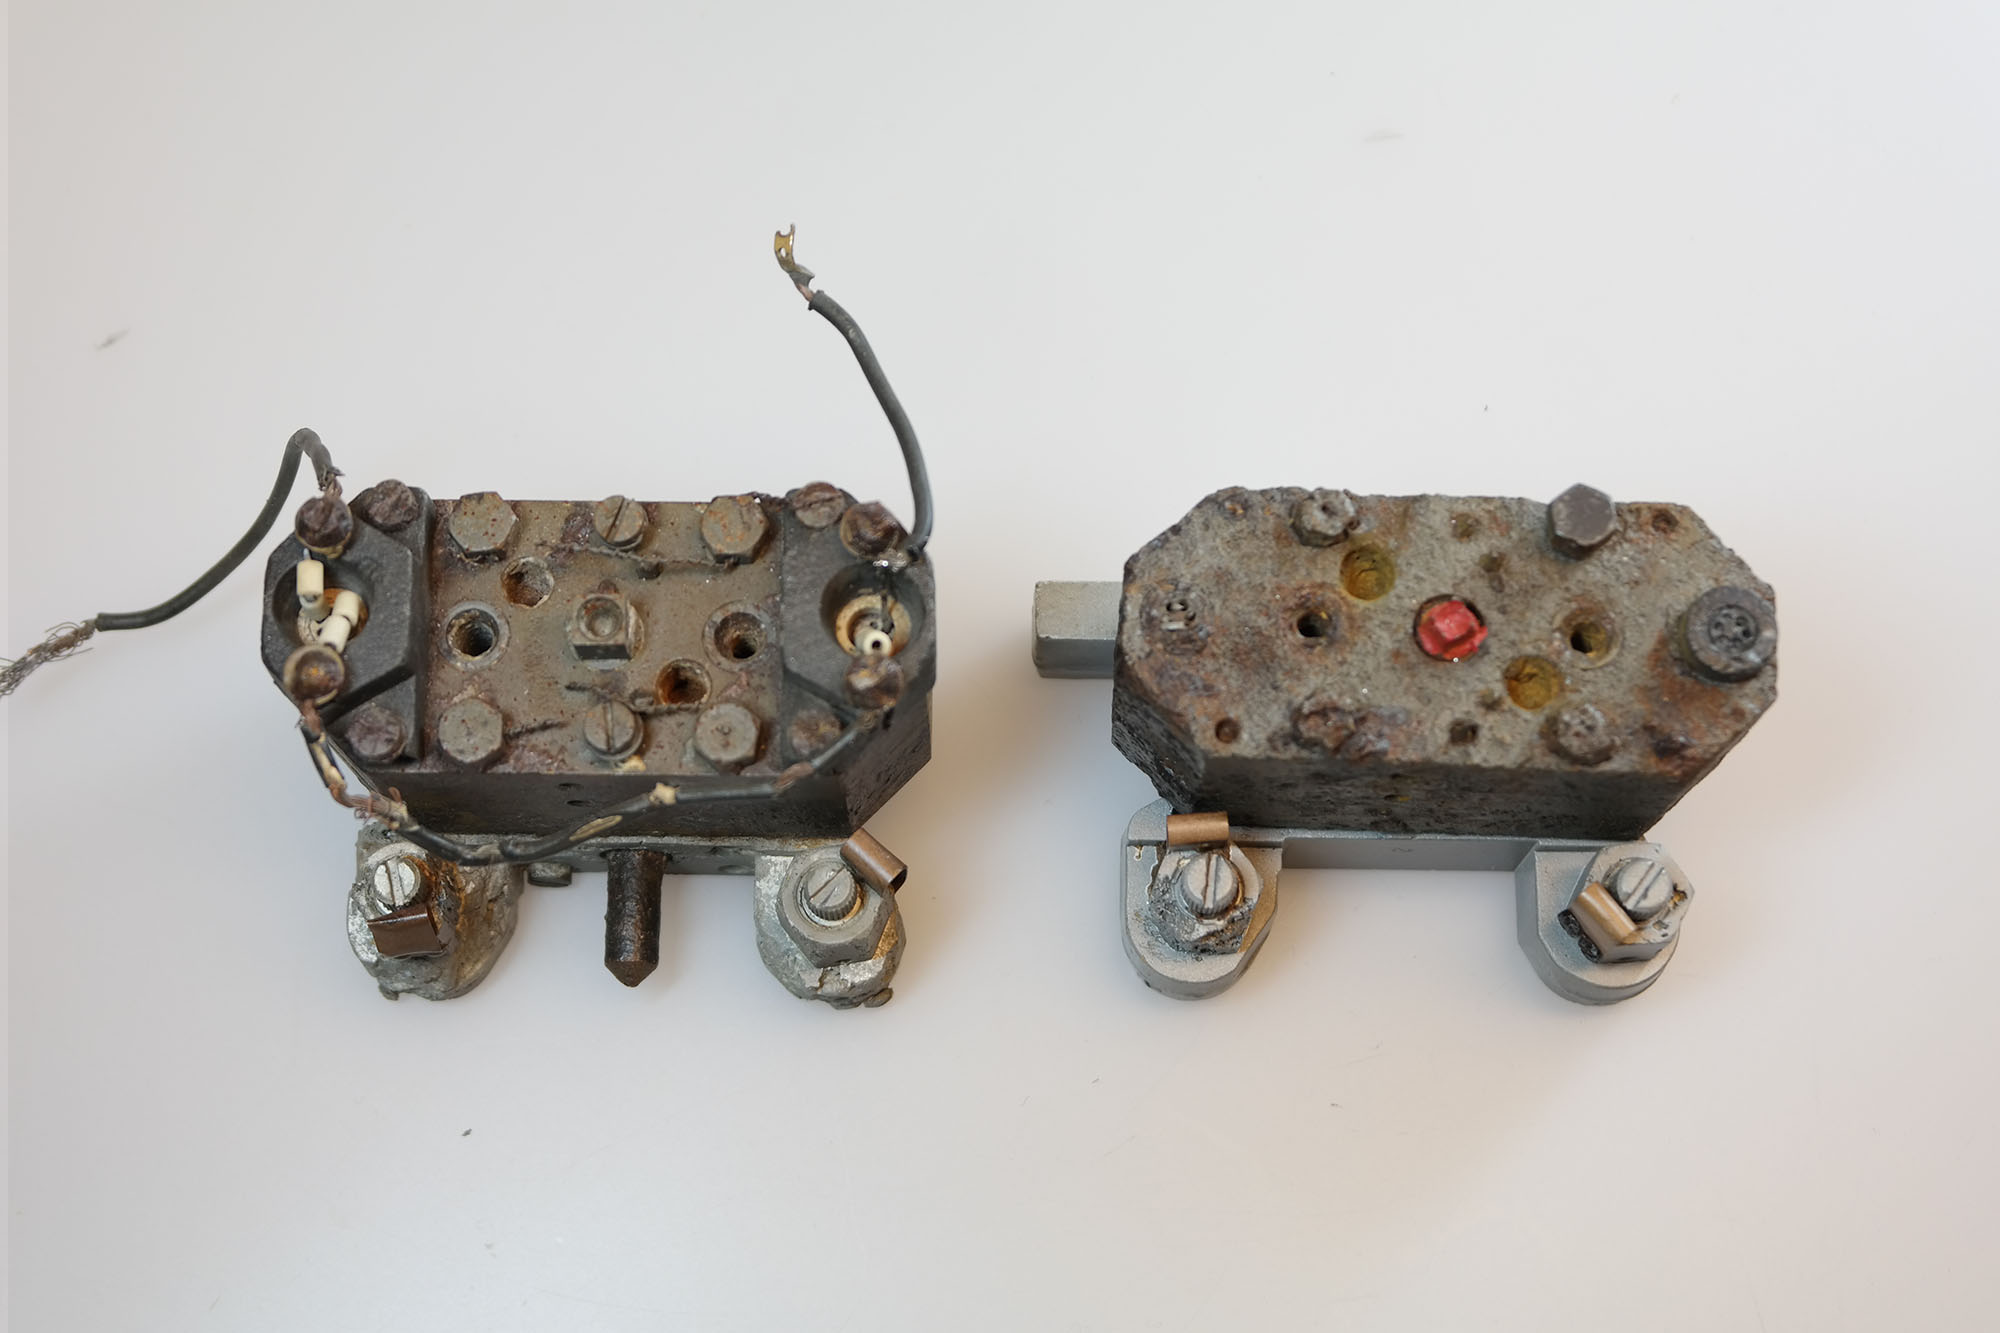
Two Askania (designed) hydraulic gear pumps – the examples shown here have two ceramic insulators with with Nichrome wire type heating elements. The heaters are located at each end of the pump on the long axis. The pump on the right still has its power supply wires attached and was easily repaired and restored to full function in our workshop.This type of pump (with heaters) seem to be rare among the debris of European combat impact sites but fairly common in debris collections emanating from research flights in Peenemünde and parts of Poland. An explanation maybe that the oil could be warmed up sufficiently simply by starting all four hydraulic gear pumps sooner in the pre-launch sequence. The only downside being that the already noisey missile would be making yet more noise in the risky period leading up to launch.

Testing fuel injectors
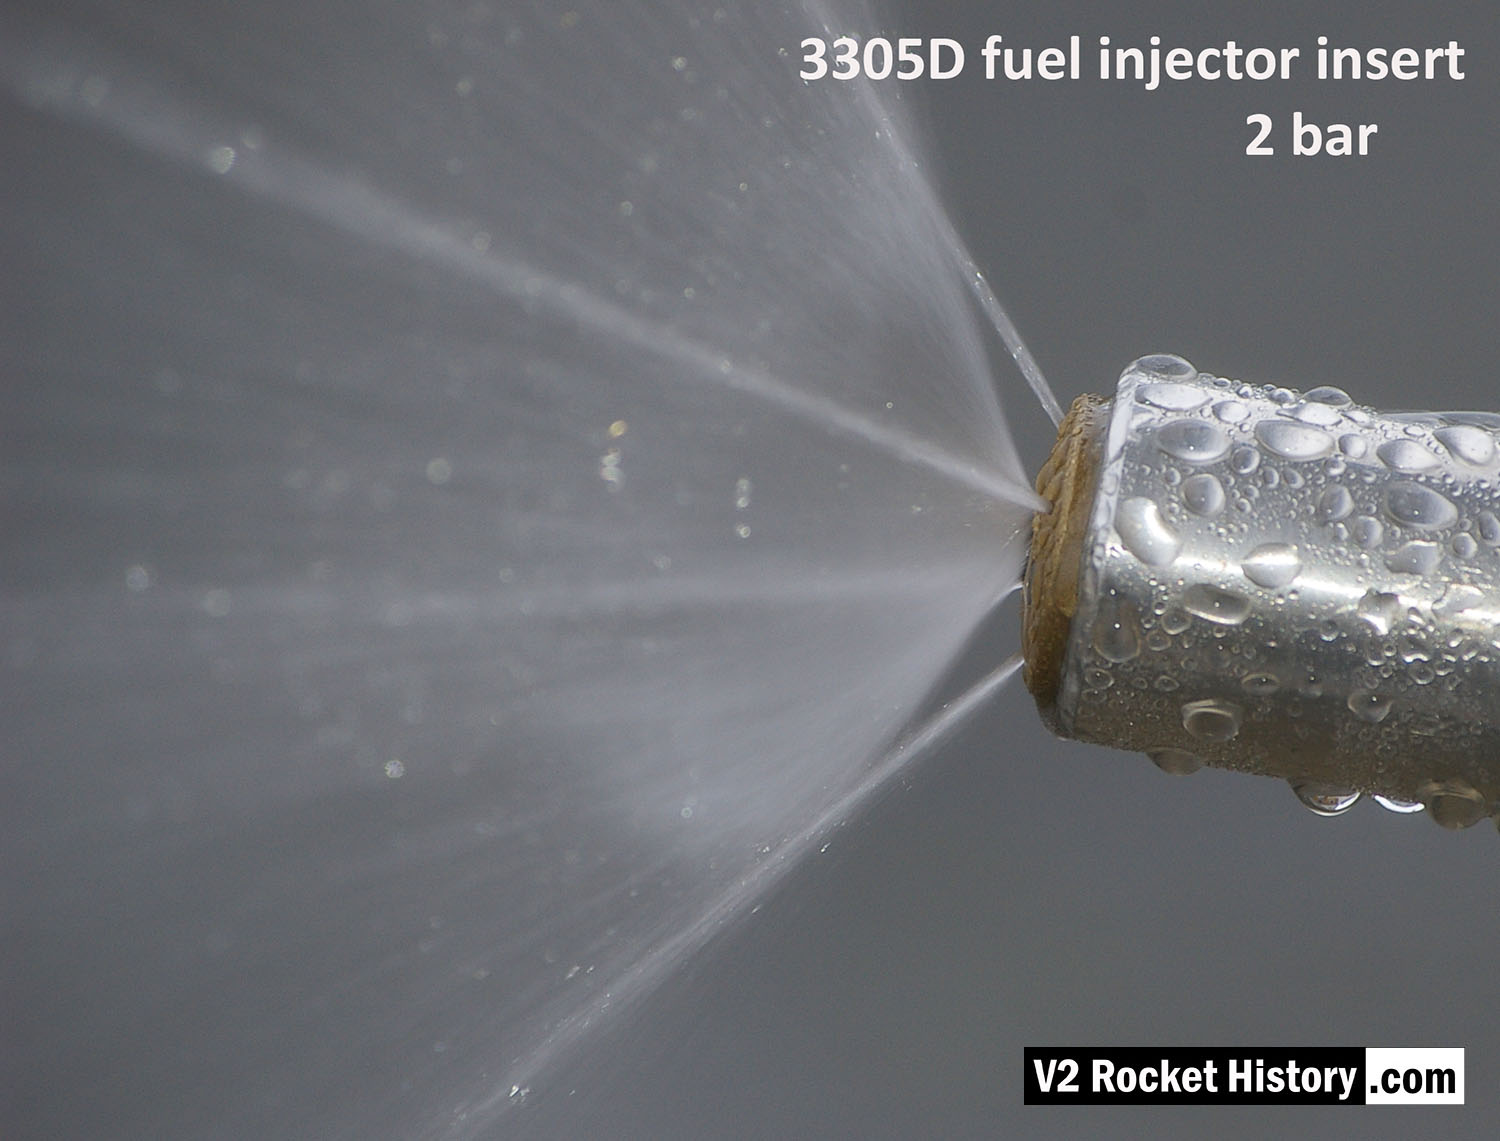
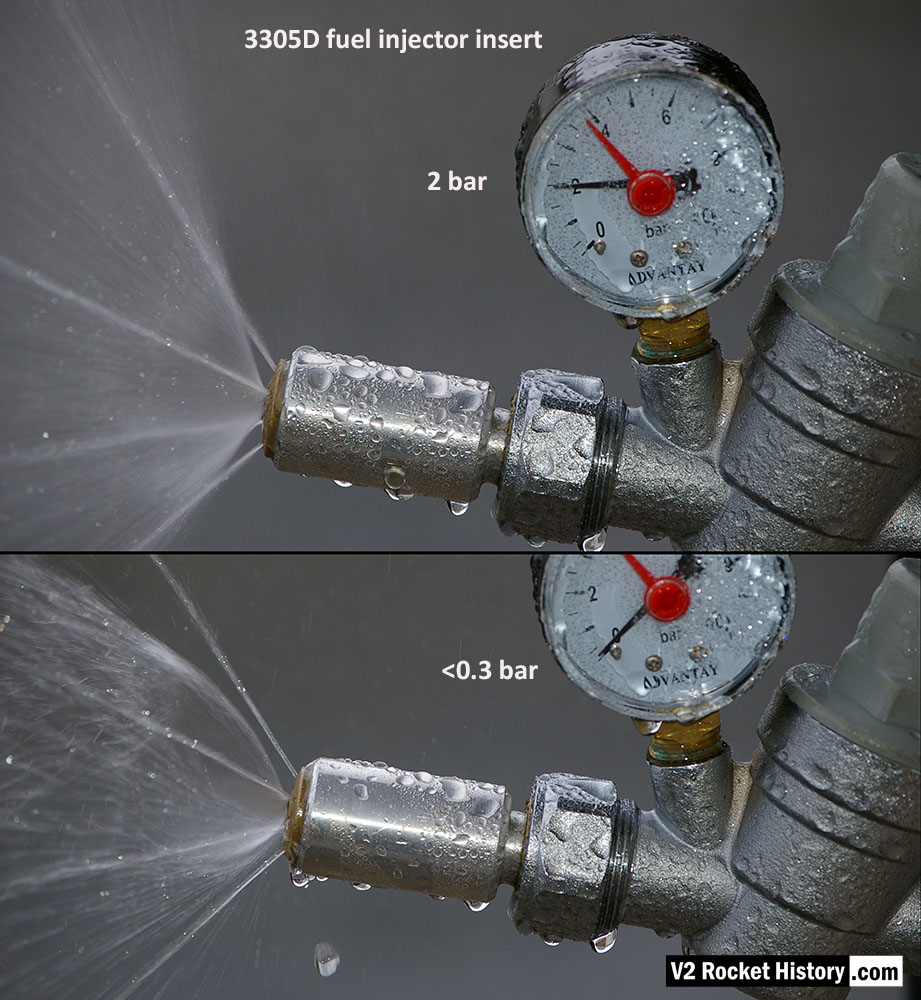
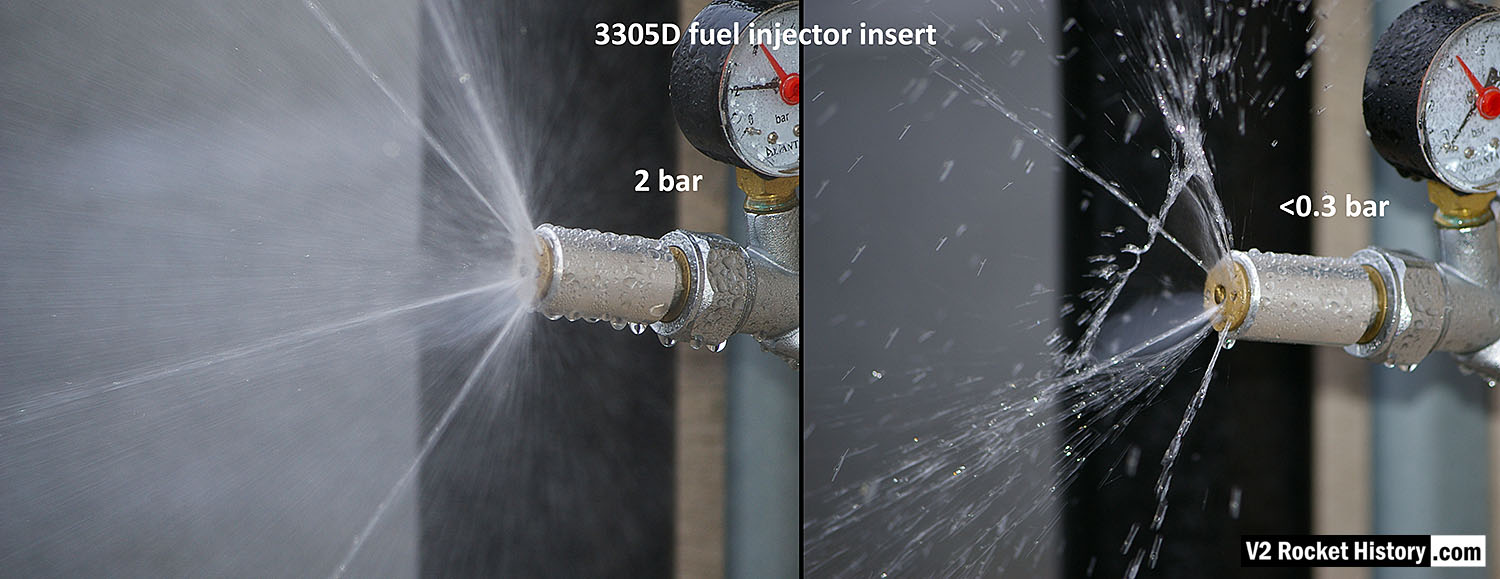
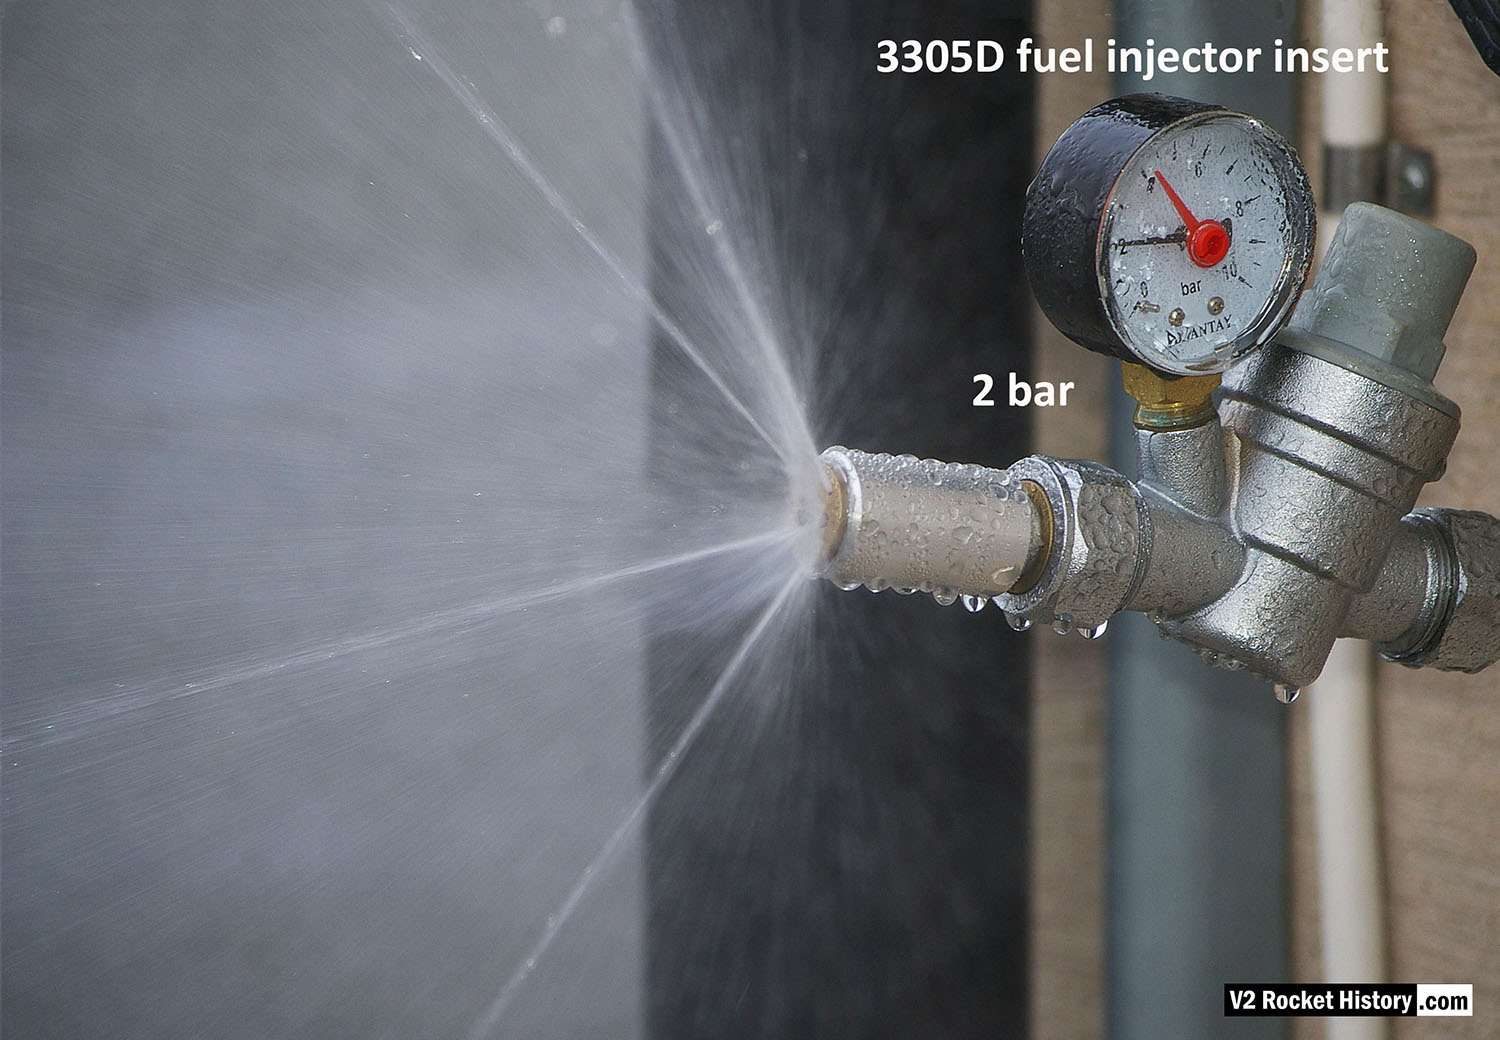
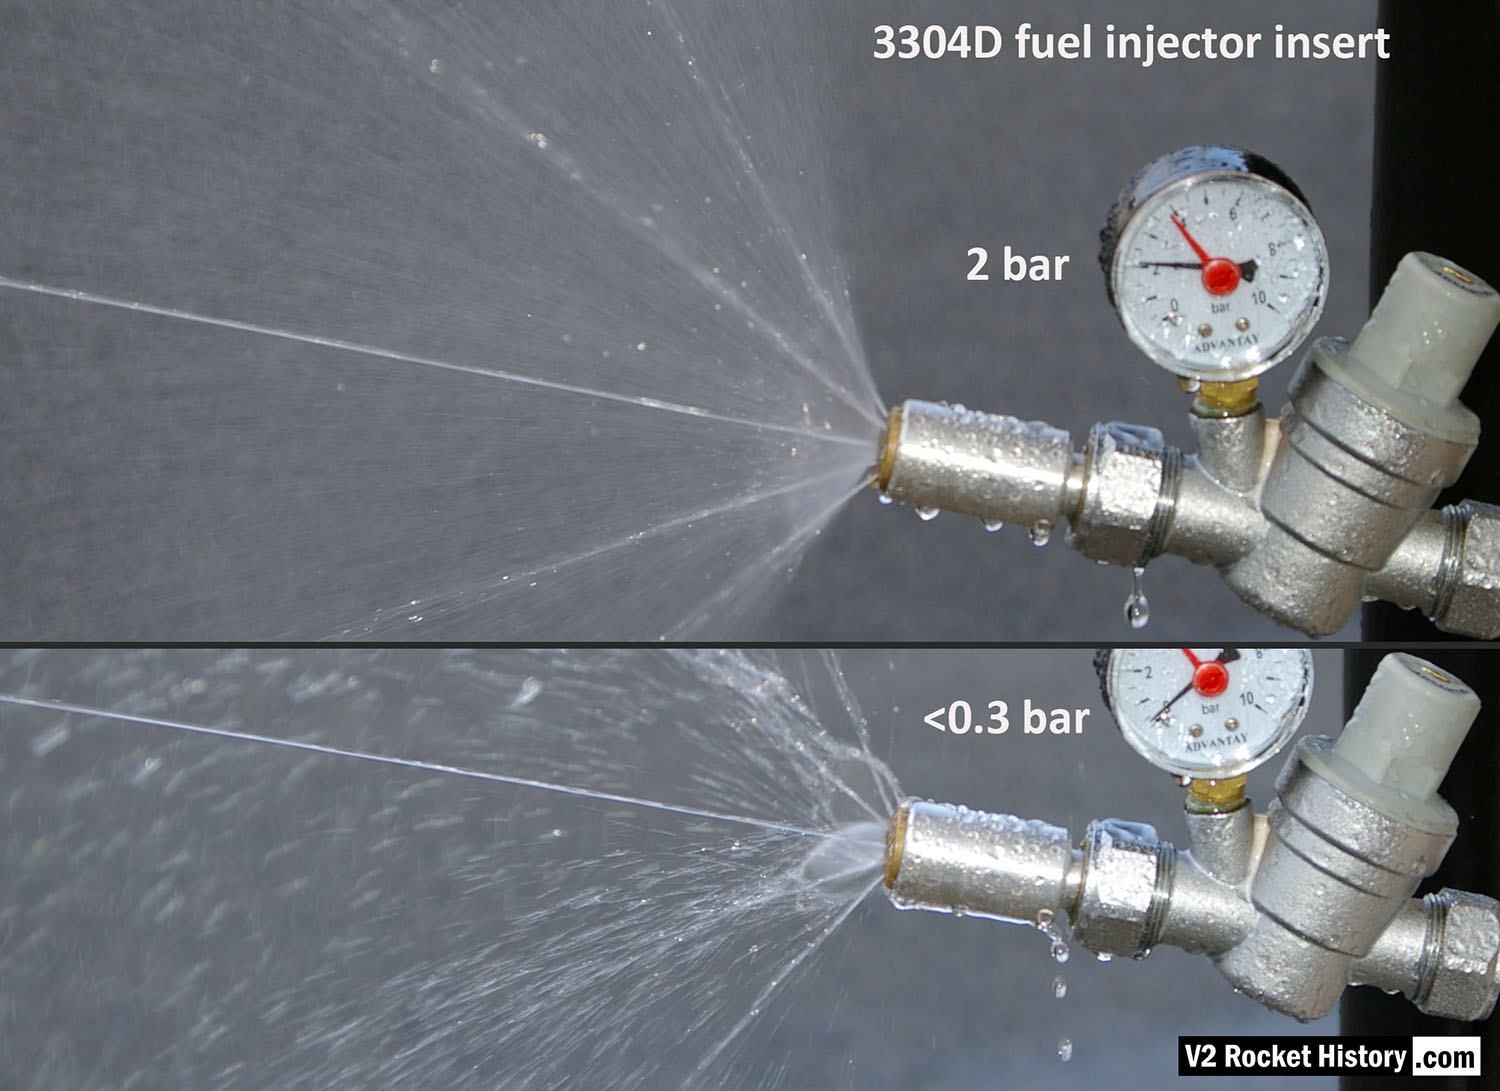
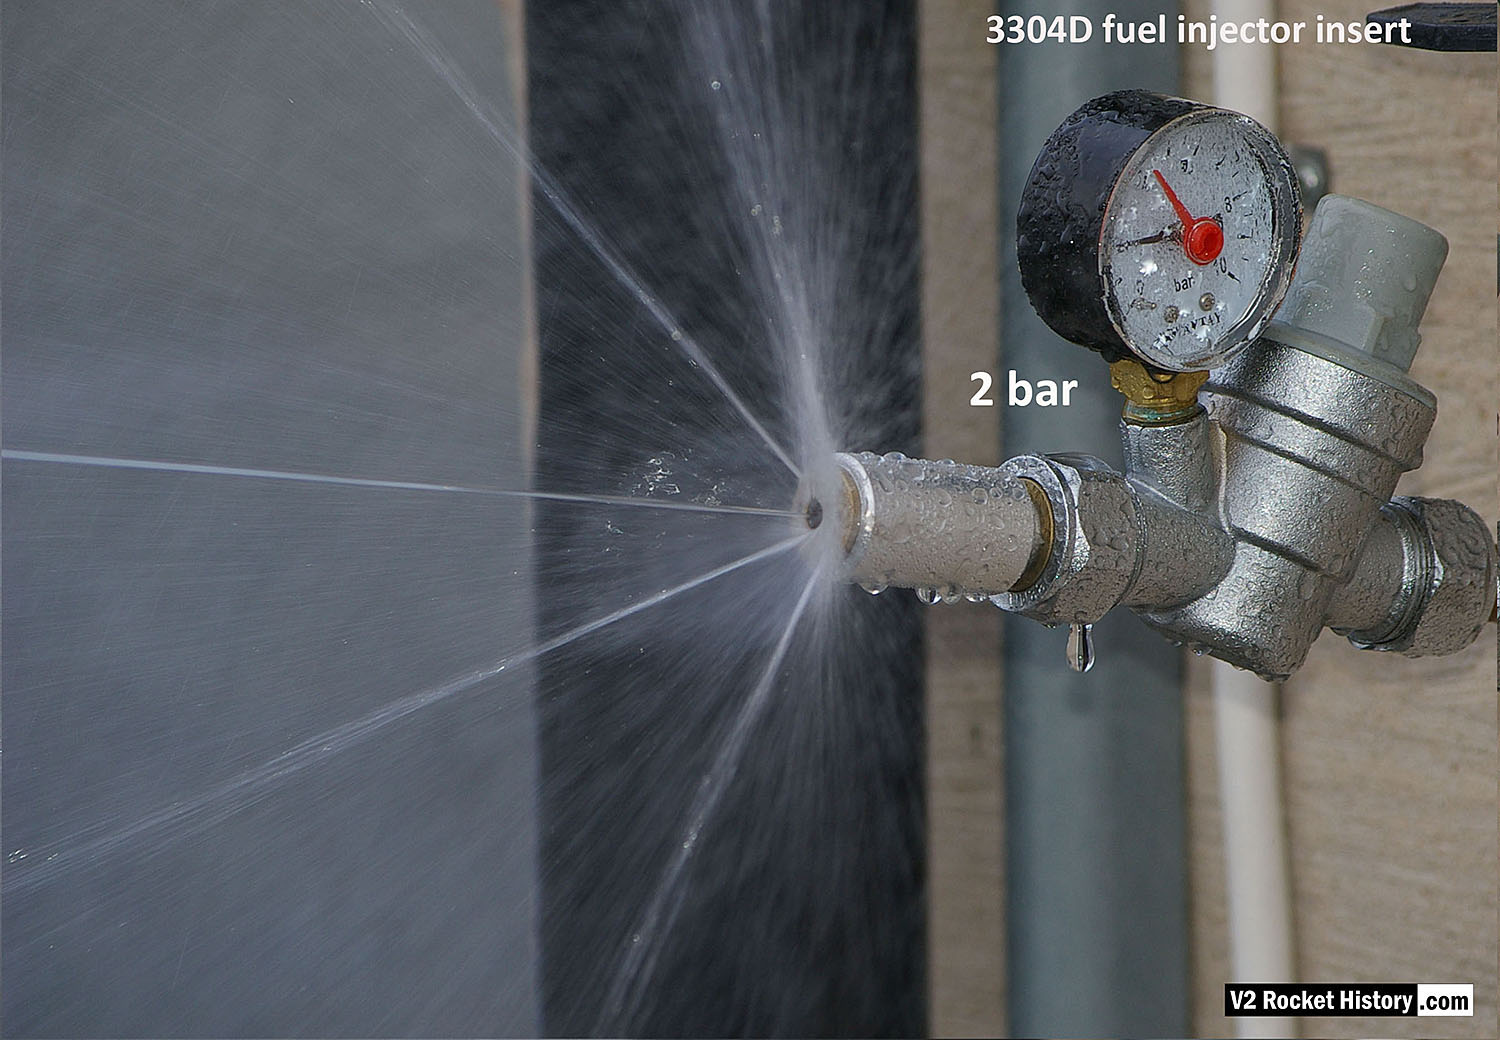
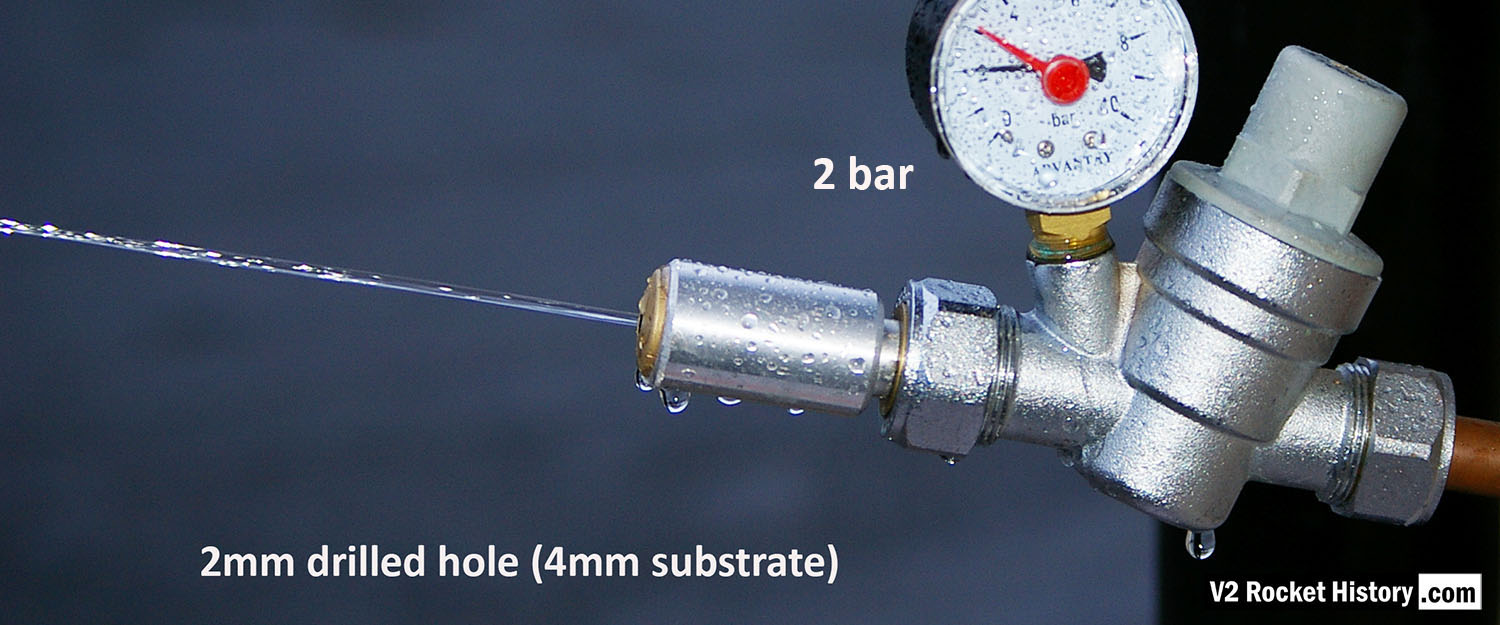
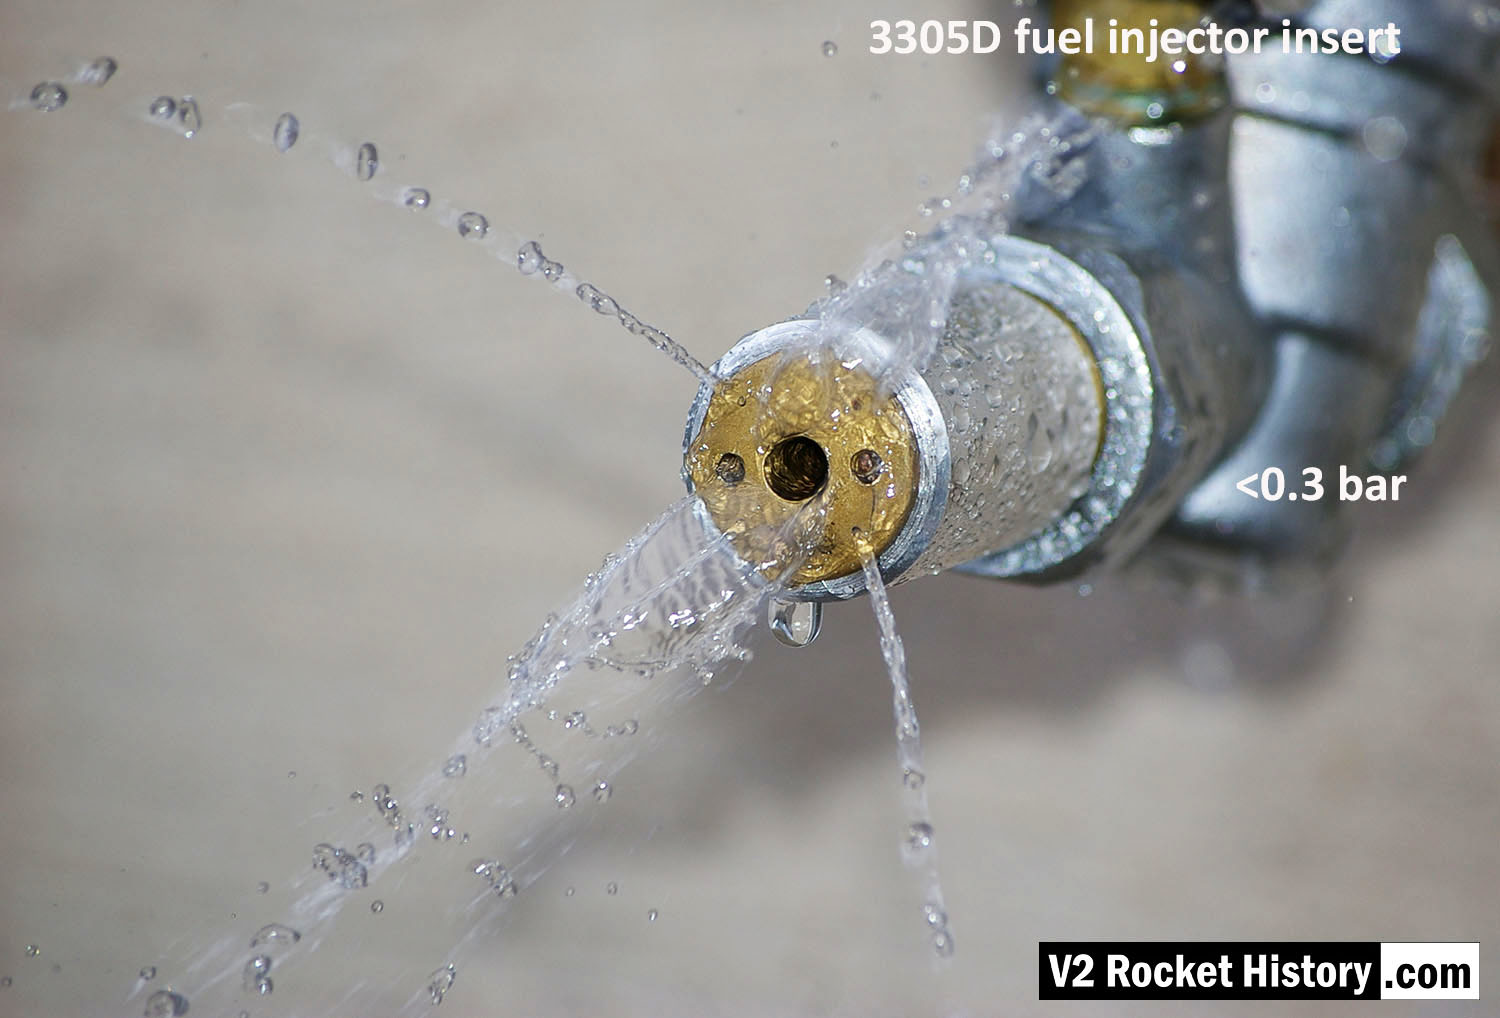
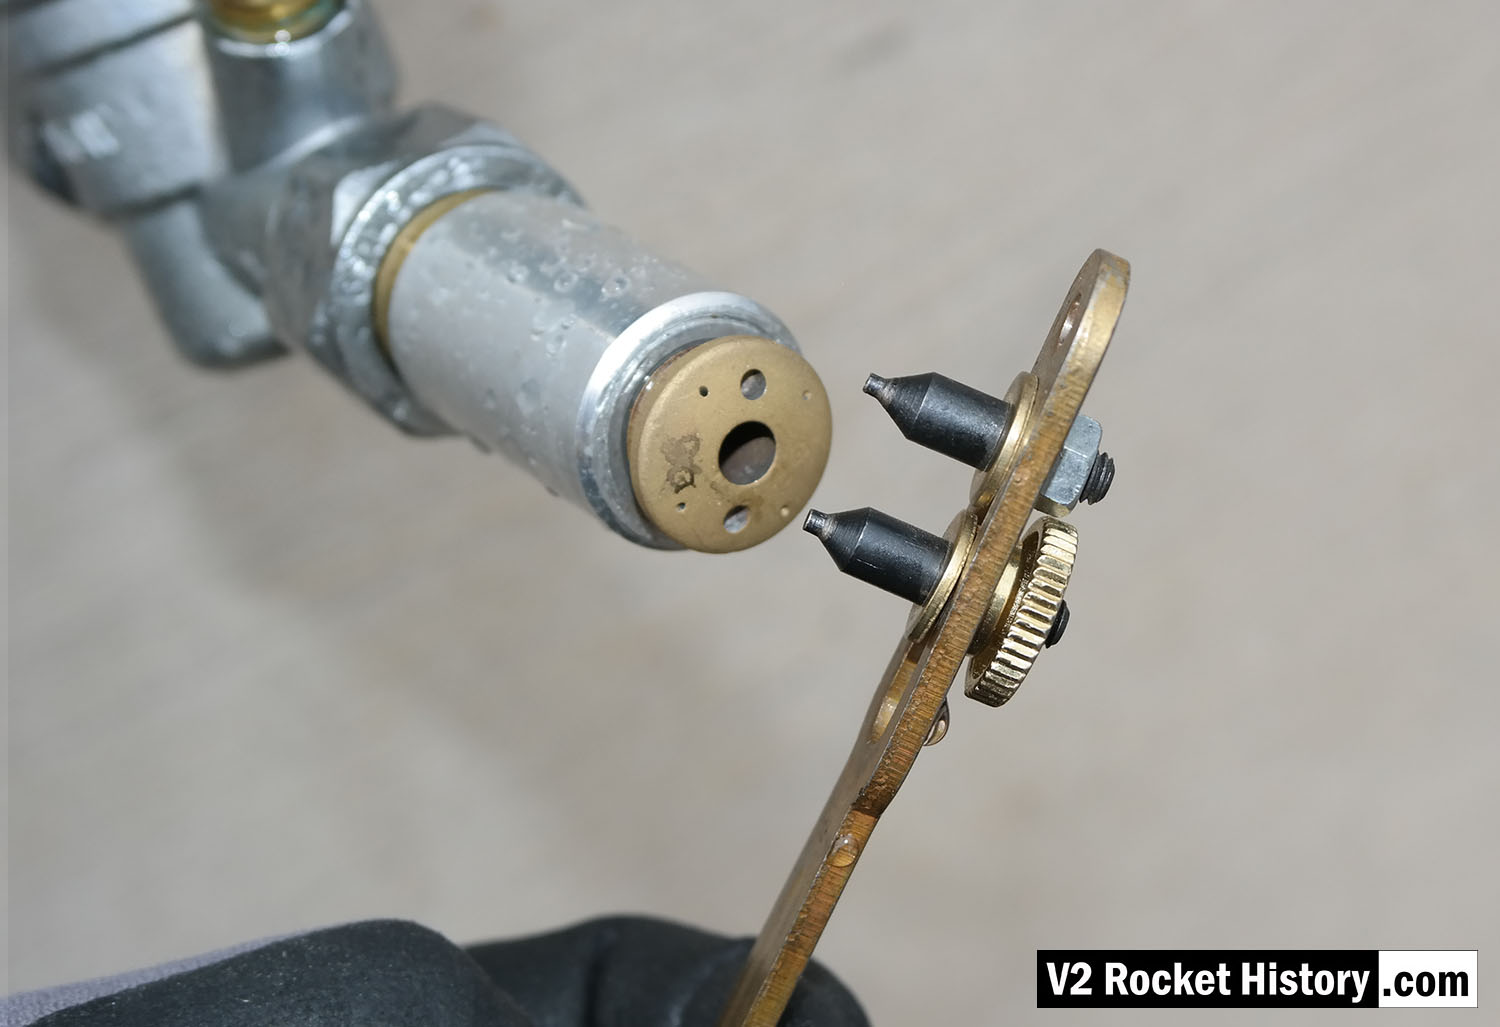
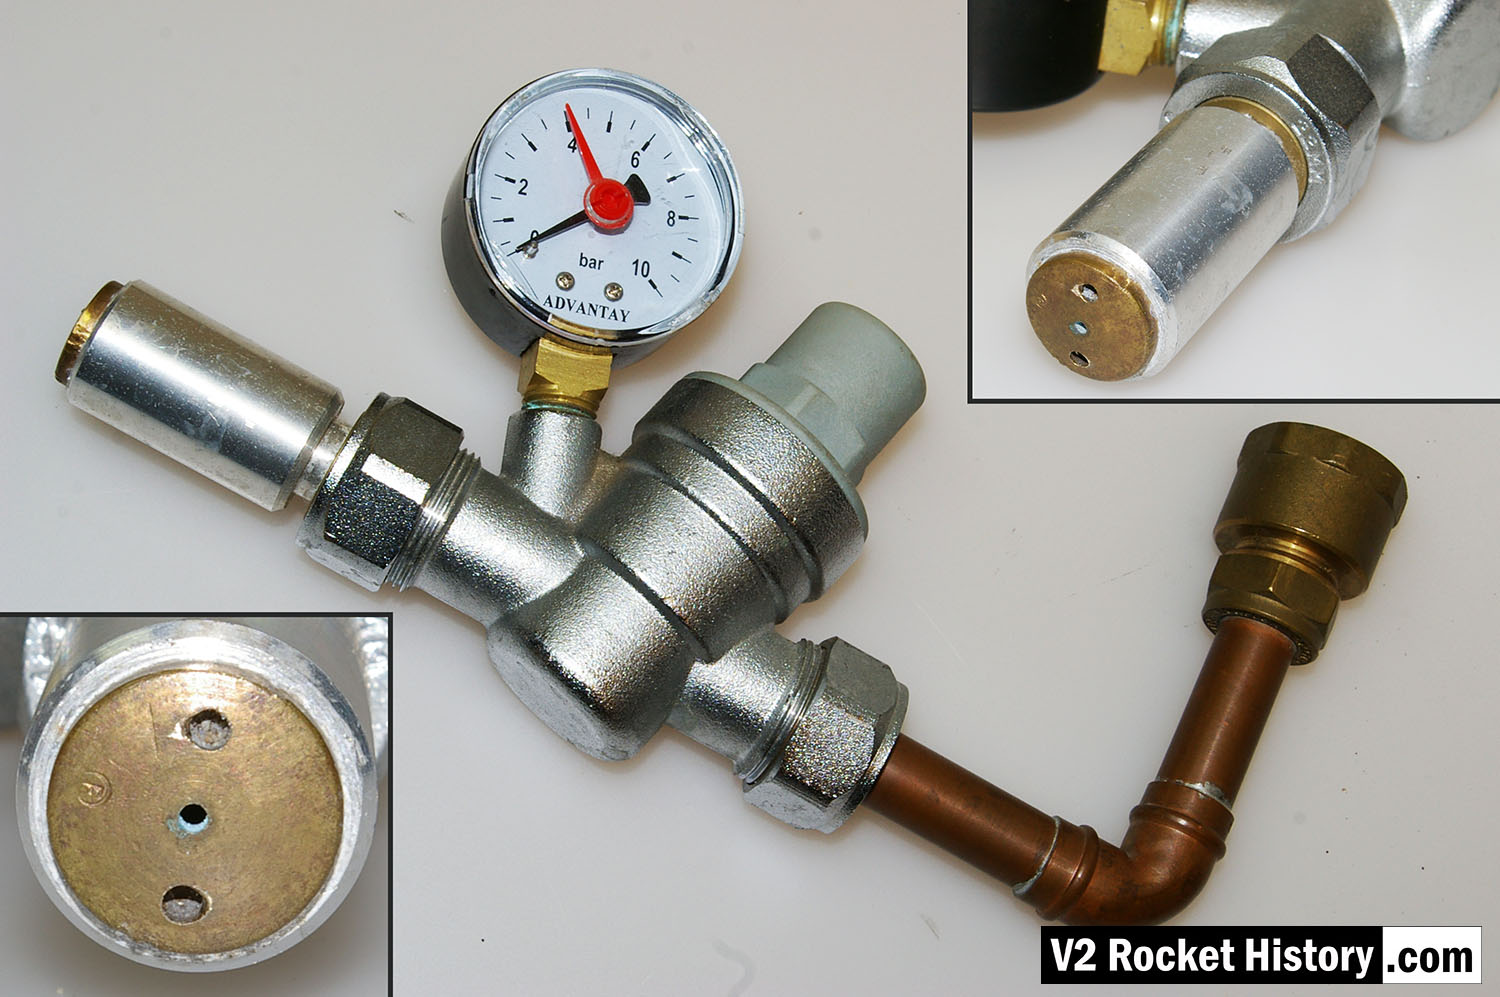

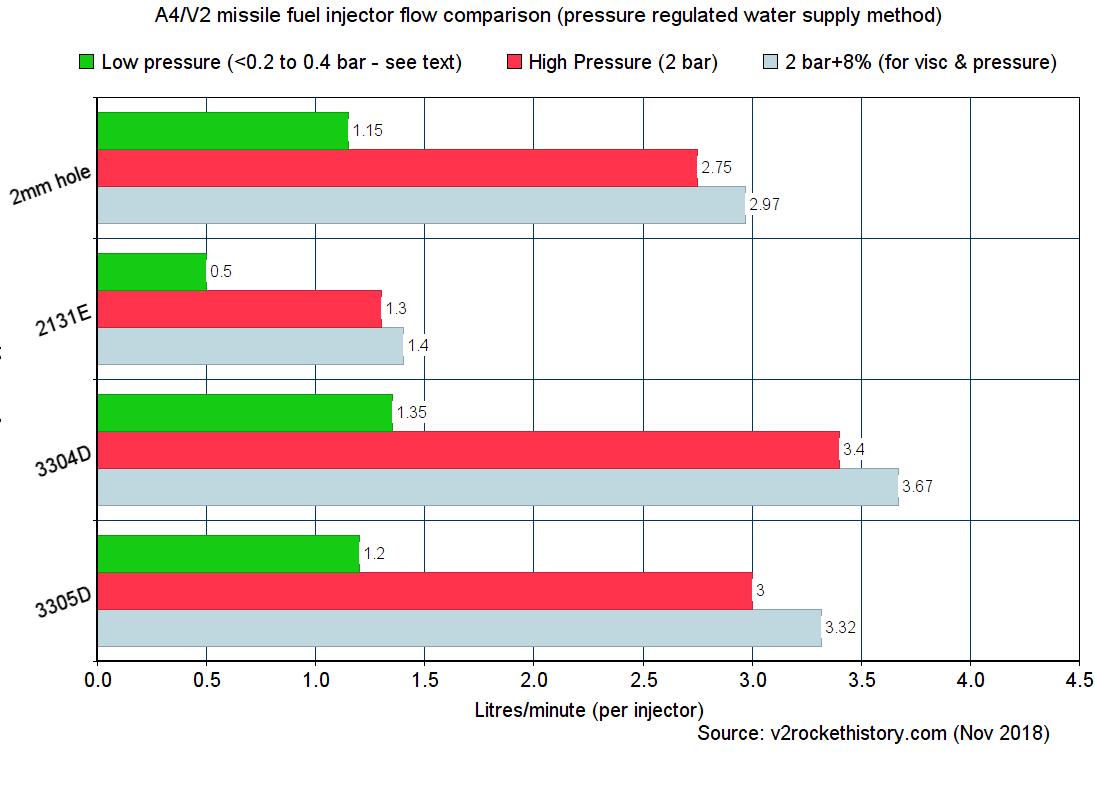

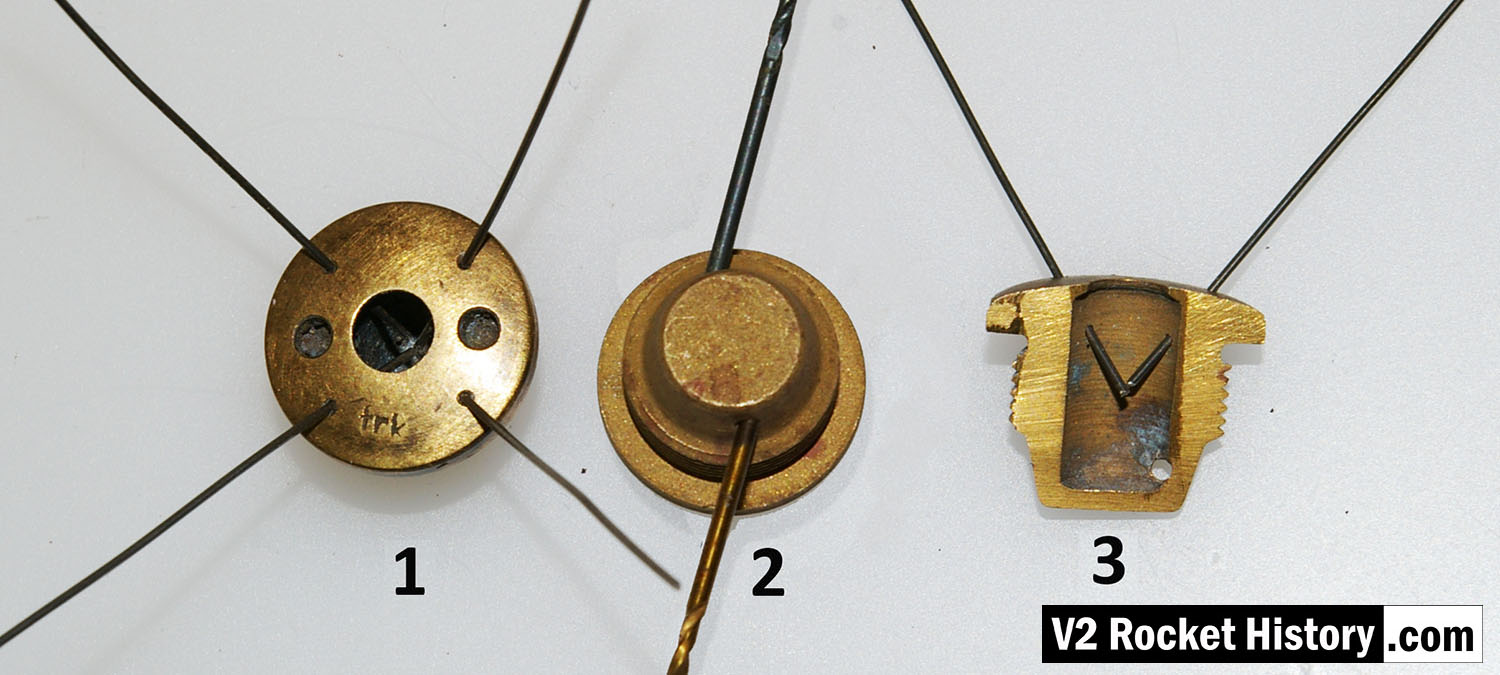
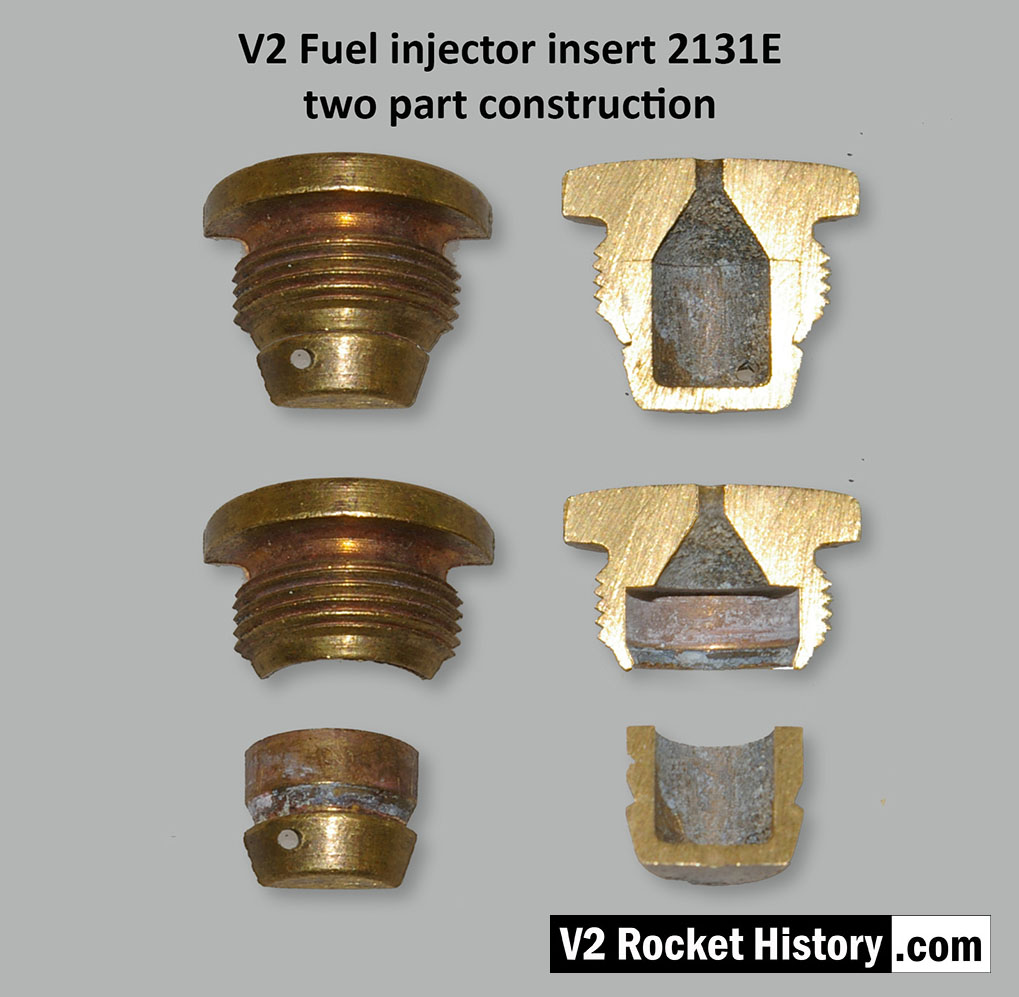
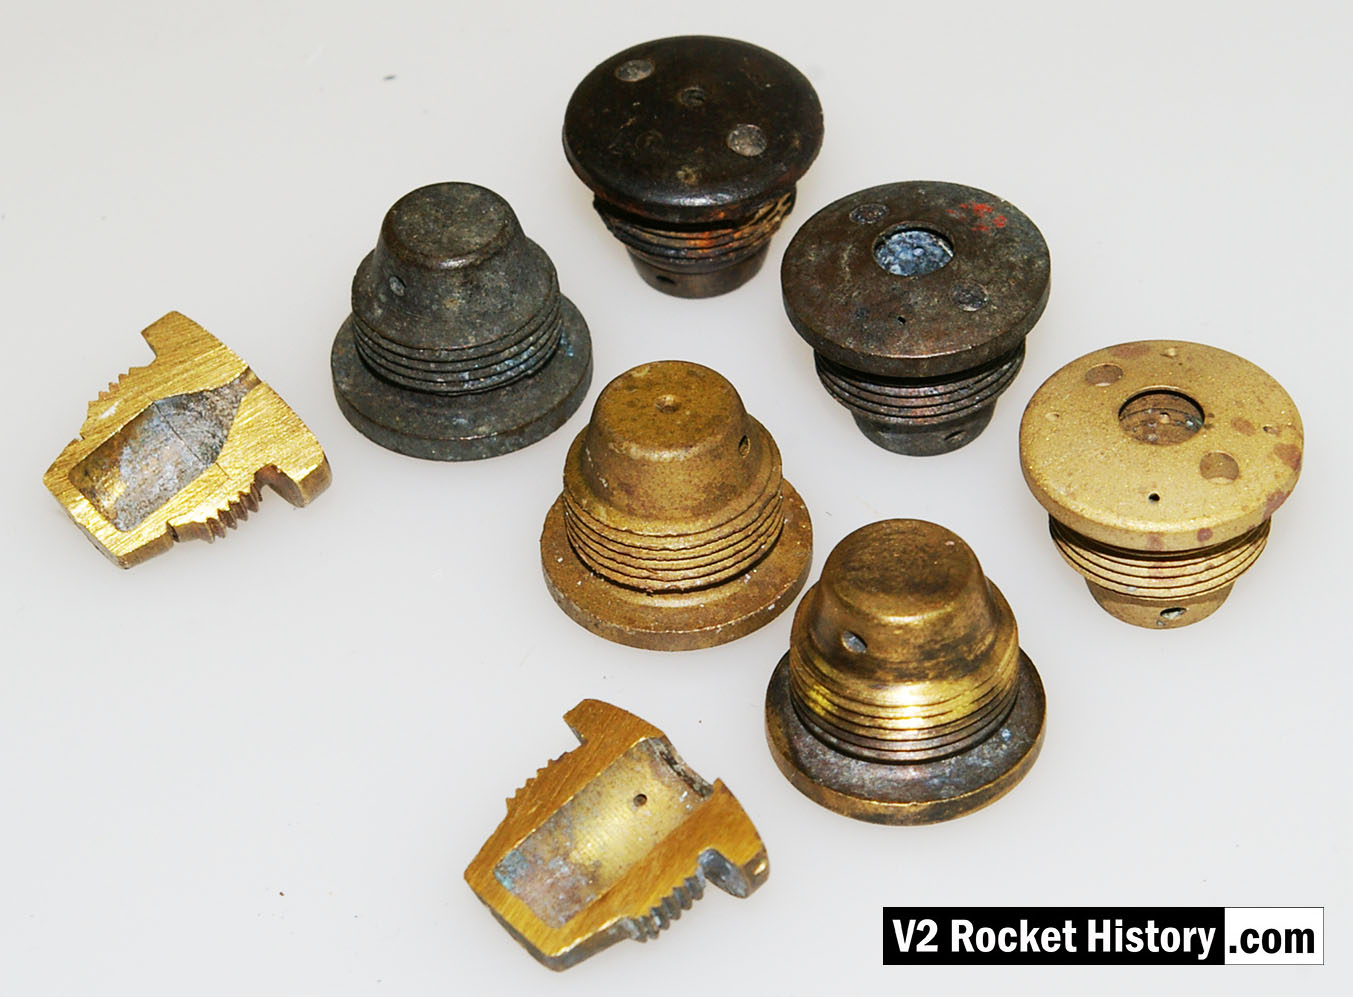
Image shows a correctly formed nebular cone attended by a fine mist. the four injector cooling jets are well shown, and although fluid beading can be seen on the face of the injector, there is insufficient liquid to cause dripping.

